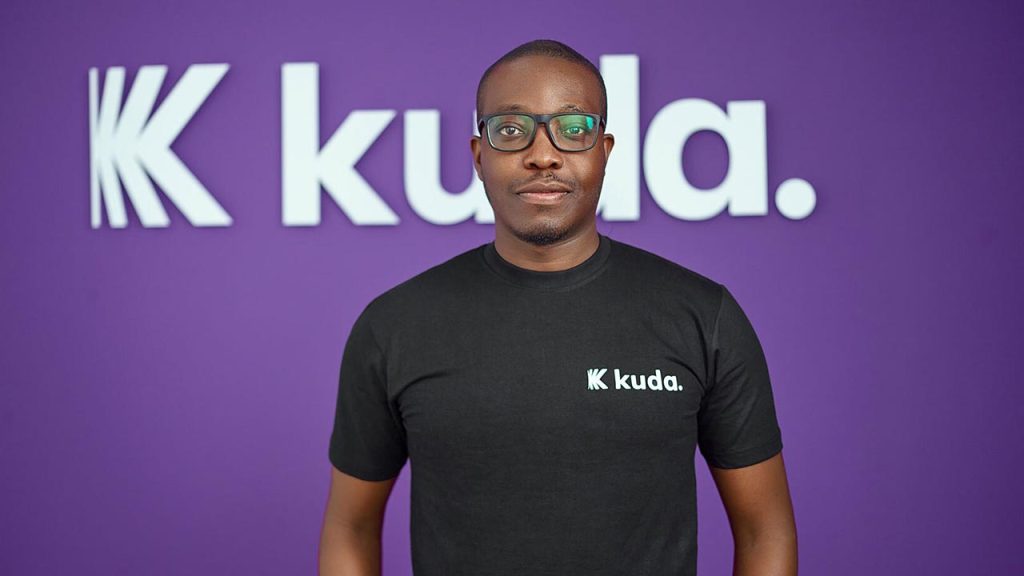
A former high-ranking executive at Kuda, one of Nigeria’s prominent fintech startups, has taken legal action in the United Kingdom, alleging workplace discrimination, a toxic corporate culture, and wrongful termination. Rosemary Hewat, Kuda’s former Group Chief People Officer, filed a lawsuit claiming that the company and its CEO, Babatunde Ogundeyi, fostered an environment where women were marginalized and treated unfairly.
According to reports from credible sources, court documents indicate that Hewat alleges Kuda failed to grant her stock options under the same terms as her male counterparts and dismissed her after she raised concerns about gender-based workplace mistreatment.
Kuda, an FCCPC-approved loan app in Nigeria that has publicly positioned itself as a proponent of gender inclusivity, now faces scrutiny over these claims. The company, backed by Target Global, has highlighted its efforts to support women in the workplace. Hewat herself played a key role in these initiatives, announcing in March 2023 that Kuda had achieved a 1:1 gender ratio. However, her lawsuit paints a different picture, describing an environment where women were systematically excluded and belittled.
Hewat specifically accuses Ogundeyi of fostering a hostile work culture. The lawsuit claims he made demeaning remarks about female employees, publicly humiliated two women at a strategy retreat in December 2023, and dismissed them as “low class” for lacking exposure to luxury. She further alleges that he instilled fear among employees, stating that staff “see him as God” and are afraid to approach him.
When asked about the allegations, Kuda confirmed the lawsuit but declined to comment.
“In line with our current policy and out of respect for privacy, we do not comment on matters of this nature involving current or former employees,” a Kuda spokesperson stated via email.
One of the key points in Hewat’s legal claims revolves around her Employee Stock Ownership Plan (ESOP). She alleges that Kuda reneged on an agreement to grant her shares at the more favorable Series A valuation, instead offering them at the higher Series B price. Meanwhile, her male counterpart, Steven Bastian, reportedly received adjusted terms to reflect the lower valuation. According to the lawsuit, Ogundeyi justified this by claiming Bastian’s role as Group CFO was “more important” than Hewat’s.
Hewat also asserts that she faced professional retaliation after voicing her concerns. She says she was deliberately excluded from critical meetings, and that Kuda’s Group Chief Operating Officer, Pavel Khristolubov, gradually took over aspects of her role while undermining her. When she raised the issue with Ogundeyi, she claims he dismissed her concerns and advised her to “spend the next six months getting Khristolubov to like her.”
Her employment at Kuda officially ended on February 20, 2024—just weeks after she filed a formal grievance about the ESOP issue. Hewat alleges she was dismissed while on her way to an executive retreat in Nigeria, with Kuda framing the decision as part of cost-cutting measures. However, she argues that the company continued spending on discretionary items, including allegedly employing a nanny for Ogundeyi’s children at the company’s expense. Adding to the confusion, Kuda’s Chief Technical Officer, Mutairu Mustapha, reportedly told Hewat that her termination was a “mistake” and urged her to return to work.
The impact of these events, Hewat claims, severely affected her mental and physical health, leading to panic attacks, depression, and insomnia. She is now seeking financial compensation for lost benefits, emotional distress, and punitive damages for what she describes as severe workplace misconduct.
Kuda has yet to issue a public statement addressing the lawsuit or the allegations made against its leadership.
MTN Nigeria has adjusted its internet tariffs, implementing a price increase that has sparked mixed reactions among subscribers. While the Nigerian Communications Commission (NCC) approved a 50% hike, some plans saw significantly steeper increases.
A closer look at the telco’s new pricing structure reveals that only four out of its 18 internet plans were directly affected by the 50% increase. However, other adjustments resulted in some plans doubling—or even tripling—in cost.
For instance, the 2GB hourly bundle, previously available for ₦200, has been replaced with a 400MB hourly plan priced at ₦100. This effectively raises the cost per gigabyte by 156%. Similarly, the 400GB three-month plan, which used to cost ₦50,000, has been revised to 480GB for ₦120,000—marking a 100% increase.
Subscribers using digital-only bundles also saw price adjustments. The 2.5GB digital channels-only plan jumped from ₦500 to ₦750, reflecting a 50% increase. Meanwhile, the most dramatic shift came with the 15GB digital channels-only bundle, which previously cost ₦2,000. It has now been rebranded as a 15GB PGW Weekly bundle and is priced at ₦6,000—an increase of 200%.
Responding to concerns over the steep increases, an MTN Nigeria spokesperson explained that the affected plans had originally been offered at heavily discounted rates to cater to specific subscriber segments.
“What we have done now is to price the bundle properly since the period for the discounted price ended a long time ago. We then added the 50% tariff increase on the standard market price,” the spokesperson stated.
Of the 18 data plans MTN offers, 13 experienced price hikes below 40%. Among these, the largest adjustment was to the 25GB monthly plan, which went from ₦6,500 to ₦9,000.
While MTN has defended the changes as a necessary correction of previously discounted rates, the new pricing has sparked debate among users, particularly those who now face significantly higher costs for the same data volume.
Imagine you’re part of a big family, and your parents buy a giant box of chocolates for everyone to share. Instead of giving each person their own box, they let everyone take chocolates from the big box as needed. This way, everyone gets their fair share, and it’s more convenient than managing individual boxes. That’s similar to how the MTN UP2U Data Bundle, officially known as MTN Group Share, works for businesses and organizations in Ghana.
What is MTN Group Share?
MTN Group Share is a service designed for businesses and organizations to manage their communication resources—like voice minutes, SMS, and data—in a shared pool. Instead of providing separate bundles to each employee, the organization purchases a bulk package at discounted rates and distributes it as needed among its members. This approach ensures efficient use of resources and cost savings.
How Does MTN Group Share Work?
Let’s break it down step by step:
Bulk Purchase: The organization buys a large amount of voice minutes, SMS, and data from MTN at discounted prices.
Shared Pool Creation: These purchased resources are stored in a central pool accessible to all authorized members of the organization.
Administration: An appointed administrator within the organization manages this pool. They can allocate specific amounts to individuals or allow members to draw from the pool as needed.
Monthly Reloads: The pool is replenished monthly based on the organization’s chosen package, ensuring continuous access to necessary resources.
This system is like having a communal pantry where everyone can take what they need, and it’s restocked regularly to keep up with demand.
Benefits of MTN Group Share
Why would an organization choose MTN Group Share? Here are some key advantages:
Cost Savings: Buying in bulk often comes with discounts, reducing the overall expenditure on communication services.
Flexibility: Resources can be allocated based on individual needs, ensuring that heavy users have enough, while lighter users don’t waste unused resources.
Simplified Management: With a centralized system, tracking and managing usage becomes more straightforward, reducing administrative hassles.
Secure Connectivity: The service includes APN (Access Point Name) services, providing a secure internet environment for sensitive business operations.
How to Register for MTN Group Share
If your organization is interested in adopting this service, here’s how you can get started:
Visit an MTN Office: Discuss your organization’s specific needs in person with MTN representatives.
Consult Your Account Manager: If you already have an MTN Business Account Manager, they can assist with the setup process.
During registration, MTN will guide you through signing agreements, determining the appropriate bundle size, and setting up portal access for resource management.
Note: As of now, the MTN Group Share service is temporarily on hold due to feature enhancements, and MTN is not onboarding new customers to this service.
Packages and Pricing
MTN Group Share offers customizable packages that include voice minutes, SMS, data bundles, and APN services. These packages are designed to be flexible, allowing organizations to tailor them to their specific needs.
Here’s a breakdown of the rates:
Package
Rate (GH₵)
Voice
0.092
SMS
0.046
Data (<10 GB)
0.041
Data (10-50 GB)
0.0062
Data (50-100 GB)
0.0031
Note: These rates are subject to change. It’s advisable to contact MTN directly for the most current pricing.
Managing Your Resources
Once registered, your organization will receive login credentials to the MTN Group Share portal. This portal allows the administrator to:
Allocate Resources: Distribute voice minutes, SMS, and data to employees based on their roles and needs.
Monitor Usage: Keep track of how resources are being used to ensure efficiency and prevent misuse.
Add or Remove Users: Easily manage who has access to the shared resources, accommodating new hires or removing former employees.
This self-service approach empowers organizations to have full control over their communication resources without relying heavily on external support.
Important Considerations
Before diving in, here are some essential points to keep in mind:
Non-Commercial Use: The MTN Group Share service is designed exclusively for businesses and organizations. Reselling or using the service for commercial purposes is prohibited and can lead to termination.
No USSD Codes: Unlike individual data bundles, the Group Share service doesn’t operate through USSD codes. All management is done via the web portal provided upon registration.
Service Availability: Currently, the service is on hold for new customers due to ongoing enhancements. Existing users should stay in touch with their MTN representatives for updates.
Frequently Asked Questions
Q: Can individuals subscribe to the MTN Group Share service?
No, this service is tailored for organizations and isn’t available for individual subscriptions.
Q: How does the monthly reload work?
Each month, the organization’s chosen bundle is automatically replenished, ensuring continuous access to communication resources.
Q: What happens if our organization exceeds the allocated resources?
The administrator can monitor usage through the portal and adjust allocations as needed. If additional resources are required, they can be purchased to supplement the existing pool.
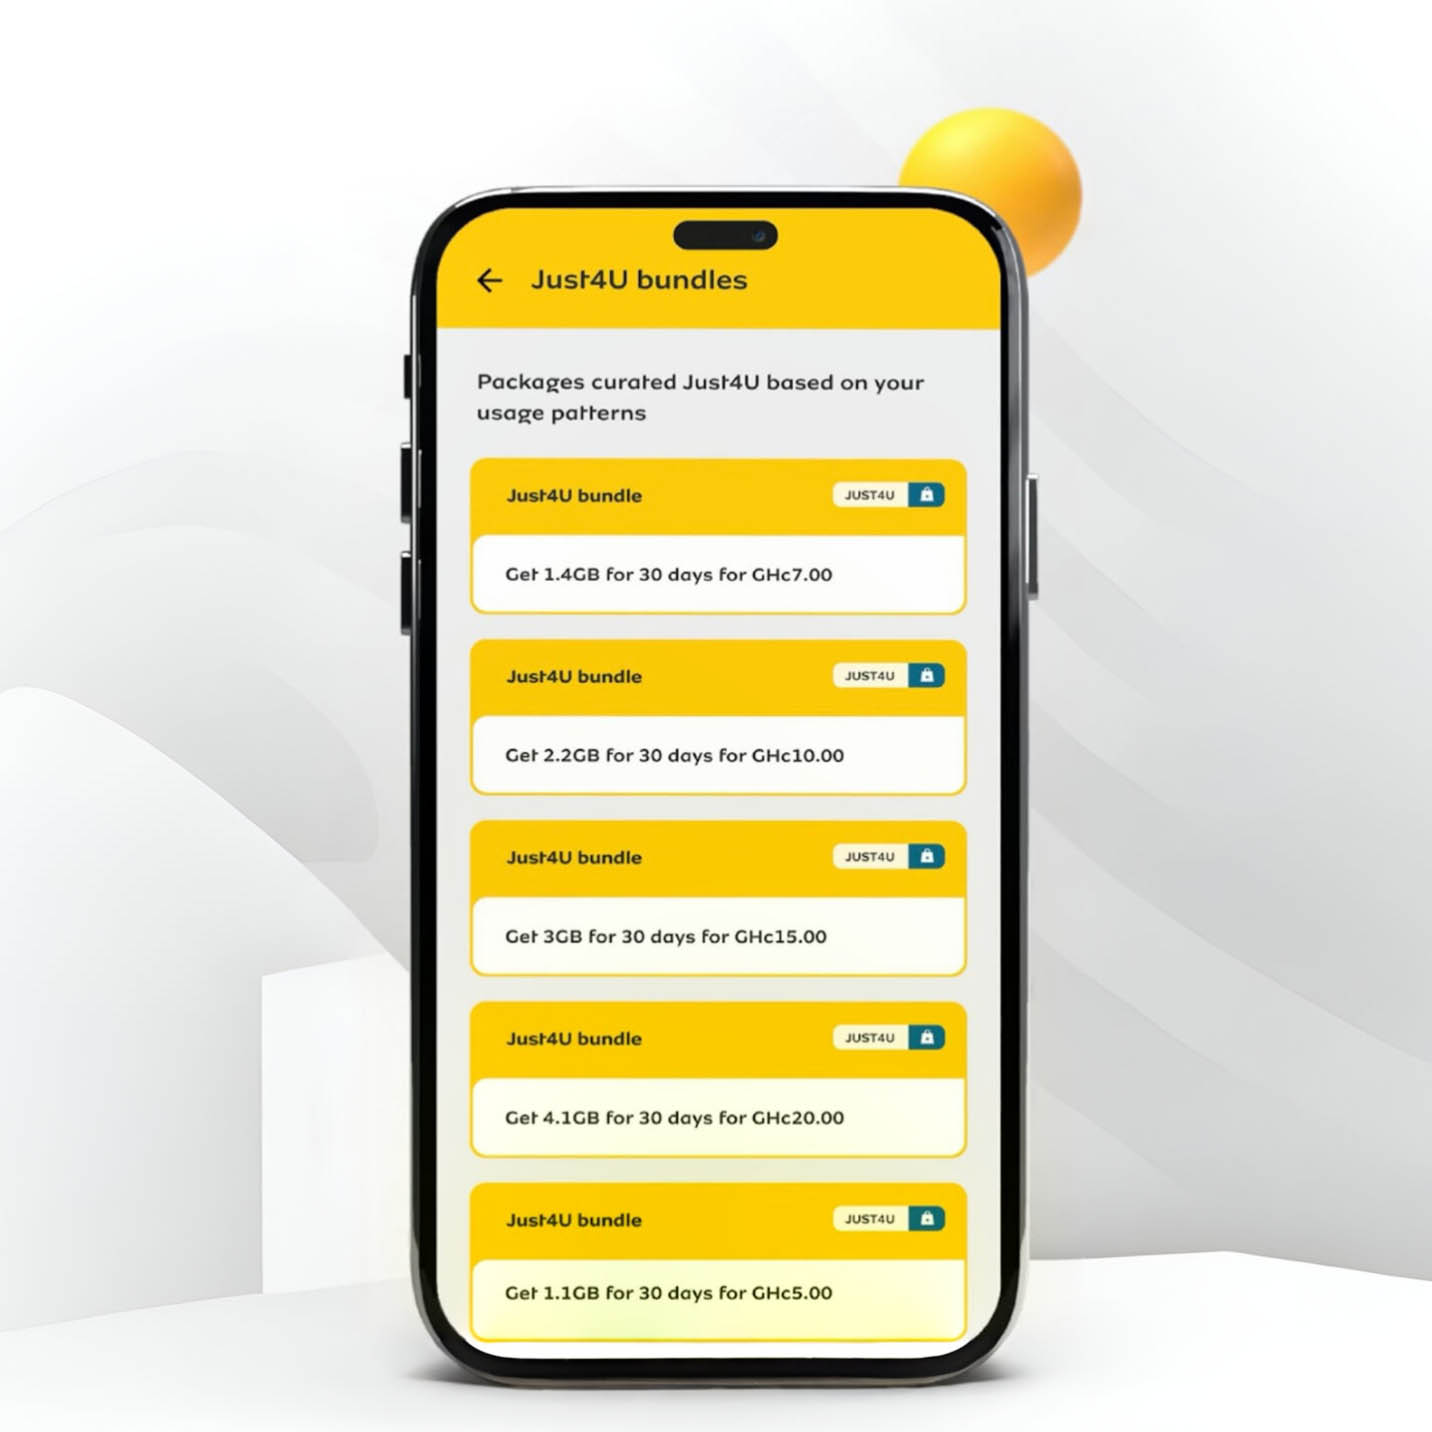
Imagine walking into a store where everything on the shelves is customized just for you—your favorite snacks, drinks, and even discounts based on what you love to buy. That’s exactly what MTN’s Just4U bundles do for your mobile data and airtime needs.
If you’ve ever wondered why some people get cheaper data offers while yours seem different, it’s because MTN Just4U is a personalized service. It gives each user a special set of offers based on their data, call, and airtime usage patterns. In this guide, I’ll show you exactly how to activate your Just4U bundle using simple, clear steps. Let’s dive in!
What Is MTN Just4U and How Does It Work?
MTN Just4U is a special offer designed to give you tailored data and airtime packages based on how you use your phone. If you buy data frequently, you might get special discounts on data. If you make lots of calls, you could see better call bundles.
Think of it like a VIP treatment where MTN studies your habits and rewards you with exclusive deals that fit your needs. The best part? These offers are often cheaper than regular bundles.
But here’s the catch—Just4U offers change from time to time. What you see today might be different tomorrow, so always check back for new deals.
How to Activate MTN Just4U Bundle in Ghana
There are three main ways to activate MTN Just4U bundles:
Using the USSD Code (Quick and easy, no internet needed)
Via the MyMTN App (Best if you prefer a visual experience)
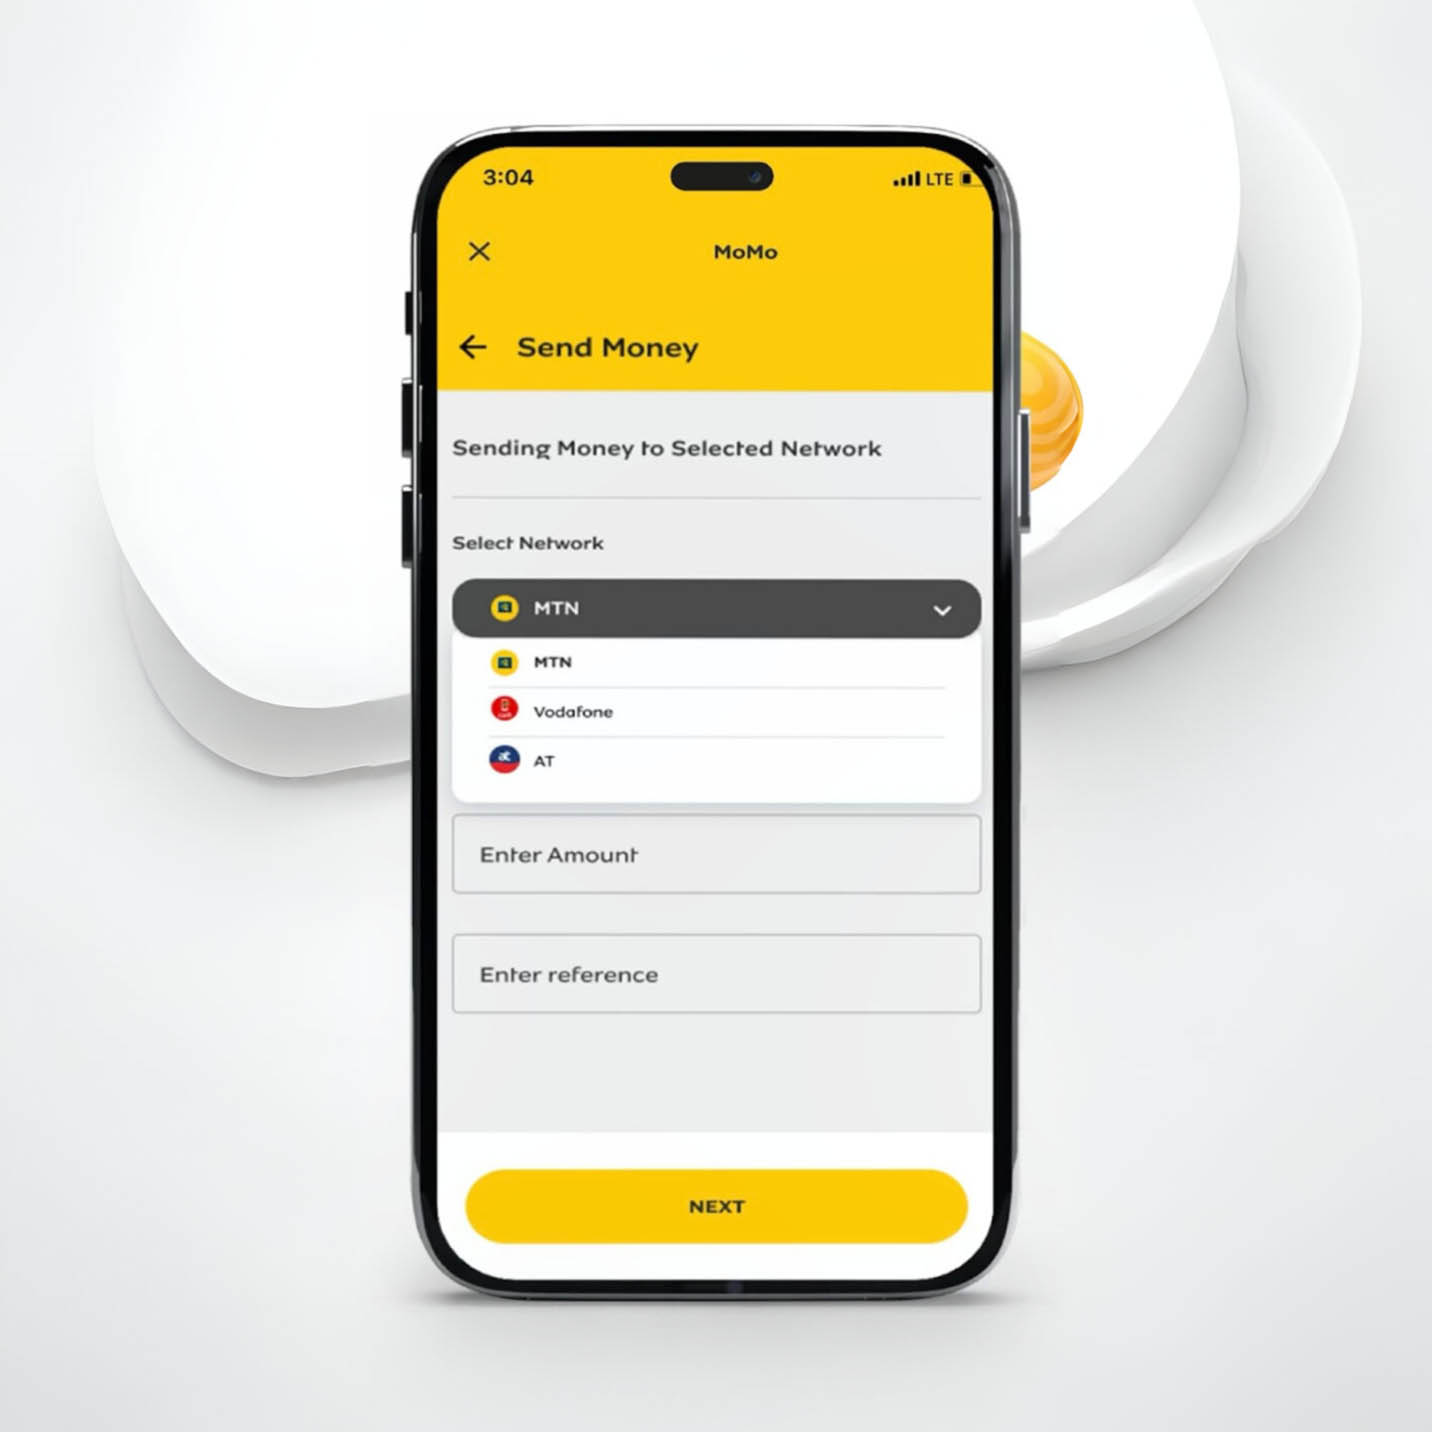
Through MTN MoMo (Convenient if you want to pay directly from your MoMo account)
Let’s break each method down step by step.
Method 1: Activating Just4U via USSD Code
This is the simplest way, and all you need is your phone.
Steps:
Dial *141# on your MTN number.
A menu will pop up showing your personalized Just4U offers.
Select the package you want.
Confirm your purchase by selecting Option 1.
Wait for an SMS confirming your purchase and enjoy your bundle!
This method is great because it works on any phone—smartphones and basic feature phones alike. No internet required!
Method 2: Activating Just4U via the MyMTN App
If you prefer using apps and want a visual way to select your offers, the MyMTN App is the best option.
Steps:
Open the MyMTN App (download it from the Play Store or App Store if you don’t have it).
On the home screen, tap on “Just4U” under Quick Access.
You’ll see your personalized Just4U offers.
Select your preferred package.
Scroll down and tap “Pay” to confirm your purchase.
Wait for an SMS confirming your purchase.
This method is user-friendly and allows you to see multiple offers at once, making it easier to compare options before buying.
Method 3: Activating Just4U via MTN MoMo
If you prefer paying directly from your MTN Mobile Money (MoMo) account, this method is perfect.
Steps:
Dial *170# to access the MoMo menu.
Select Option 3: Airtime & Bundles.
Choose Option 2: Just4U.
Select your preferred Just4U bundle.
Confirm your purchase and wait for a payment prompt.
Enter your MoMo PIN to complete the transaction.
You’ll receive an SMS confirmation with your credited data or airtime.
If you’re someone who keeps most of your money in MoMo, this method makes purchasing Just4U bundles super convenient.
How Long Do MTN Just4U Bundles Last?
MTN Just4U bundles have expiration dates, and they vary depending on the type of bundle you choose. Some are valid for a day, while others last a week.
Bundle Type
Validity Period
Daily Just4U Offer
24 Hours
Weekly Just4U Offer
7 Days
Special Offers
Varies
One important thing to note is unused data does NOT roll over. If you don’t use your bundle before it expires, it’s gone. So, always check the validity period when purchasing.
Frequently Asked Questions (FAQs)
1. Is MTN Just4U Available for Everyone?
No. Just4U is only available for MTN prepaid users. Also, the offers are different for each user, meaning what you see might not be the same as what your friend gets.
2. Can I Buy More Than One Just4U Offer at a Time?
Yes, you can buy multiple Just4U bundles, but each will have its own expiration date. Be mindful of when they expire!
3. What If I Don’t See Any Just4U Offers?
If you dial *141# and don’t see any offers, it could mean:
You haven’t been using your MTN number actively.
Your previous Just4U offers expired, and new ones haven’t been generated yet.
MTN hasn’t assigned you a new personalized offer at the moment.
Try checking back later or using the MyMTN App for updates.
MTN Just4U is a fantastic way to get personalized, discounted bundles based on your usage. Whether you use USSD, the MyMTN App, or MoMo, activating a Just4U bundle is quick and easy. Just remember:
Offers vary from person to person.
Bundles expire, so use them before they’re gone.
If you don’t see any offers, keep using your MTN number actively and check back later.
Now that you know how to activate MTN Just4U in Ghana, go ahead and grab the best deal for yourself. Happy browsing!
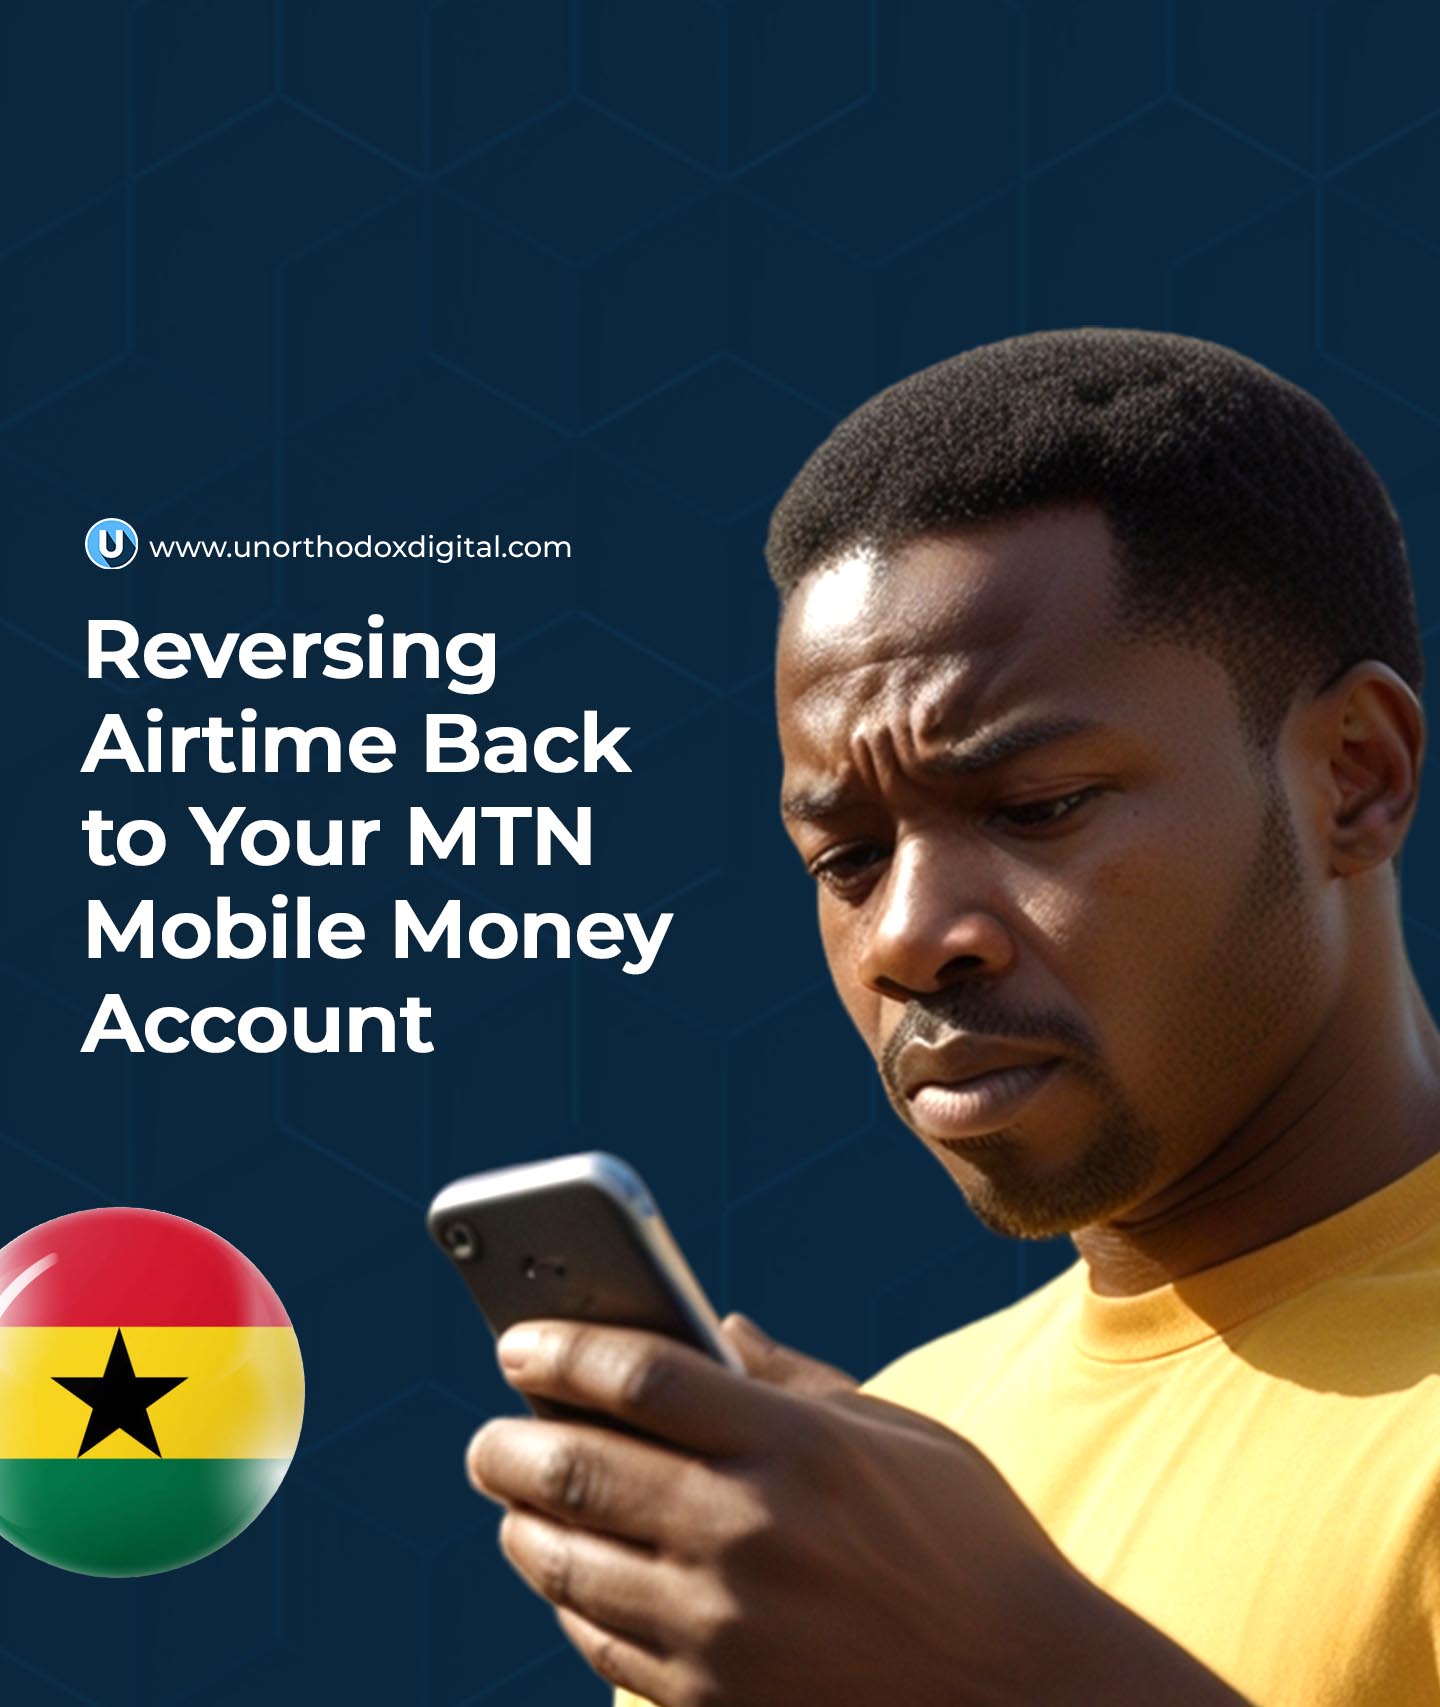
Have you ever accidentally purchased airtime instead of transferring money through your MTN MoMo wallet? Don’t panic! MTN has made it super easy to reverse airtime purchases and get the funds back into your MoMo wallet. Whether you’re new to MTN or you’ve been using it for years, understanding how to do an airtime reversal can save you time and frustration. This article will break it all down in a simple and easy-to-follow way—no complicated tech terms, just clear steps anyone can follow.
What You Need to Know Before Reversing Airtime
Before diving into the process of reversing airtime, let’s get a few important details straight. Here are some things you should know:
You Have 72 Hours to Reverse: If you made the wrong purchase, don’t wait too long to request a reversal. MTN only allows reversals within 72 hours (3 days) of the transaction.
One Reversal Per Week: You can only reverse one airtime purchase per week. So, if you’ve already reversed airtime this week, you’ll need to wait until next week for another reversal.
The Minimum Reversal Amount: To reverse airtime, the minimum amount eligible for a reversal is GHS 10. Unfortunately, if you purchased less than this amount, you won’t be able to reverse it.
Full Reversals Only: MTN only allows full reversals. You can’t reverse just part of the airtime you bought. So, if you purchased GHS 20 worth of airtime, the entire GHS 20 will be refunded—not a smaller portion.
You Must Not Have Used the Airtime: If you’ve used any part of the airtime, you need to top up your account to make sure the full amount is still available in your airtime balance before you can reverse it.
Reversals Apply Only to MoMo Purchases: Airtime purchased through your MoMo wallet or from an MTN number can be reversed. However, airtime wrongly sent to other networks (like Vodafone or Airtel) cannot be reversed. Additionally, airtime bought from an agent cannot be reversed.
Knowing these details will help you avoid any confusion later on.
How to Reverse Airtime Using the MTN MoMo USSD Code
One of the easiest ways to reverse airtime is by using the MTN MoMo USSD code. If you prefer not to use an app and want a quick method, follow these simple steps:
Step-by-Step Guide for the USSD Code:
Dial the USSD Code: Start by dialing *170# on your phone to access the MoMo menu.
Choose the Wallet Option: Once the MoMo menu appears, select Option 6 (Wallet).
Proceed to Next Step: You’ll then be asked to press # to move to the next screen.
Select ‘Reversals’: From the menu options, choose Option 8 (Reversals).
Choose ‘Airtime Reversal’: After that, select Airtime Reversal.
Select the Transaction to Reverse: You’ll now see a list of your recent transactions. Select the airtime purchase you want to reverse.
Confirm the Reversal: The system will ask you to confirm the transaction. Select 1 to confirm and initiate the reversal.
How to Reverse Airtime Using the MyMTN App
If you prefer using an app, MTN has made it just as easy to reverse airtime through the MyMTN App. Here’s how to do it:
Step-by-Step Guide for the MyMTN App:
Open the MyMTN App: Start by opening the MyMTN App on your phone. Make sure you’re logged in.
Select ‘More’: Once inside the app, tap the More button at the bottom-right corner of the screen.
Choose ‘Airtime Reversal’: In the new menu, you’ll see an option called Airtime Reversal. Select this option.
Pick the Transaction: A list of your recent transactions will appear. Choose the airtime purchase you wish to reverse.
Confirm the Reversal: After selecting the transaction, tap Top-up and then confirm the reversal.
Wait for Confirmation: The system will process your reversal, and once complete, you will receive a confirmation message.
What to Do if You Encounter Problems
Sometimes things don’t go as planned. If you run into an issue while reversing your airtime, here’s what you can do:
Error Message: “Y’ello, Kindly note that 054XXXXXXX has less than …”
If you see this error message, it means that the recipient’s balance is too low for the reversal to go through. Don’t worry—MTN customer care can help.
Contact Customer Service: If you face this issue, contact MTN customer support immediately. They’ll log the complaint for you, and the airtime should be reversed within 24-48 hours.
What Happens After a Successful Reversal?
Once your airtime has been successfully reversed, the amount (plus a bonus) will be credited back to your MoMo wallet. MTN typically credits a 50% bonus (formerly 100%) of the airtime purchased through your MoMo wallet.
Example: If you bought GHS 20 worth of airtime, you’ll get a GHS 20 refund back to your MoMo wallet, plus a GHS 10 bonus—making a total of GHS 30 back in your MoMo account.
Frequently Asked Questions (FAQs)
1. Is There a Charge for Airtime Reversals?
No, MTN does not charge any fees for reversing airtime. The full amount of airtime you purchased will be refunded back into your MoMo wallet.
2. Can I Reverse the MTN Airtime I Wrongly Transferred?
Yes! If you mistakenly transferred airtime to the wrong person, you can reverse it. However, the airtime must still be unused. If the recipient used the airtime, the reversal will not be possible.
3. Is There a Limit on the Amount of Airtime I Can Reverse?
Yes, there is a minimum limit of GHS 10 for any airtime reversal. This means you can only reverse purchases that are GHS 10 or more.
4. Can I Reverse Part of My Airtime Purchase?
No, MTN only allows full airtime reversals. If you bought GHS 50 worth of airtime, you must reverse the full amount. Partial reversals are not allowed.
Things to Keep in Mind
Double-Check Your Transactions: Always double-check the details before confirming any airtime purchases or transfers to avoid errors.
Don’t Use the Airtime: If you realize you made a mistake, don’t use the airtime. If any part of the airtime is used, you won’t be able to reverse it.
Reversing airtime on MTN is a simple process that can help you get your money back into your MoMo wallet if you made a mistake. Whether you’re using the USSD code or the MyMTN App, the process is straightforward and quick—just remember to act within 72 hours and ensure the airtime hasn’t been used.
By following the steps outlined in this guide, you’ll be able to reverse any airtime purchase with ease and get your funds back in no time. And remember, if you ever run into any trouble, MTN customer service is always there to help you out.
Now that you know the ins and outs of reversing airtime on MTN, you can confidently handle any mistakes and keep your MoMo wallet in check!
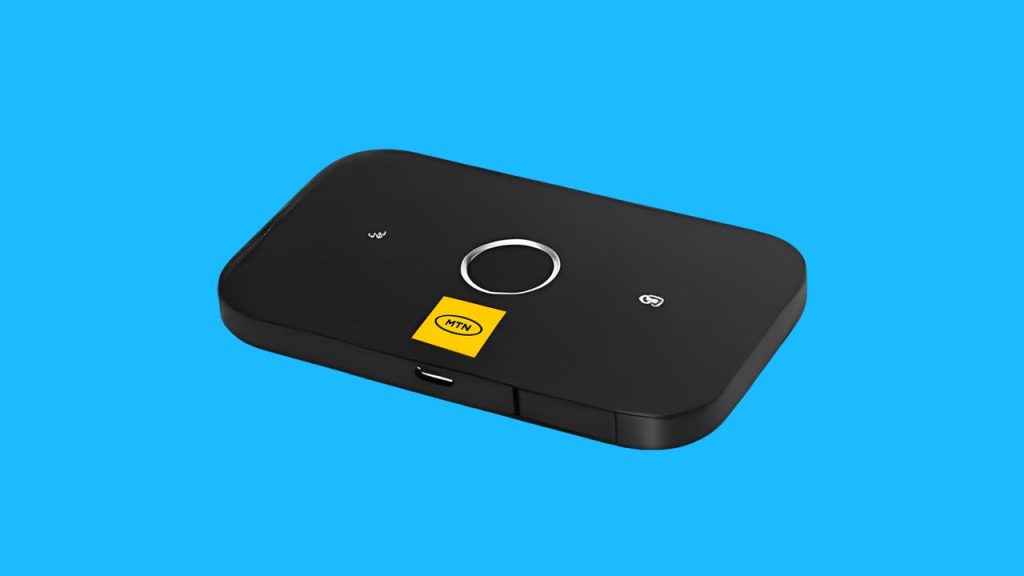
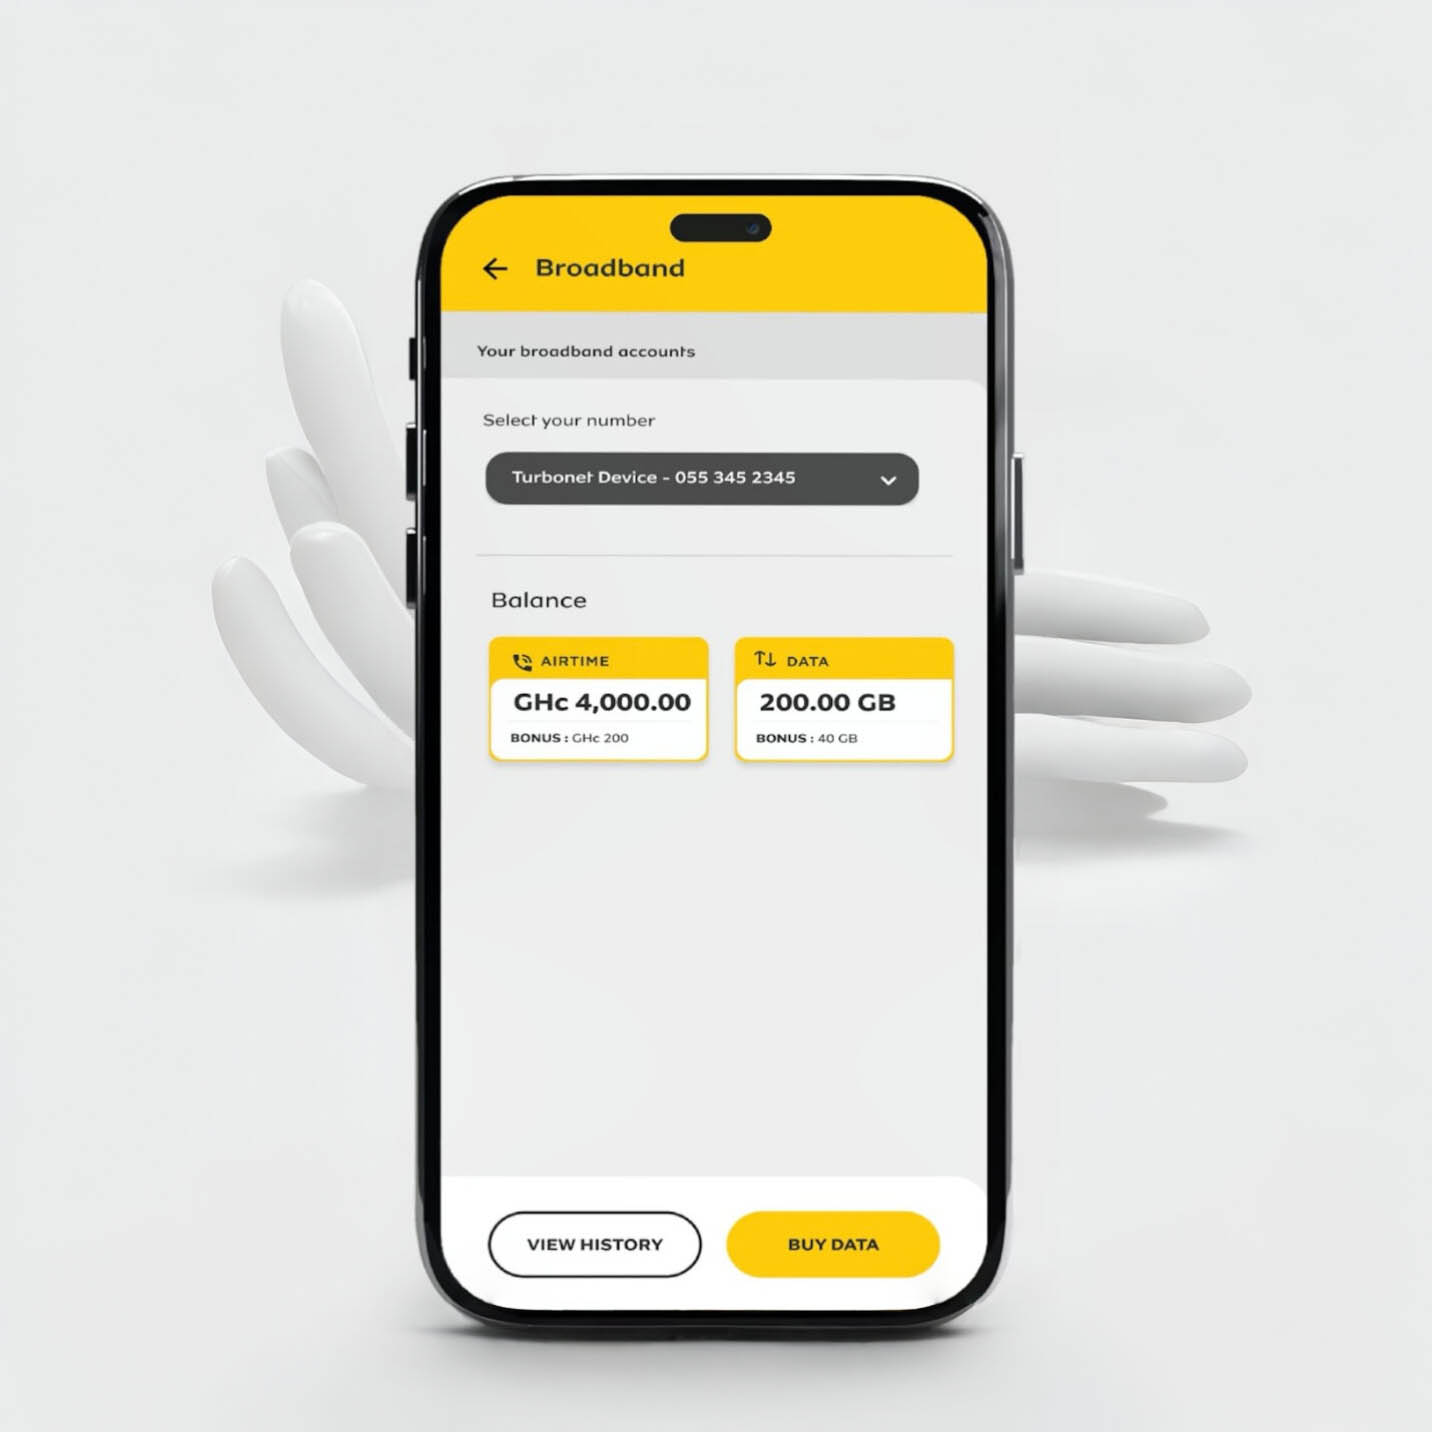
Imagine carrying your own personal Wi-Fi connection wherever you go. No need to rely on slow public Wi-Fi or burn through your phone’s data. That’s exactly what the MTN Ghana MiFi offers—a portable internet solution that keeps you connected anytime, anywhere. But how much does it cost, and which data plan gives you the best value? Let’s break it all down in a way that’s easy to understand.
What is the MTN Ghana MiFi?
MTN’s MiFi is a small, battery-powered wireless router that connects to MTN’s mobile network and creates a Wi-Fi hotspot. It allows multiple devices—like your phone, tablet, or laptop—to access the internet at the same time. Unlike home broadband, which stays in one place, a MiFi is portable, so you can take it wherever there’s MTN network coverage.
The price of the MTN MiFi depends on the model you choose. Generally, you can expect to pay between GHS 300 and GHS 650.
MiFi Type
Price Range (GHS)
3G MiFi
300 – 400
4G MiFi
500 – 650
These prices can change depending on where you buy it. If you purchase directly from an MTN service center, you’re guaranteed an authentic product. In Ghana, you may also find MiFi devices on Jiji, Jumia, or other online stores, but be sure to verify that they are genuine MTN products before buying.
Best MTN Ghana MiFi Data Plans
Once you have your MiFi, the next step is choosing the right data plan. MTN Ghana offers different options depending on how much data you need and how long you want it to last.
1. Regular Data Bundles
If you want straightforward, no-expiry data, this is the best option. These bundles don’t expire, so you can use them until they run out.
Data Amount
Price (GHS)
1.5GB
10
3GB
20
10GB
100
20GB
200
2. Just4U & Zone Bundles
These are discounted bundles that offer extra data at lower prices. The catch? They do expire after a set period.
Data Amount
Price (GHS)
Validity
2GB
5
24 hours
5GB
15
3 days
10GB
50
7 days
3. MTN MashUp
If you use both calls and data, MashUp bundles give you a mix of both.
Data & Call Credit
Price (GHS)
1GB + 25 minutes
10
2GB + 50 minutes
20
5GB + 150 minutes
50
Which Plan is Best for You?
Casual users (checking emails, social media) → Regular small bundles (e.g., 3GB for GHS 20).
Heavy streamers/gamers → 10GB or 20GB bundle for uninterrupted use.
Select your preferred package and confirm payment.
How to Check Your MTN MiFi Data Balance
Keeping track of your data usage helps you avoid running out unexpectedly. Here are three ways to check your balance:
1. Through the myMTN App
Connect your phone to the MiFi’s Wi-Fi.
Open the myMTN app.
Your balance appears under the DATA section.
2. Using USSD Code
Remove the SIM from the MiFi and insert it into a phone.
Dial *124#.
Your remaining data balance will be displayed.
3. Through the MiFi Admin Portal
Open a web browser and type in the MiFi’s IP address.
Log into the admin dashboard.
Enter *124# in the USSD section.
Your data balance will be displayed.
Is the MTN MiFi Fast Enough?
The MiFi’s speed depends on where you are and how strong MTN’s network is in that area. On average, you can expect 10-15 Mbps speeds, which is enough for:
Browsing and emails ✔
Streaming YouTube & Netflix (standard quality) ✔
Online meetings & video calls ✔
Ultra HD video streaming ❌
Large downloads at high speed ❌
Frequently Asked Questions (FAQs)
1. Does MTN MiFi Data Expire?
Yes, but only certain bundles expire. Just4U and Zone bundles have expiration dates, but regular data bundles do not.
2. Where Can I Find My MiFi’s Username & Password?
Check under the battery cover of your MiFi device. It’s printed on a sticker.
3. Is MTN MiFi Faster Than a Phone Hotspot?
Yes! MiFi devices are designed for better internet sharing, while phone hotspots can drain battery life quickly and may not be as stable.
MTN Ghana’s MiFi is a fantastic option if you need portable internet that supports multiple devices. Whether you need it for work, entertainment, or everyday browsing, knowing the costs and best data plans helps you make the right choice. If you’re looking for reliable, on-the-go internet, the MTN MiFi is worth considering!
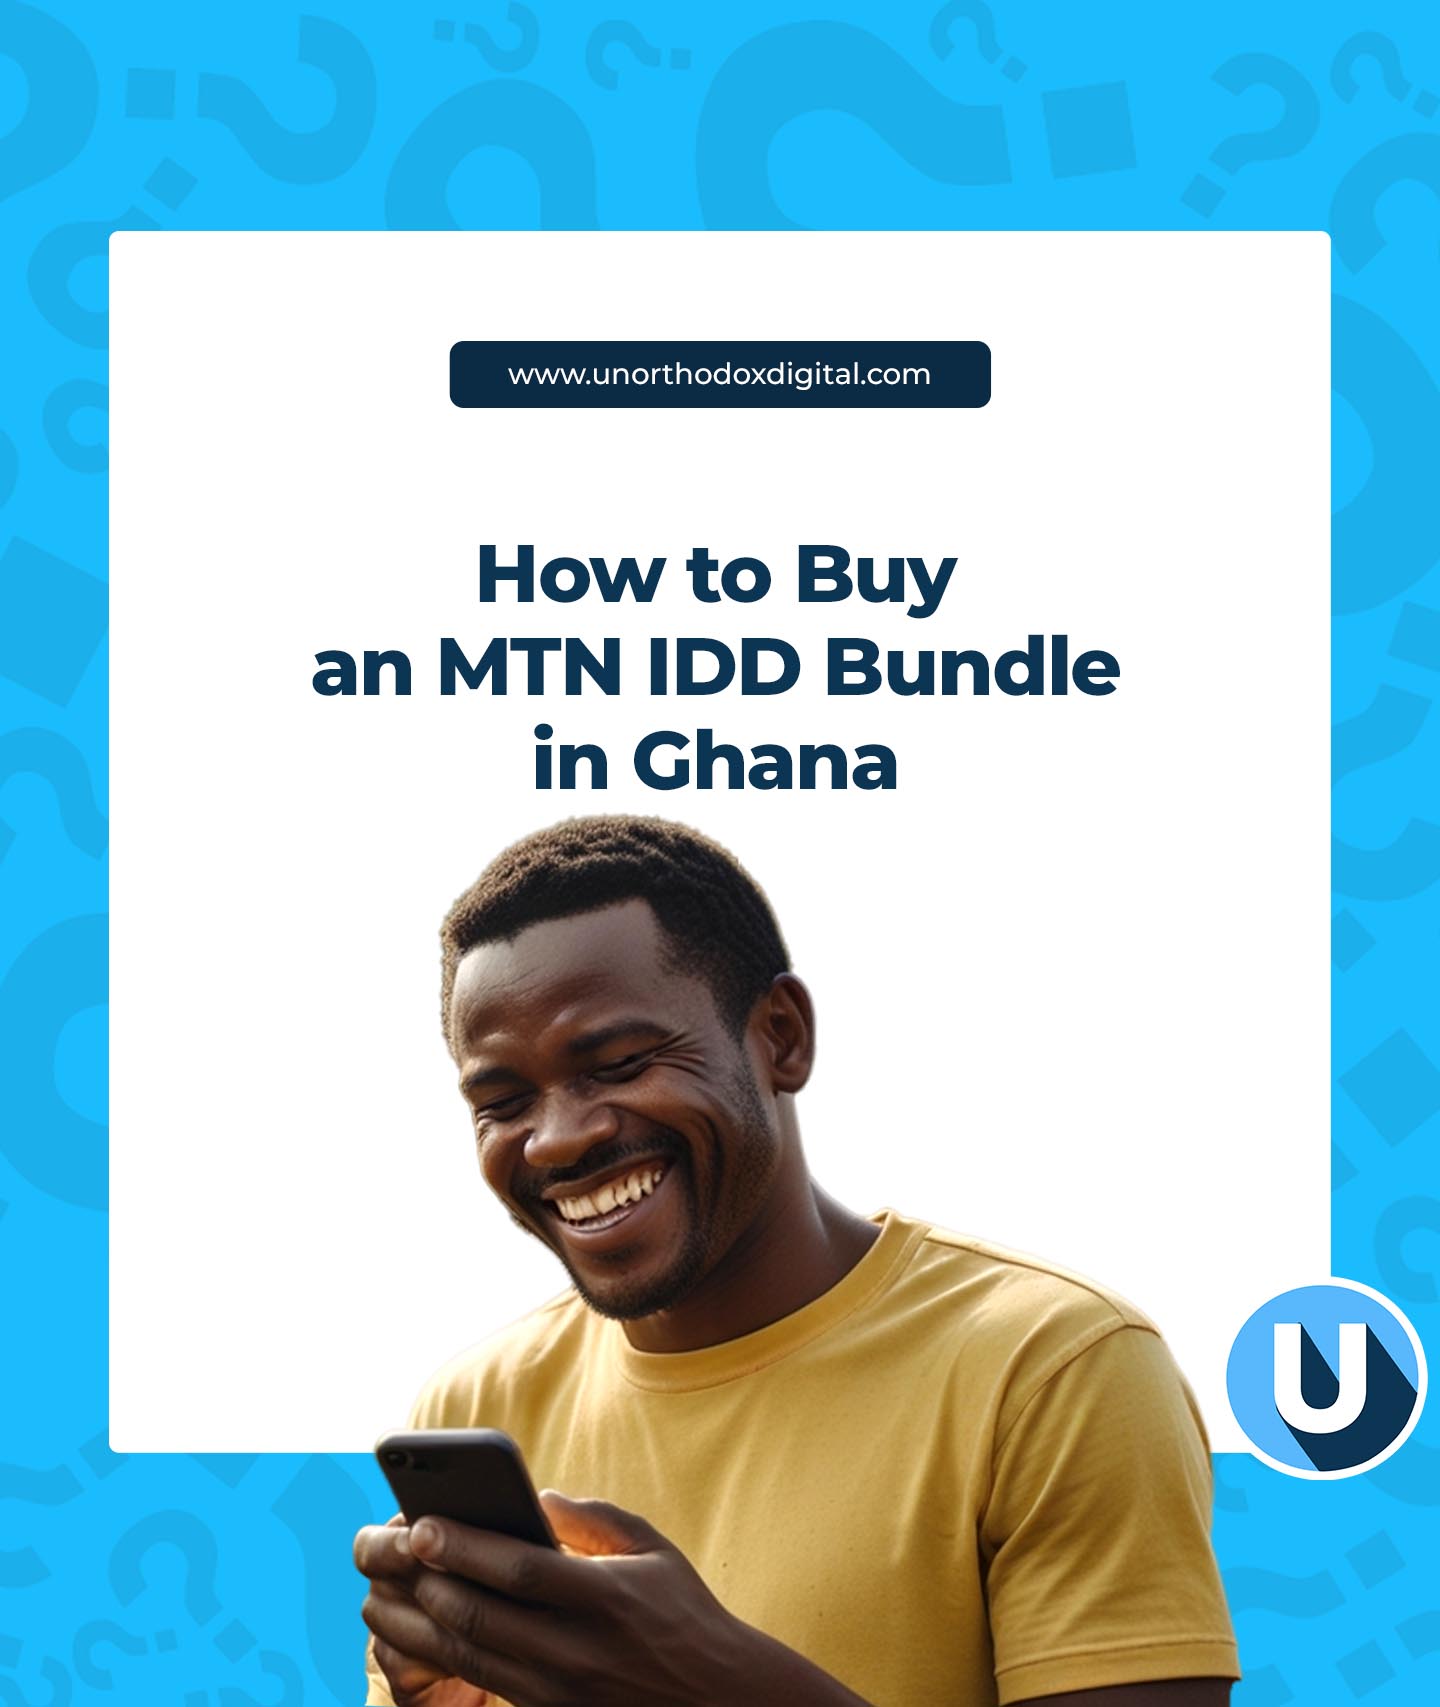
Staying connected with family, friends, or business partners abroad can be expensive. But what if you could make international calls without worrying about high costs? That’s where MTN’s International Direct Dial (IDD) bundles come in! These bundles let you call selected countries at affordable rates. Whether you’re chatting with a loved one in Canada, discussing business in the USA, or checking in with family in China or India, MTN has you covered. Let’s break down how to buy an IDD bundle in the simplest way possible.
What Is an MTN IDD Bundle?
Think of an IDD bundle as a special ticket that gives you discounted minutes to make international calls. Instead of using your regular airtime and paying high rates per minute, you buy a bundle that gives you more minutes for less money. MTN offers different bundles to suit different needs, whether you make frequent long calls or just need a few minutes now and then.
MTN IDD Bundle Options
Here are the available MTN IDD bundles and their prices:
Price (GHS)
Minutes
Validity (Days)
2.50
30
3
6.22
70
7
12.43
150
15
Now, let’s go step by step on how you can buy one.
3 Easy Ways to Buy an MTN IDD Bundle
There are three simple ways to purchase an IDD bundle:
If you love using apps, this method is for you. The MyMTN App is like a small shop where you can buy bundles, check balances, and do more with just a few taps. Here’s how:
Open the MyMTN App (Download it if you don’t have it yet!).
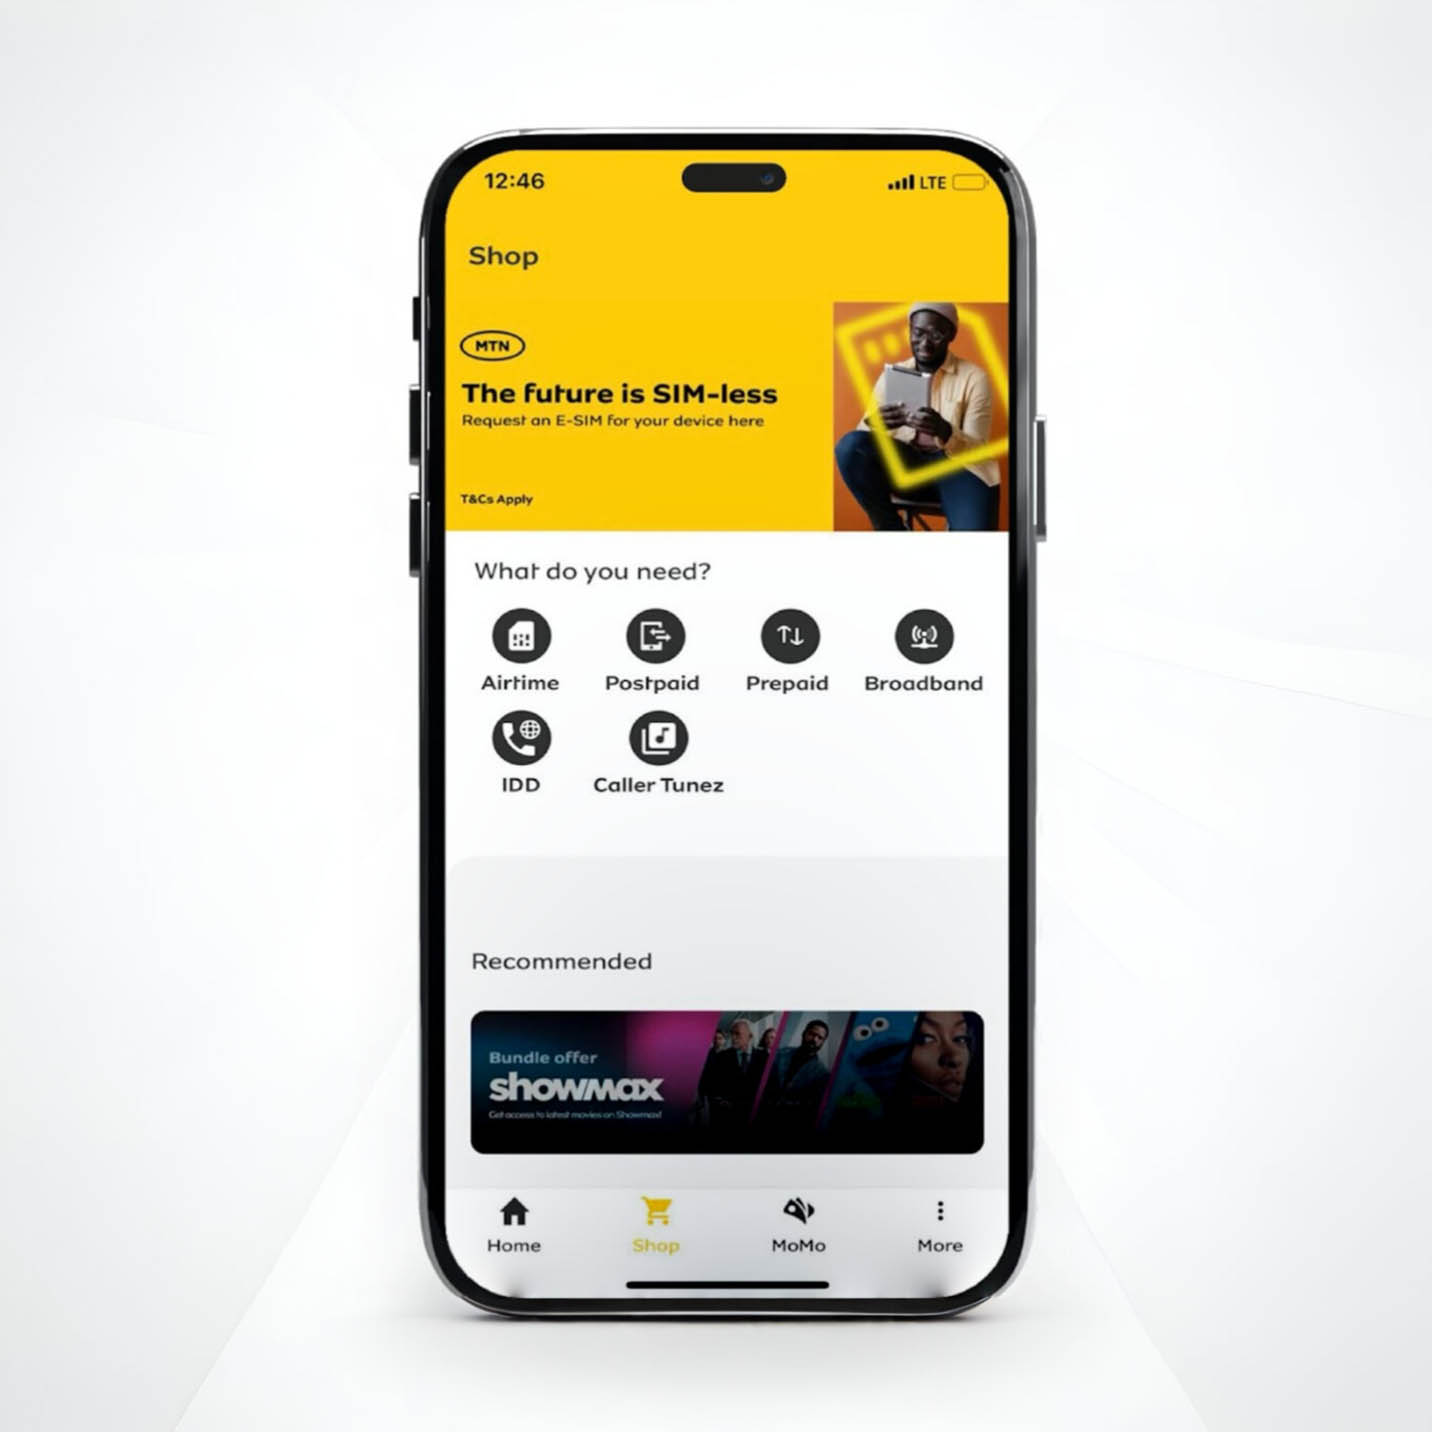
Tap “Shop” at the bottom of the home screen.
Select “Call Abroad” to find IDD bundles.
Choose your phone number if buying for yourself.
Pick the destination country.
Select the bundle that fits your needs.
Choose a payment method (Airtime or Mobile Money).
Scroll down and tap “Pay” to complete your purchase.
That’s it! You can now start making international calls instantly.
3. Buying an MTN IDD Bundle via MTN MoMo (*170#)
If you’re a Mobile Money (MoMo) user, you can buy an IDD bundle directly from your MoMo account. Here’s how:
Dial *170# on your phone.
Select “Airtime & Bundles.”
Choose “Internet Bundles.”
Enter “99” for more options and select “IDD Bundles.”
Choose “Buy for Self” (or “Buy for Others” if needed).
Pick the destination country.
Select your preferred bundle.
Confirm your purchase.
Enter your MoMo PIN to complete the transaction.
And just like that, your IDD bundle is activated!
How to Check Your Remaining IDD Bundle Balance
Want to know how many minutes you have left? Here’s what to do:
Dial *138#.
Select “1” to proceed to buy a bundle.
Enter “99” for more options.
Choose “IDD Bundles.”
Select “Check IDD Bundle Balance.”
Your remaining minutes will be displayed on your screen.
Can I Buy More Than One IDD Bundle?
Yes! If you run out of minutes before your bundle expires, you can buy another one. The minutes will add up, so you don’t have to wait for one bundle to expire before purchasing another.
Frequently Asked Questions (FAQs)
1. What happens if I don’t use all my minutes before the expiry date?
Unfortunately, unused minutes do not roll over. Be sure to use them before the bundle expires.
2. Can I use my IDD bundle to call other countries apart from Canada, China, the USA, and India?
No. The IDD bundle is specifically for these four countries. If you need to call other places, your call will be charged from your regular airtime.
3. Can I buy an IDD bundle for someone else?
Yes! When buying, just select “Buy for Others” and enter the recipient’s number.
4. How do I know which bundle to choose?
It depends on how much you plan to talk. If you make short calls occasionally, the GHS 2.50 bundle might be enough. But if you chat often, the GHS 12.43 bundle gives you the most value.
MTN’s IDD bundles make international calling easy, affordable, and convenient. Whether you’re keeping in touch with family, checking in with friends, or handling business abroad, there’s a bundle that fits your needs. With three simple ways to buy—USSD, MyMTN App, and MoMo—you can stay connected no matter where you are.
So go ahead, grab an IDD bundle today, and make that call! You’ve got this!
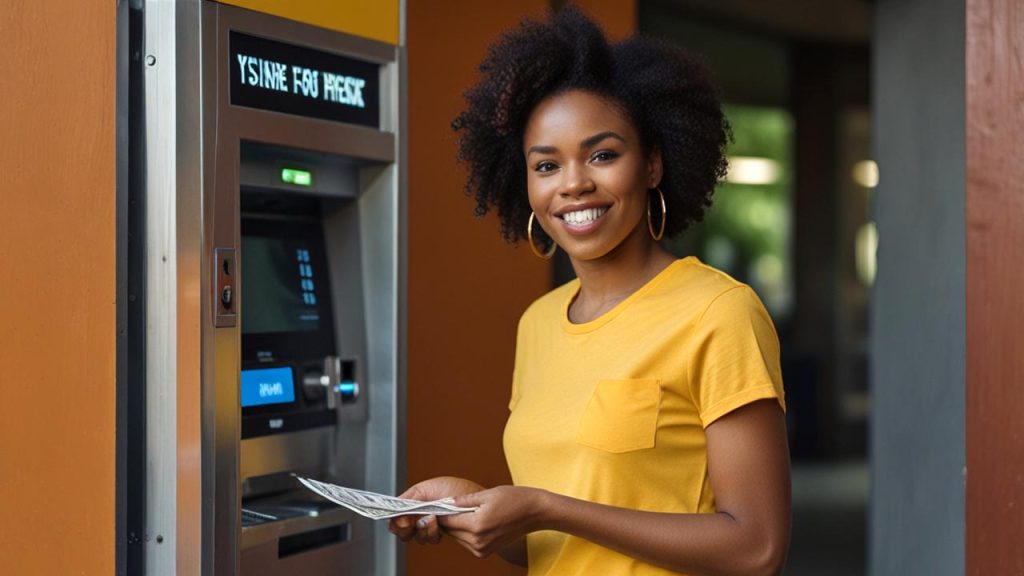
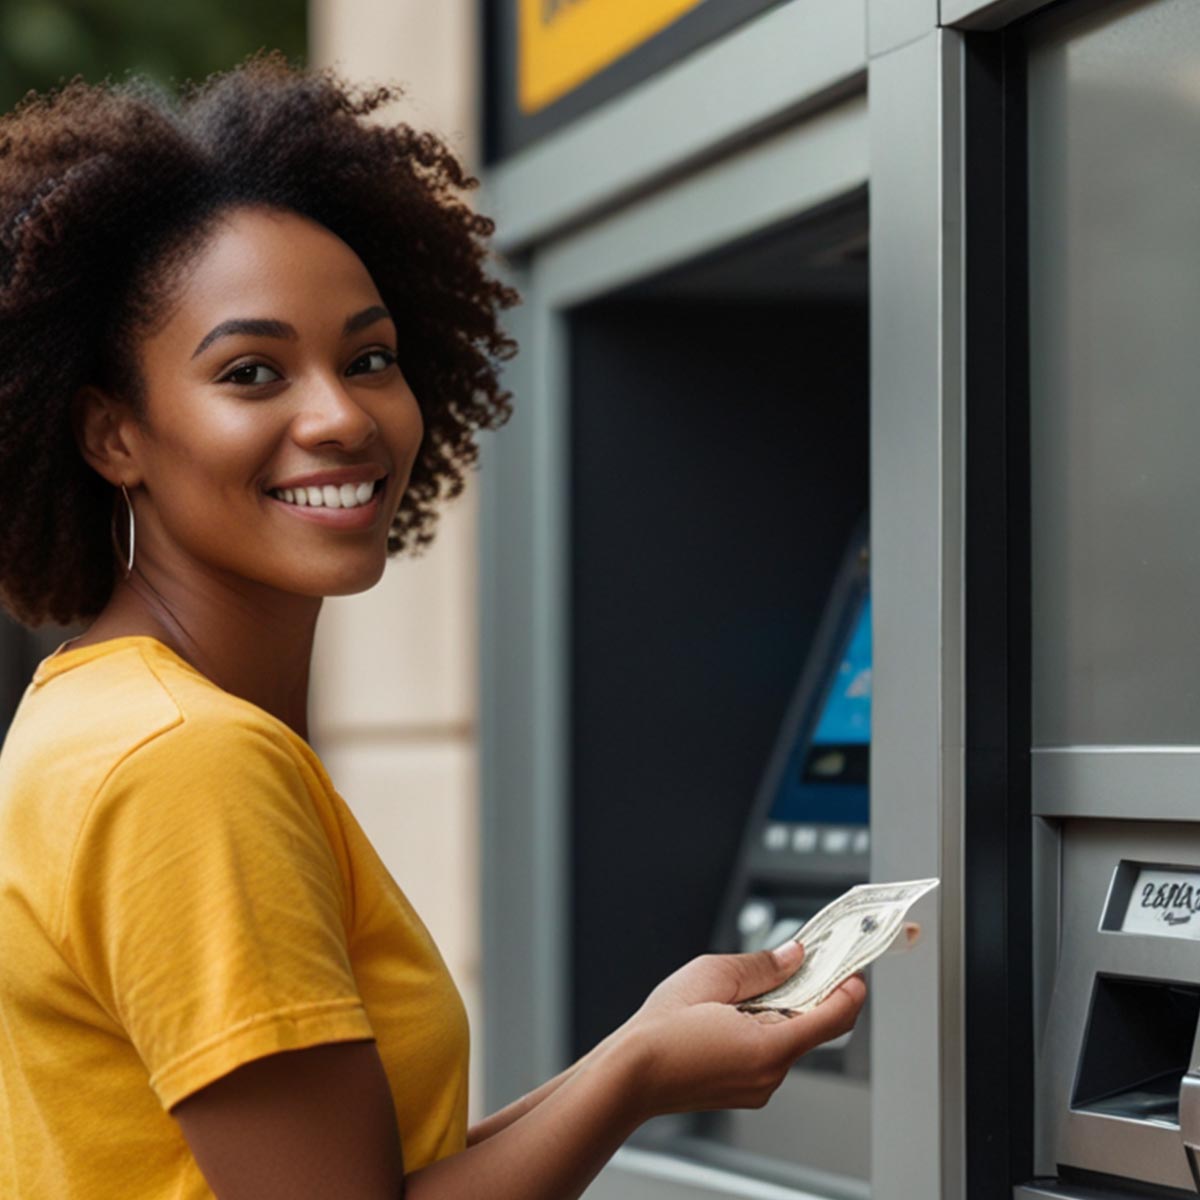
Imagine you need cash urgently, but there’s no MoMo agent in sight. You start stressing out, wondering where to find one. What if I told you there’s an easier way? You can withdraw your MTN Mobile Money (MoMo) straight from an ATM—no bank card needed! Sounds great, right? This guide will walk you through the entire process step by step, making sure you understand everything like a pro.
What is MTN MoMo ATM Withdrawal?
MTN Mobile Money ATM withdrawal is a feature that lets you withdraw cash from your MoMo wallet at select ATMs without needing a physical bank card. Instead, you generate a special code on your phone, use it at the ATM, and voila! Your money is in your hands.
What You’ll Need
Before heading to the ATM, make sure you have the following:
A registered MTN MoMo account with enough balance.
A supported ATM from an MTN partner bank (we’ll list them later).
Step-by-Step Guide to Withdrawing MTN MoMo at an ATM
This process happens in two parts: first, you generate a withdrawal code on your phone, then you complete the transaction at an ATM. Let’s go through both parts in detail.
Part 1: Generating the Withdrawal Token on Your Phone
Follow these steps to start the withdrawal process:
Dial *170# on your MTN line.
Select option 5 for Financial Services.
Choose Bank Services from the menu.
Select ATM CashOut.
Tap on Generate Token.
Enter any four-digit secret code of your choice (you’ll use this later at the ATM, so note it down!).
Enter the amount you want to withdraw.
Wait for a prompt to enter your MoMo PIN to confirm the transaction.
You will receive a nine-digit token via SMS.
Quick Fix: Didn’t receive a prompt to enter your MoMo PIN? No worries! Simply dial *170# again, select My Wallet (option 6), go to My Approvals, and approve the pending transaction.
Part 2: Completing the Withdrawal at the ATM
Once you have your token, it’s time to get your cash! Follow these steps at the ATM:
Enter the four-digit secret code you created earlier.
Input the exact amount you selected on your phone.
The ATM will process your request and dispense your cash!
Tip: If you can’t find the MoMo option on the ATM, ask a bank staff or security guard for guidance.
MTN MoMo ATM Withdrawal Charges
MTN MoMo ATM withdrawals come with charges similar to agent withdrawals. Here’s a general breakdown:
Amount Withdrawn (GHS)
Estimated Fee (GHS)
5 – 50
0.50 – 2.00
51 – 100
2.50 – 5.00
101 – 400
6.00 – 20.00
Charges may vary slightly based on MTN’s current rates.
Which Banks Support MTN MoMo ATM Withdrawals?
Not every bank allows MoMo ATM withdrawals, so make sure you visit a supported ATM. Here’s a list of banks in Ghana where you can withdraw MTN MoMo:
Ecobank
ABSA
Zenith Bank
UBA
Access Bank
ADB
Bank of Africa
GT Bank
CBG
Fidelity Bank
FBN
GCB
First Atlantic Bank
Republic Bank
UMB
CAL Bank
Prudential Bank
FNB
OmniBSIC
Stanbic Bank
If you’re unsure whether an ATM supports MoMo withdrawals, look for the MTN Mobile Money option on the screen before proceeding.
FAQs
1. Do I need a bank account to withdraw MTN MoMo at an ATM?
Nope! You don’t need a bank account. As long as you have an MTN MoMo wallet, you can withdraw cash from a supported ATM.
2. What happens if I enter the wrong token or secret code?
If you enter the wrong token or secret code too many times, the transaction may be blocked for security reasons. If this happens, generate a new token and try again.
3. Is there a minimum and maximum withdrawal amount?
Yes. The minimum amount you can withdraw is GHS 5, and the maximum is GHS 400 per transaction.
4. What if my transaction fails but my money is deducted?
If your money is deducted but the ATM doesn’t dispense cash, contact MTN Customer Care at 100 or visit the nearest MTN office to report the issue.
MTN MoMo ATM withdrawals are a lifesaver when you need cash but can’t find an agent. The process is simple: generate a token on your phone, head to a supported ATM, enter the details, and grab your cash. Easy, right?
So, next time you’re in a hurry and need cash, remember this guide—you’ve got the know-how to withdraw MTN MoMo like a pro!
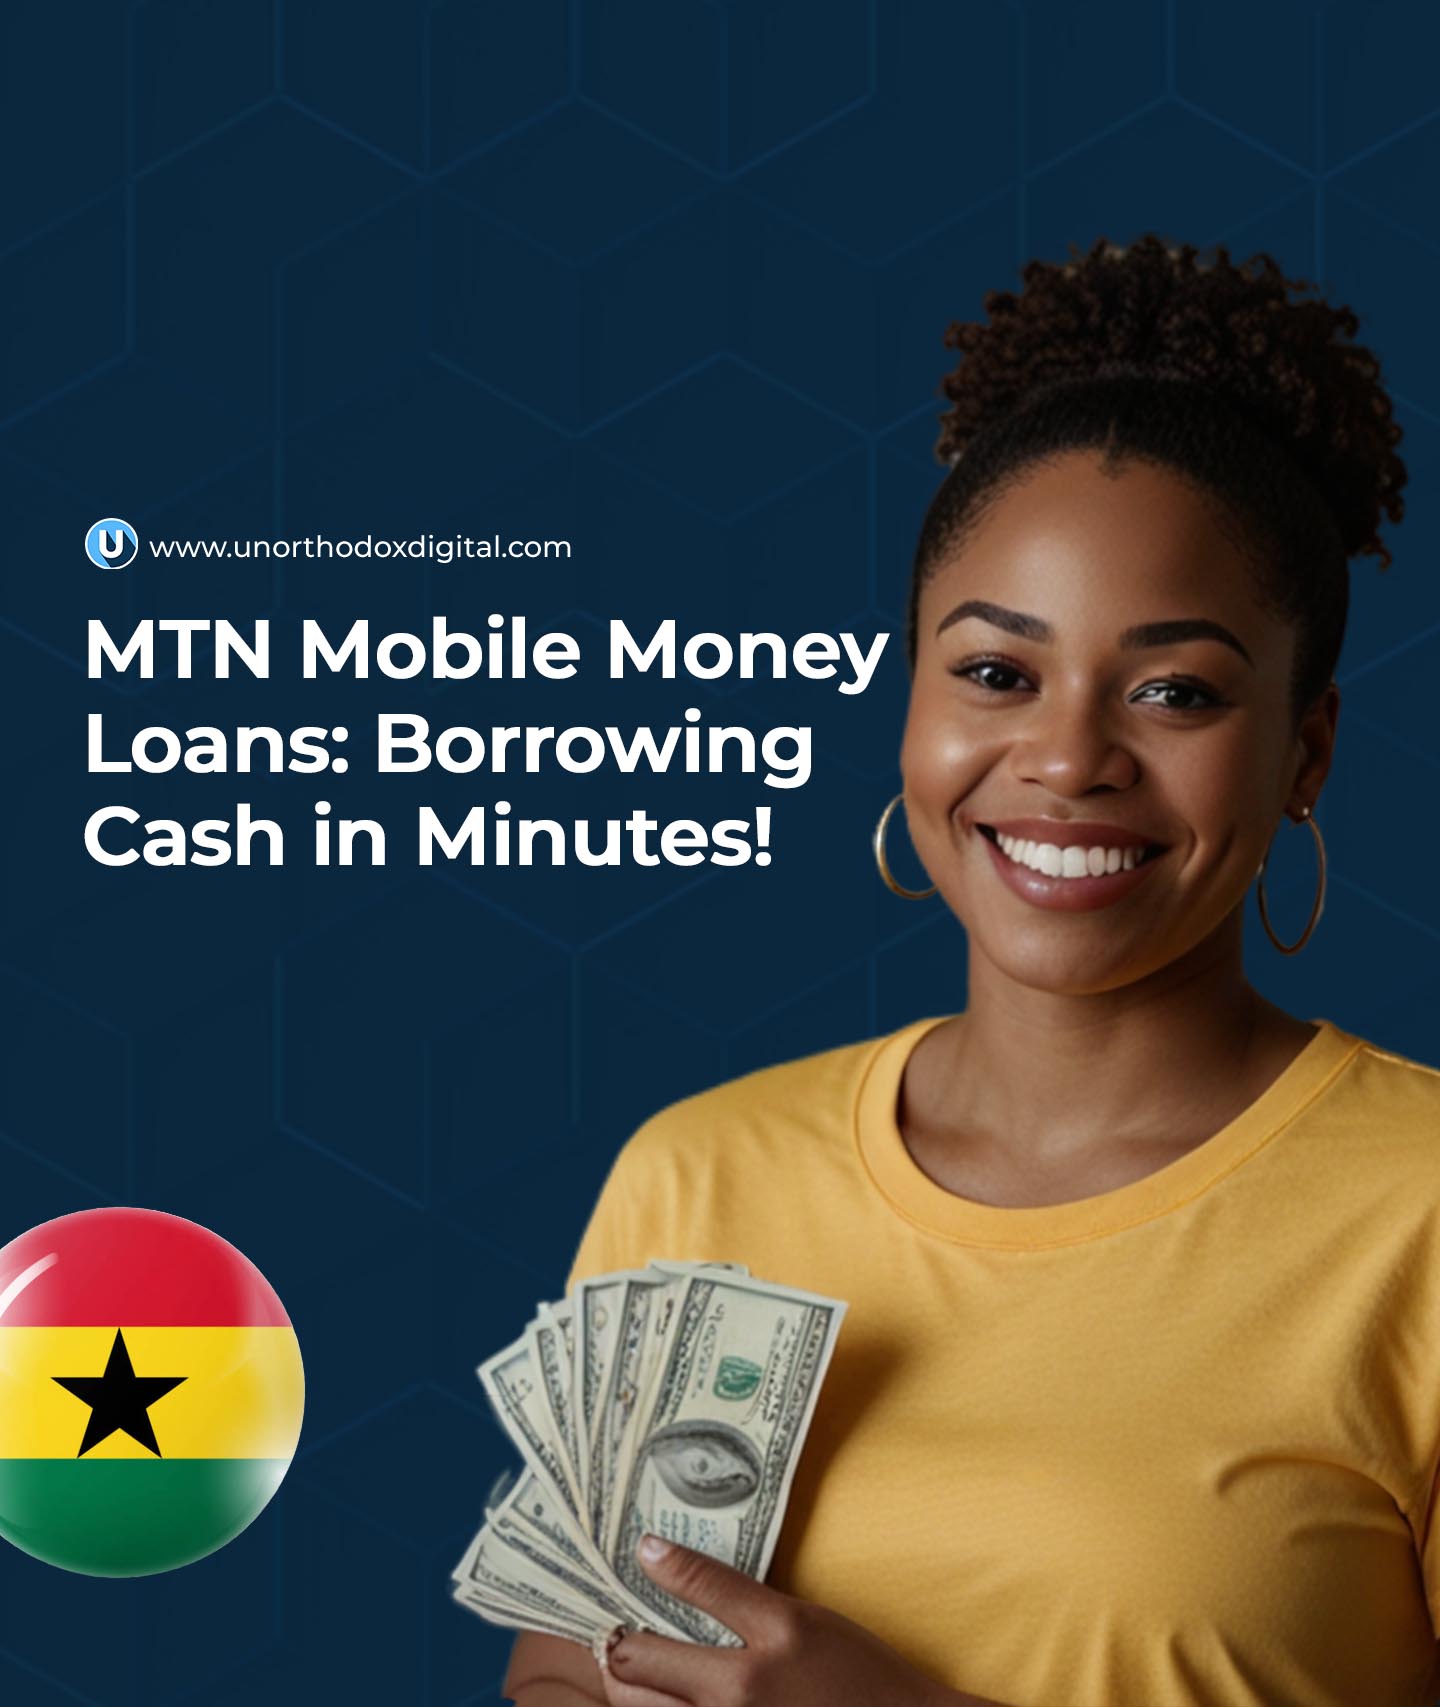
Imagine you’re out and about, and suddenly you need cash—maybe your favorite snack vendor only takes mobile money, or your transport fare runs out at the worst time. Wouldn’t it be great if you could borrow a little extra right from your phone, no long forms or stress involved? Well, with MTN Mobile Money Loans, you can do just that!
In this guide, we’ll break down everything you need to know about borrowing money using MTN’s mobile loan services, explaining it in a way that’s easy to follow, whether you’re new to this or just need a refresher.
What Is MTN Qwikloan?
MTN Qwikloan is a short-term loan service that allows MTN Mobile Money (MoMo) users to borrow cash instantly—anywhere, anytime. You can borrow between GHS 25 and GHS 1,000, and you’ll have 30 days to pay it back with a 6.9% interest rate. That means if you borrow GHS 100, you’ll pay back GHS 106.90 after a month.
There’s no need for paperwork, bank visits, or collateral—just your MTN MoMo account and a good track record.
Who Can Get an MTN Qwikloan? (Eligibility Requirements)
Not everyone qualifies for an MTN Qwikloan right away. To be eligible, you need to:
Maintain a good credit history (if you’ve borrowed before, make sure you paid on time!)
If you tick all these boxes, you’re good to go!
How to Borrow Money from MTN (Step-by-Step Guide)
Getting a loan is as easy as dialing a short code and following a few prompts. Here’s how:
Dial *170# on your MTN phone
Select “Financial Services”
Choose “Loans”
Select “Qwikloan”
Tap “Get a Loan”
Enter your MoMo PIN to confirm
Choose the loan amount you need (within the available range)
Confirm the loan amount and repayment terms
Agree to the terms and conditions
Select the reason for your loan (e.g., emergency, business, bills)
That’s it! You’ll receive an SMS confirmation and the money will be instantly credited to your MoMo wallet.
How to Repay Your MTN Qwikloan
Paying back your loan on time is crucial because it helps you qualify for higher loan amounts in the future. MTN gives you 30 days to repay, and you have two ways to do it:
1. Manual Repayment
Want to repay early? No problem! Follow these steps:
Deposit the loan amount + interest into your MoMo wallet
Dial *170#
Go to “Financial Services”
Select “Loans”
Tap “Qwikloan”
Choose “Repay My Loan”
Enter your MoMo PIN to confirm
Select full payment or part payment
Confirm the repayment
You’ll receive an SMS confirmation once your loan is successfully repaid.
2. Automatic Deduction
If you don’t manually repay, MTN will automatically deduct the loan amount (plus interest) from your MoMo wallet on the due date. Make sure you have enough funds in your account to avoid penalties!
What Happens If You Don’t Repay on Time?
Late repayments come with consequences, and you definitely don’t want to ignore them:
Your interest rate increases from 6.9% to 12.5%
You might be disqualified from borrowing again
Your credit score drops, making it harder to get loans elsewhere
So, always repay on time to keep your options open!
Other MTN Loan Options
Besides Qwikloan, MTN has partnered with other financial institutions to offer more loan choices:
1. XpressLoan
Provided by Ecobank Ghana & Jumo
Works like Qwikloan with a 6.9% interest rate
No paperwork or collateral required
2. Ahomka Loan
Introduced during COVID-19 to help people with short-term loans
Same 30-day repayment period and 6.9% interest
3. MTN XtraCash
Offers small, short-term loans (GHS 50 or less)
Must be repaid within 7 days
Late payments attract a 10% penalty
MTN also offers a pick-now-pay-later service for buying phones and tablets, where you pay in installments over 6-12 months.
3 Tips to Increase Your Loan Limit
Want to borrow higher amounts? Follow these tips:
Use MoMo regularly – The more transactions you make, the more MTN trusts you.
Link your MoMo account to your Ghana Card – It boosts your credibility.
Repay loans on time – A clean track record means higher loan offers!
FAQs
1. What’s the maximum loan amount I can get?
The highest amount for Qwikloan is GHS 1,000.
2. Can I apply for multiple loans at the same time?
No, you must repay your current loan before applying for another.
3. What happens if I don’t repay my loan?
Your interest rate increases to 12.5% and you may be blocked from borrowing in the future.
MTN Mobile Money Loans are a lifesaver when you need quick cash without stress. Whether it’s for an emergency, small business, or just covering expenses before payday, these loans are fast, easy, and convenient.
Just remember: borrow only what you can repay and always pay on time to keep your loan options open. Need cash now? Dial *170# and get started!
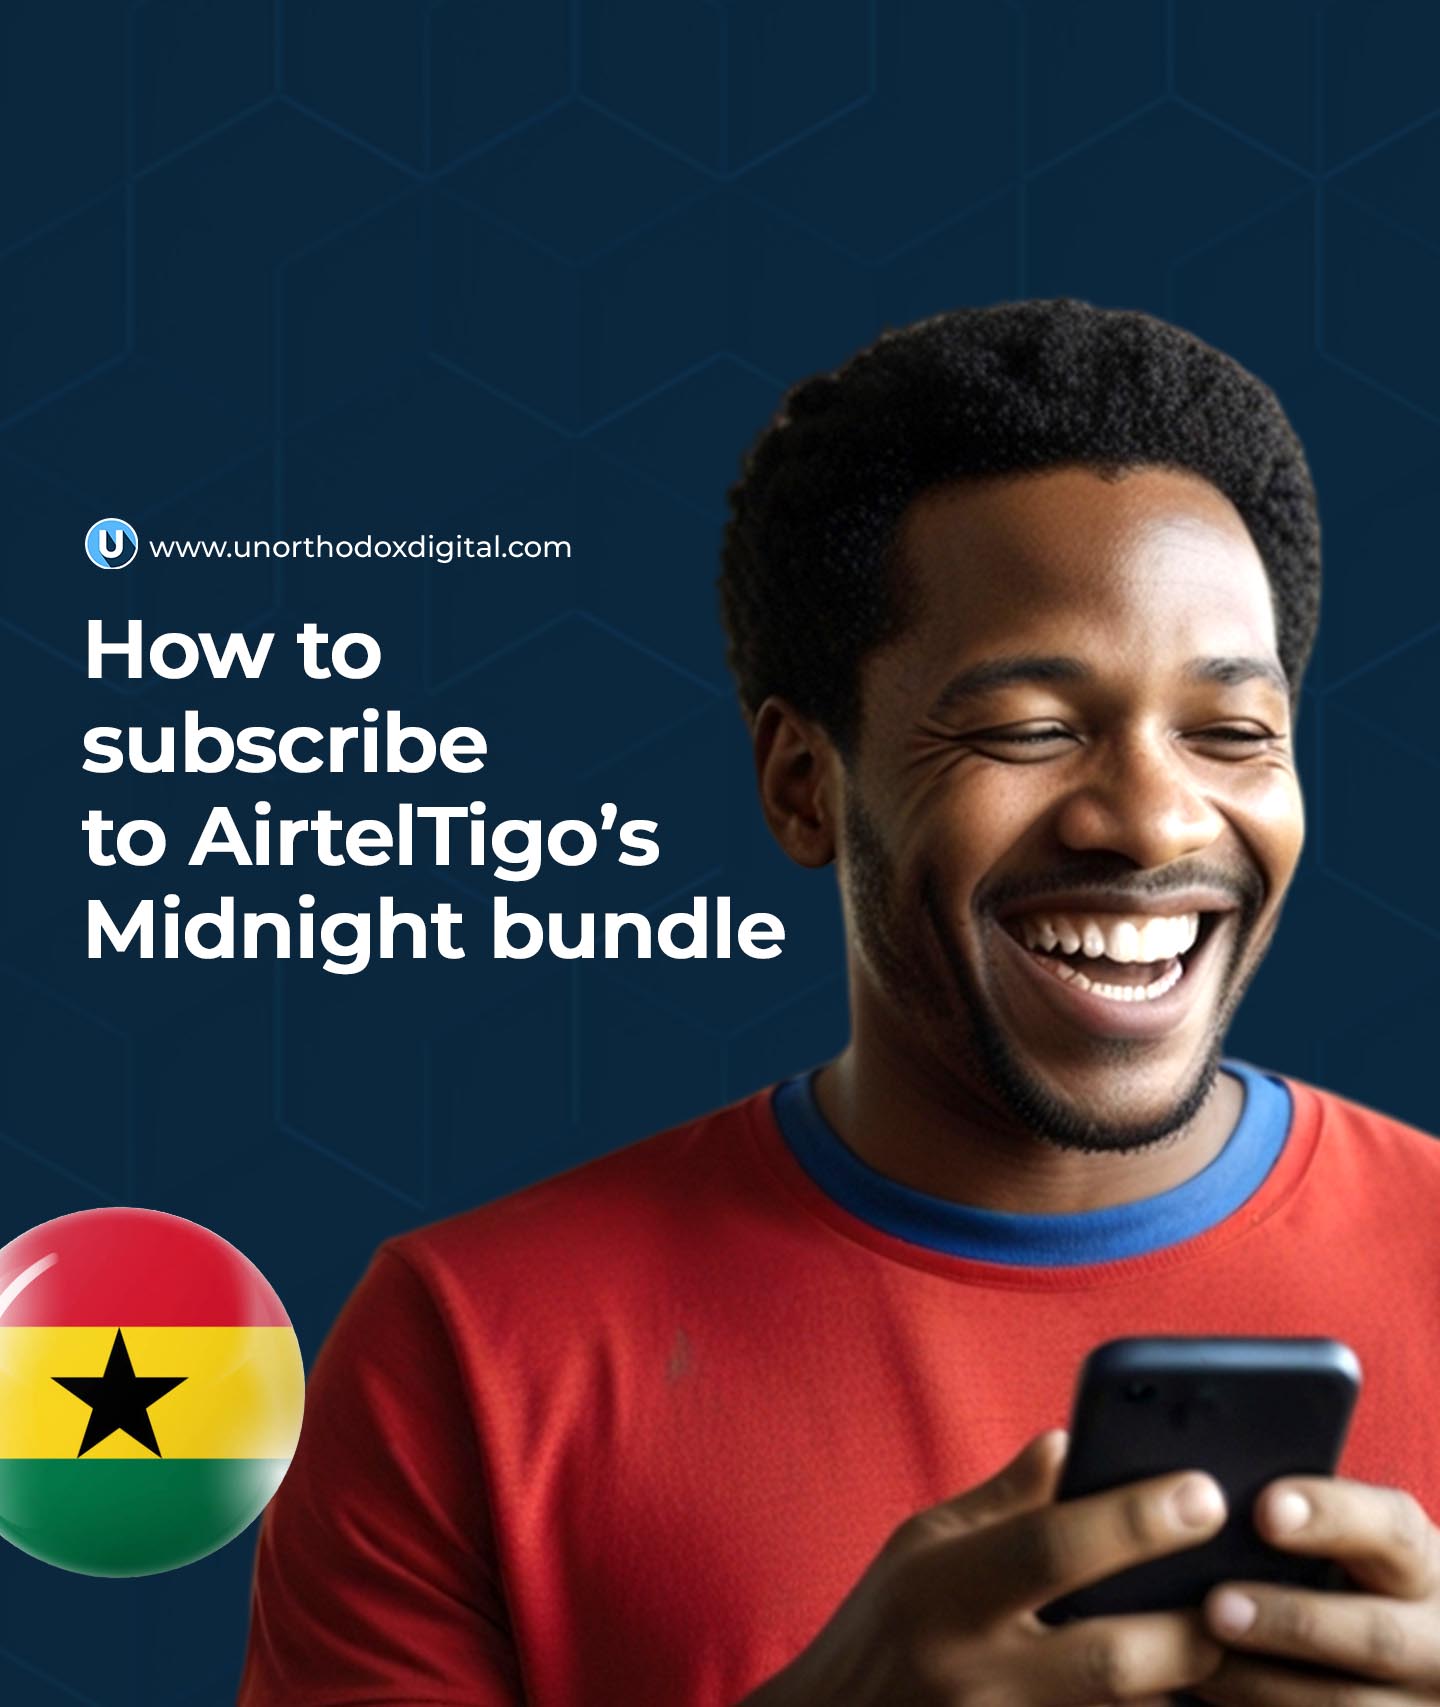
If you’re someone who enjoys staying up late, streaming videos, or downloading large files at night, AirtelTigo’s Midnight Bundle is a great way to save on data costs. This special bundle offers affordable internet access from 12 AM to 4 AM, allowing you to enjoy a seamless browsing experience at a fraction of the cost. In this guide, we’ll break down everything you need to know about AirtelTigo’s Midnight Bundle, including the subscription process, pricing, benefits, and how to check your balance.
What is the AirtelTigo Midnight Bundle?
The AirtelTigo Midnight Bundle, also called the Night Bundle, is a special data package designed for late-night internet users. It provides users with large amounts of data at a lower cost, making it ideal for activities like streaming, downloading, and heavy browsing between midnight and 4 AM.
Available AirtelTigo Midnight Bundles
Here’s a look at the available Midnight Bundle packages:
Price
Data Volume
Call Minutes
GHS 3
4.5 GB
100 minutes
GHS 5
7.5 GB
Unlimited
Key Features of the AirtelTigo Midnight Bundle:
Affordable pricing: Get more data for less money compared to regular data plans.
Large data allocation: Perfect for downloading, streaming, and other data-heavy activities.
Call benefits: Includes free AirtelTigo-to-AirtelTigo call minutes.
No expiration: If you don’t finish your data in one night, you can continue using it the next night (within the 12 AM – 4 AM window).
Multiple purchases allowed: You can buy the bundle multiple times if you need more data.
How to Subscribe to the AirtelTigo Midnight Bundle
There are two ways to purchase the Midnight Bundle: using a USSD code or via the My AirtelTigo App.
Select Option 4 for “Sika Kokoo & Other Data Bundles.”
Choose “Night Pack.”
Select your preferred bundle (GHS 3 for 4.5GB or GHS 5 for 7.5GB).
Select 1 to buy for yourself or choose another option if purchasing for someone else.
Choose a payment method (Airtime or Mobile Money).
Confirm your purchase.
Method 2: Using My AirtelTigo App
Open the My AirtelTigo App (download it if you don’t have it).
Scroll down and select “Internet.”
Swipe through and select “Night Bundles.”
Choose your preferred bundle (4.5GB or 7.5GB).
Select a payment method (Airtime or Mobile Money).
Tap “Buy Internet” to confirm.
How to Check Your AirtelTigo Midnight Bundle Balance
To keep track of your remaining data and call minutes:
Option 1: Using USSD Code
Dial *504# and wait for an SMS notification showing your data balance.
Option 2: Using My AirtelTigo App
Open the app and tap “Internet” to view all your data balances.
Frequently Asked Questions
Does the AirtelTigo Midnight Bundle expire?
No, the data does not expire. However, you can only use it between 12 AM and 4 AM. If you have leftover data, you can continue using it the next night within the same time window.
Can I purchase the AirtelTigo Midnight Bundle at any time?
Yes, you can buy the bundle at any time of the day, but it will only be usable between 12 AM and 4 AM.
Can I use the AirtelTigo Midnight Bundle during the day?
No, the bundle is strictly available for use between 12 AM and 4 AM. If you need data for daytime use, consider purchasing a different data package.
Can I buy multiple Midnight Bundles in one night?
Yes, you can purchase multiple bundles if you need more data. For example, if you need 15GB, you can buy the 7.5GB bundle twice.
AirtelTigo’s Midnight Bundle is an excellent option for night owls who want high-speed internet at a low cost. Whether you’re streaming, downloading, or just browsing, these affordable data plans give you the freedom to do more without worrying about high data charges. With easy subscription methods and no data expiration, it’s a convenient choice for anyone who needs reliable night-time internet access.
Now that you know how to subscribe, check your balance, and maximize your data, you can take full advantage of AirtelTigo’s Midnight Bundle for all your late-night online activities!
MTN Mobile Money, or MoMo, is one of the easiest ways to send, receive, and store money in Ghana. Whether you’re paying for groceries, sending money to family, or withdrawing cash, MoMo makes it simple. But with every service, there are costs involved. In this guide, we’ll break down all the fees you might encounter when using MTN MoMo—no complicated jargon, just clear, useful info.
1. Depositing Money: It’s Free!
Good news! You don’t pay anything to deposit money into your MTN Mobile Money wallet. Whether you add GHS 1 or GHS 10,000, it’s completely free.
2. Withdrawing Money: What’s the Cost?
While putting money into your MTN Mobile Money wallet is free, taking it out isn’t. Here’s a simple table showing how much you’ll pay when you withdraw cash:
Amount (GHS)
Withdrawal Fee
50 and below
GHS 0.50
51 – 1,999
1% of the amount
2,000 and above
GHS 20
So, if you withdraw GHS 500, you’ll pay 1%, which is GHS 5.
So, if you send GHS 500 from your MTN Mobile Money wallet to a Telecel user, you’ll pay 0.75%, which is GHS 3.75.
4. Bank Transfers: Free or Not?
If your MoMo number is linked to your Ghana Card and your bank account, transferring money to and from your bank is completely free. If not, here’s what you’ll pay:
Amount (GHS)
Bank Transfer Fee
0.01 – 50
GHS 0.38
50 – 1,000
0.75% of the amount
Above 1,000
GHS 7.5
5. Bill Payments: No Extra Fees
Using MTN Mobile Money to pay for electricity, water, school fees, or TV subscriptions? That’s free! You won’t pay extra for making bill payments.
6. Transaction Reversals: Also Free!
If you send money to the wrong number by mistake, don’t panic. You can request a reversal, and it won’t cost you anything. Just make sure to report the issue quickly.
7. E-Levy: A Government Tax on Transfers
The Ghanaian government charges an Electronic Levy (E-Levy) on some MoMo transactions. Here’s how it works:
Amount (GHS)
E-Levy Charge
Up to 100
No Charge
Above 100
1% of the amount
For example, if you transfer GHS 200, the E-Levy charge is GHS 2 (1% of 100, since the first GHS 100 is free).
8. MTN Mobile Money Limits: How Much Can You Hold or Send?
Depending on the type of MoMo account you have, there are limits on how much money you can store and send daily.
Maximum Account Balance
Account Type
Old Limit (GHS)
New Limit (GHS)
Minimum KYC
3,000
5,000
Medium KYC
25,000
40,000
Enhanced KYC
50,000
75,000
Daily Transaction Limit
Account Type
Old Limit (GHS)
New Limit (GHS)
Minimum KYC
2,000
3,000
Medium KYC
10,000
15,000
Enhanced KYC
15,000
25,000
Monthly Transaction Limit
Account Type
Old Limit (GHS)
New Limit (GHS)
Minimum KYC
6,000
10,000
Medium KYC
Unlimited
Unlimited
Enhanced KYC
Unlimited
Unlimited
If you want higher limits, you can upgrade your account by providing additional details like your Ghana Card, proof of address, and next of kin information.
9. MTN MoMo Agent Commissions
MTN Mobile Money agents earn commissions whenever customers withdraw money. Here’s how much they make:
Amount (GHS)
Old Commission
New Commission
50 and below
GHS 0.20
GHS 0.20
51 – 999
0.4% of amount
0.4% of amount
1,000 – 1,999
GHS 4
0.4% of amount
2,000 and above
GHS 4
GHS 8
10. How Much Does MTN Charge to Withdraw GHS 10,000?
If you withdraw GHS 10,000 from your MoMo wallet, MTN charges GHS 20. However, some agents may ask for extra fees before processing large withdrawals.
MTN Mobile Money is a great tool for handling money easily, but understanding the charges helps you avoid surprises. Keep these fees in mind so you can save money and make the best use of your MoMo wallet. Whether you’re sending cash, paying bills, or withdrawing funds, knowing what to expect makes all the difference.
Want to get started with MTN MoMo? Check out our guide on how to register and set up your MoMo account hassle-free!
Imagine being able to send money, buy airtime, and pay bills—all from your phone—without needing to visit a bank. That’s exactly what AirtelTigo Money (AT Money) allows you to do. If you’ve ever wondered how to register, don’t worry! This guide will walk you through the process in the simplest way possible, making sure you don’t miss a step.
What is AirtelTigo Money?
AirtelTigo Money (AT Money) is like a digital wallet sitting right in your phone. It lets you send and receive money, buy airtime and data, pay for goods and services, and even handle bill payments. Whether you’re splitting a lunch bill with a friend or paying your electricity bill, AT Money makes it easy.
It started in 2011 as Tigo Cash, but after Airtel and Tigo merged in 2017, it became AirtelTigo Money. Today, it’s one of Ghana’s most convenient mobile money services.
What You Need to Register for AirtelTigo Money
Before you jump into the registration process, make sure you meet these requirements:
You must be at least 18 years old
You need a valid national ID (Ghana Card, Passport, Voter ID, etc.)
AirtelTigo makes it easy to register in two ways: through your phone or at an AirtelTigo office. Let’s break them down step by step.
Method 1: Register Using Your Phone (USSD Code)
If you prefer handling things from the comfort of your home, this method is for you. Here’s how you do it:
Dial *110# on your AirtelTigo line.
Select Register from the options.
Choose Self AT Money Registration.
Wait for a confirmation SMS about your registration status.
Set Up Your PIN
Once you’re registered, you’ll need to set up your PIN to keep your money safe:
Dial *110# again.
Select Option 1 (Yes) to confirm registration.
Enter a 4-digit PIN (Avoid easy guesses like 1234 or 1111).
Confirm the PIN by entering it again.
Provide an alternate phone number for PIN recovery.
Enter a secret word that you can remember easily (this helps with account recovery if needed).
And that’s it! You’ll get a final SMS confirming that your AirtelTigo Money wallet is ready to use.
Pro Tip: If you face any issues during self-registration, simply call AirtelTigo customer service or visit an agent for help.
Method 2: Register at an AirtelTigo Office
Not comfortable doing it yourself? No problem! Just visit any AirtelTigo office or agent with your valid national ID. A customer care agent will assist you with the registration process.
You’ll provide your personal details, set up a 4-digit PIN, and within minutes, you’ll be good to go!
AirtelTigo Money Charges: What You Should Know
Let’s talk money! While sending money to another AirtelTigo user is free, there are charges for other transactions. Here’s what you should expect:
Amount (GHS)
Charge
0 – 50p
0.5 GHS
51 – 1000
1%
1001 – 1999
10 GHS
2000+
20 GHS
E-Levy Charges: If you send more than GHS 100 in a day, you’ll be charged 1% for e-levy, even if you’re sending money to another AirtelTigo number.
Frequently Asked Questions (FAQs)
What is the AirtelTigo Money shortcode for merchants?
If you’re a business owner, you can access your merchant account by dialing *464#.
Can I send money from AirtelTigo Money to other networks?
Yes! Thanks to Ghana’s mobile interoperability system, you can send money from AT Money to other networks like MTN MoMo and Telecel Cash.
How can I reset my AirtelTigo Money PIN if I forget it?
If you forget your PIN, don’t panic! Just dial *110#, select Reset PIN, and follow the instructions. You may need your secret word or an alternate number for verification.
AirtelTigo Money makes life easier by allowing you to handle transactions straight from your phone. Whether you’re paying for groceries, sending cash to family, or buying data, it’s a reliable and convenient service.
Dial *110# now to get started and enjoy seamless mobile money transactions! Just remember—never share your PIN with anyone to keep your account safe from fraudsters.
Now that you know how to register, go ahead and activate your AirtelTigo Money wallet today!
If you’ve got an MTN SIM card in Ghana, you need to register it—no ifs, ands, or buts. Whether you’re getting a new SIM or making sure your old one is properly registered, this guide will walk you through every step in the simplest way possible. Think of it like setting up a new phone—easy when you know what to do, but frustrating if you don’t. Let’s make sure you get it right the first time!
Why Do You Need to Register Your MTN SIM Card?
Registering your SIM card isn’t just some random rule—it’s a government requirement. The goal is to keep mobile networks secure and prevent fraud. If you don’t register, your SIM will eventually get blocked, meaning no calls, no texts, no data—nothing. That’s not a situation you want to be in!
What You Need for MTN SIM Registration
Before heading to an MTN office or agent, make sure you have:
Your Ghana Card (ECOWAS card) – No other ID will work!
Your digital address – You can find this using Ghana Post GPS
That’s it! If you have these three things, you’re good to go.
Step 1: Linking Your Ghana Card to Your MTN SIM
Before you can complete biometric verification, you need to link your SIM to your Ghana Card. You can do this in two ways: using a USSD code or through the myMTN app.
Method 1: Using the USSD Code (Easiest Method)
Dial *404# on your phone.
Follow the prompts and enter:
Your full name (as it appears on your Ghana Card)
Your Ghana Card number (skip the hyphens)
Your date of birth
You’ll get a confirmation message with a unique code.
Method 2: Using the myMTN App
If you prefer using an app, follow these steps:
Open the myMTN app (download it from Google Play Store or Apple App Store if you don’t have it).
Tap More, then My Account.
Select SIM Registration and agree to the Terms of Service.
Confirm that you are the owner of the SIM.
Enter your phone number and verify with an OTP (One-Time Password).
Enter your name and Ghana Card number.
You’ll get a notification confirming the linking process.
Note: If you’re registering a brand-new SIM, the linking process is automatic since it’s required before activation.
Step 2: Completing Biometric Verification
Linking your SIM isn’t enough—you still need to verify your identity through biometric registration. This part must be done in person at an MTN office or an authorized agent.
Here’s what to do:
Visit any MTN service center or an authorized MTN agent.
Provide your MTN SIM card, Ghana Card, and digital address.
The agent will scan your fingerprints and take other biometric details.
Once complete, they’ll confirm that your SIM is now fully registered.
You’ll receive a confirmation message, and your SIM is now good to go!
Step 3: Checking Your SIM Registration Status
Not sure if everything went through successfully? Here’s how to check:
B-Cap (Biometric Capture) status (if it says “Yes,” you’re fully registered)
If the B-Cap status is “No,” you need to visit an MTN office to complete biometric verification.
FAQs
Can I Register My MTN SIM by Myself?
No. MTN used to have a self-registration app, but it’s no longer available for customers. You must visit an authorized agent for biometric verification.
How Much Does SIM Registration Cost?
Officially, registering an MTN SIM is free when you buy a new SIM. However, some agents may charge between GHS 30 – GHS 35 for verification and Mobile Money (MoMo) registration.
What Happens if I Don’t Register My SIM?
If you don’t register your SIM, MTN will block it. You won’t be able to make calls, send texts, or use data. If you miss the final deadline set by the government, your number could be permanently deactivated.
Registering your MTN Ghana SIM card isn’t as complicated as it might seem. Just follow these steps:
Link your SIM to your Ghana Card using *404# or the myMTN app.
Visit an MTN office or agent for biometric verification.
Check your registration status by dialing *400#.
That’s it! Now, you can enjoy your MTN service without any worries. If you found this guide helpful, share it with someone who might need it!
Have you ever loaded airtime, only to see it vanish before you even make a call? You’re not alone. Many MTN Ghana users find their airtime disappearing like magic, often because of hidden subscriptions they didn’t even realize they had. From caller tunes to daily news updates, these services can silently drain your balance.
But don’t worry! In this guide, I’ll show you exactly how to cancel any MTN Ghana subscription—step by step—so you can finally stop wasting money on things you don’t need. It’s super simple, and you’ll feel great knowing your airtime is safe.
Why Your Airtime Keeps Disappearing
You might think your airtime is running out because of calls or data usage, but there’s a sneaky culprit—automatic subscriptions! These can include:
Caller tunes (those songs people hear when they call you)
Daily news or horoscope updates
Sports alerts
Trivia games
Mobile insurance
Phonebook backup services
Some of these services might have been activated accidentally, while others could have been bundled with something else you signed up for. The good news? You can cancel them all in seconds.
The Magic Code to Cancel MTN Ghana Subscriptions
MTN has a simple way to manage subscriptions, and it all starts with this shortcode: *175#.
Think of this as your “reset button” to take back control of your airtime. Here’s how to use it:
Step-by-Step Guide to Unsubscribing from MTN Services
Dial 175# on your phone (just like you would when checking your balance).
A menu will pop up. Select Option 1 for “My Subscriptions.”
You’ll see a list of all active subscriptions linked to your number.
Choose the subscription you want to cancel, or select “Unsubscribe All” to remove everything at once.
Confirm your deactivation by selecting “Yes.”
You’ll receive an SMS confirming that the subscription has been canceled.
That’s it! No more unwanted deductions from your airtime.
Extra Tip: How to Prevent Accidental Subscriptions
Stopping subscriptions is great, but preventing them from coming back is even better. Here’s how to avoid unwanted sign-ups in the future:
Be careful when clicking pop-ups – Some ads and messages trick you into subscribing without realizing it.
Check messages from MTN carefully – Sometimes, they send offers that activate services if you reply.
Avoid dialing random shortcodes – Some promotions require you to dial a code that automatically signs you up for a service.
By staying alert, you can keep your airtime safe from sneaky deductions.
Frequently Asked Questions (FAQ)s:
Q: How do I check all my active subscriptions?
Dial *175# and select “My Subscriptions” to see everything you’re currently subscribed to.
Q: What if I still get charged after canceling?
Sometimes, cancellations take a few minutes to process. If you’re still being charged after a few hours, try dialing *175# again to confirm.
Q: Can I stop all subscriptions at once?
Yes! Just select “Unsubscribe All” when managing your subscriptions, and MTN will cancel everything in one go.
Q: Will canceling affect my ability to make calls or browse the internet?
Not at all! Canceling subscriptions only stops paid services you don’t need. Your regular airtime usage for calls and data remains the same.
No more frustrating airtime losses! Now that you know how to cancel any MTN Ghana subscription in seconds, you’re in control. Just remember the magic code *175# and check your subscriptions regularly to avoid surprises.
Try it now, and enjoy keeping your airtime where it belongs—with you!
So, you’ve heard that MTN Ghana allows people to buy shares, and you’re curious about how to get in on it. Maybe you’re thinking, “Is this really for me? Do I need to be some kind of stock market genius?” The good news is—you don’t! Buying MTN shares is easier than you think, and by the time you finish reading this, you’ll know exactly how to do it.
What Are Shares, and Why Should You Care?
Imagine you and your friends want to start a small business selling snacks. You all contribute money, and each of you owns a piece of the business. That piece? That’s basically what a share is! When you buy MTN Ghana shares, you’re buying a tiny part of the company.
And why is this exciting? Well, if MTN continues to do well, your shares can increase in value. Plus, MTN may give you a little bonus called dividends—extra money just for owning shares! Not a bad deal, right?
MTN Ghana Shares: What You Need to Know
MTN is currently the only telecom company in Ghana offering shares to the public.
The share price changes over time. In 2018, the price started at GHS 0.75 per share. By April 2024, it was GHS 1.56.
You can buy shares through MTN Mobile Money (MoMo) or a licensed brokerage firm.
Two Ways to Buy MTN Shares
MTN has made buying shares super convenient. You can either use your phone with MoMo or go through a brokerage firm. Let’s break both down.
Method 1: Buying MTN Shares via Mobile Money (MoMo)
This is the easiest method, especially if you already use MoMo. Here’s how:
Click on the link, sign up, and select your account type.
Once registered, you can buy shares directly from your MoMo wallet.
Your shares will be stored in your Central Securities Depository (CSD) account with the Ghana Stock Exchange. That’s basically your digital piggy bank for shares!
Method 2: Buying MTN Shares Through a Brokerage Firm
A brokerage firm is like a middleman that helps you buy and sell shares. If you want a more traditional way to invest, this is a solid option.
Here’s how to do it:
Choose a brokerage firm. Some licensed brokers in Ghana include IC Securities, Fidelity Bank, CalBank, and Black Star Brokerage Limited.
Open an account. You’ll need to provide some personal details like your name, address, and a valid ID.
Fund your account. You can transfer money via bank, MoMo, or even a debit/credit card.
Buy your MTN shares. Use the broker’s online platform or speak with them directly to place your order.
Get confirmation. Your broker will send you a confirmation once your shares are successfully purchased.
You earn dividends. Twice a year, MTN gives shareholders a portion of their profits.
Your shares can increase in value over time. If MTN continues to grow, your investment grows too.
Common Questions About Buying MTN Shares
How many MTN shares can I buy?
There’s no limit! You can buy as many as you want, but the minimum is 10 shares.
Does MTN pay dividends?
Yes! Shareholders receive dividends twice a year, depending on how well the company performs.
Can I sell my MTN shares later?
Absolutely! If you ever want to cash out, you can sell your shares through your brokerage firm or the Ghana Stock Exchange.
Should You Invest?
Like any investment, buying shares comes with risks. The stock price can go up or down, so it’s always a good idea to do your research and think about your long-term goals.
But if you’re looking for a straightforward way to start investing, MTN Ghana shares are a great option. Whether you use MoMo for a quick and easy purchase or go through a brokerage firm for a more traditional experience, you’re taking a smart step towards growing your money.
So, are you ready to become a shareholder? Give it a shot—your future self might thank you!
Imagine never having to fumble with tiny SIM cards again. No more searching for a paperclip to pop out your SIM tray. No more worrying about losing or damaging your SIM card. Sounds good, right? That’s exactly what MTN eSIM offers—a completely digital way to stay connected. If you’re curious about how to get started, don’t worry. I’ve got you covered with this step-by-step guide, explained in a way that makes sense.
What Exactly Is an MTN eSIM? (And Why Should You Care?)
An eSIM (embedded SIM) is like an invisible SIM card built into your phone. Instead of a physical chip, your device uses a digital profile to connect to MTN’s network. That means no more swapping SIM cards when you travel, and you can even have multiple numbers on one phone—perfect for separating work and personal calls.
Now, you might be wondering: Do I really need this? Well, if you love convenience, flexibility, and a clutter-free experience, then yes, an eSIM is for you.
Step 1: Check If Your Phone Supports eSIM
Before anything else, let’s see if your phone is eSIM-ready. Here’s how:
Dial #06# on your phone.
If you see a 32-digit EID number, congratulations! Your phone is compatible.
If you don’t see an EID, your phone doesn’t support eSIM. (Time for an upgrade? Maybe!)
For iPhone users, another way to check is to go to Settings > Cellular > Add eSIM. If you see that option, you’re good to go. Android users can check under Settings > About Phone > SIM Status for a similar option.
Step 2: Gather What You Need
Before you start the application process, make sure you have:
MTN will send you a 6-digit code. Enter it to verify your identity.
Fill out the eSIM Request form and hit submit.
MTN will confirm your request via SMS. Processing takes up to 72 hours, so keep an eye on your messages.
Option 2: Apply via the MTN eSIM Portal
If you don’t have the MyMTN App, no worries! Here’s how to apply online:
Visit the MTN eSIM Request Portal.
Enter your MTN mobile number and click Request OTP.
Enter the 6-digit OTP sent to your phone to verify your identity.
Complete the eSIM Request form and submit it.
Just like with the app method, MTN will process your request within 72 hours.
Step 4: Activating Your MTN eSIM
Once MTN approves your request, they’ll send you an email with two important things:
A step-by-step installation guide (super helpful)
A QR code (this is how you activate your eSIM)
Here’s what you do:
Open your phone’s Settings.
Select Cellular (iOS) or SIM Manager (Android).
Choose Add eSIM and scan the QR code from MTN’s email.
Once scanned, reply “Done Scanning” to the email, and MTN will finalize the activation.
And just like that, your eSIM is up and running!
Why You Might Love an MTN eSIM
Still on the fence? Here are some cool benefits of using an MTN eSIM:
Convenience
No more swapping SIM cards or visiting stores to get a new one. Everything is digital and hassle-free.
Enhanced Security
Since the eSIM is built into your phone, it can’t be removed or stolen like a physical SIM. If your phone gets lost, you can simply deactivate the eSIM remotely.
Multiple Profiles
Want to keep your work and personal numbers separate? No problem! eSIMs let you have multiple numbers on one device.
Works on Smart Devices
Use your eSIM not just on your phone, but also on compatible tablets and smartwatches.
Any Downsides?
Nothing is perfect, right? Here are a couple of things to consider:
Not all phones support eSIM yet. If your device isn’t compatible, you’ll need a traditional SIM.
If you switch phones often, transferring an eSIM isn’t as simple as swapping a physical SIM. You may need to visit an MTN service center for help.
Bonus: Free Data for New eSIM Users!
Good news—MTN rewards new eSIM subscribers with 10GB of free data. That’s a nice little bonus just for making the switch!
How Much Does It Cost?
Absolutely nothing! Applying for and activating your MTN eSIM is completely free for all MTN subscribers.
Ready to Switch?
If you’re tired of dealing with physical SIM cards and want a smoother, more flexible mobile experience, now’s the time to make the switch. Just follow the steps in this guide, and you’ll be enjoying the benefits of eSIM in no time.
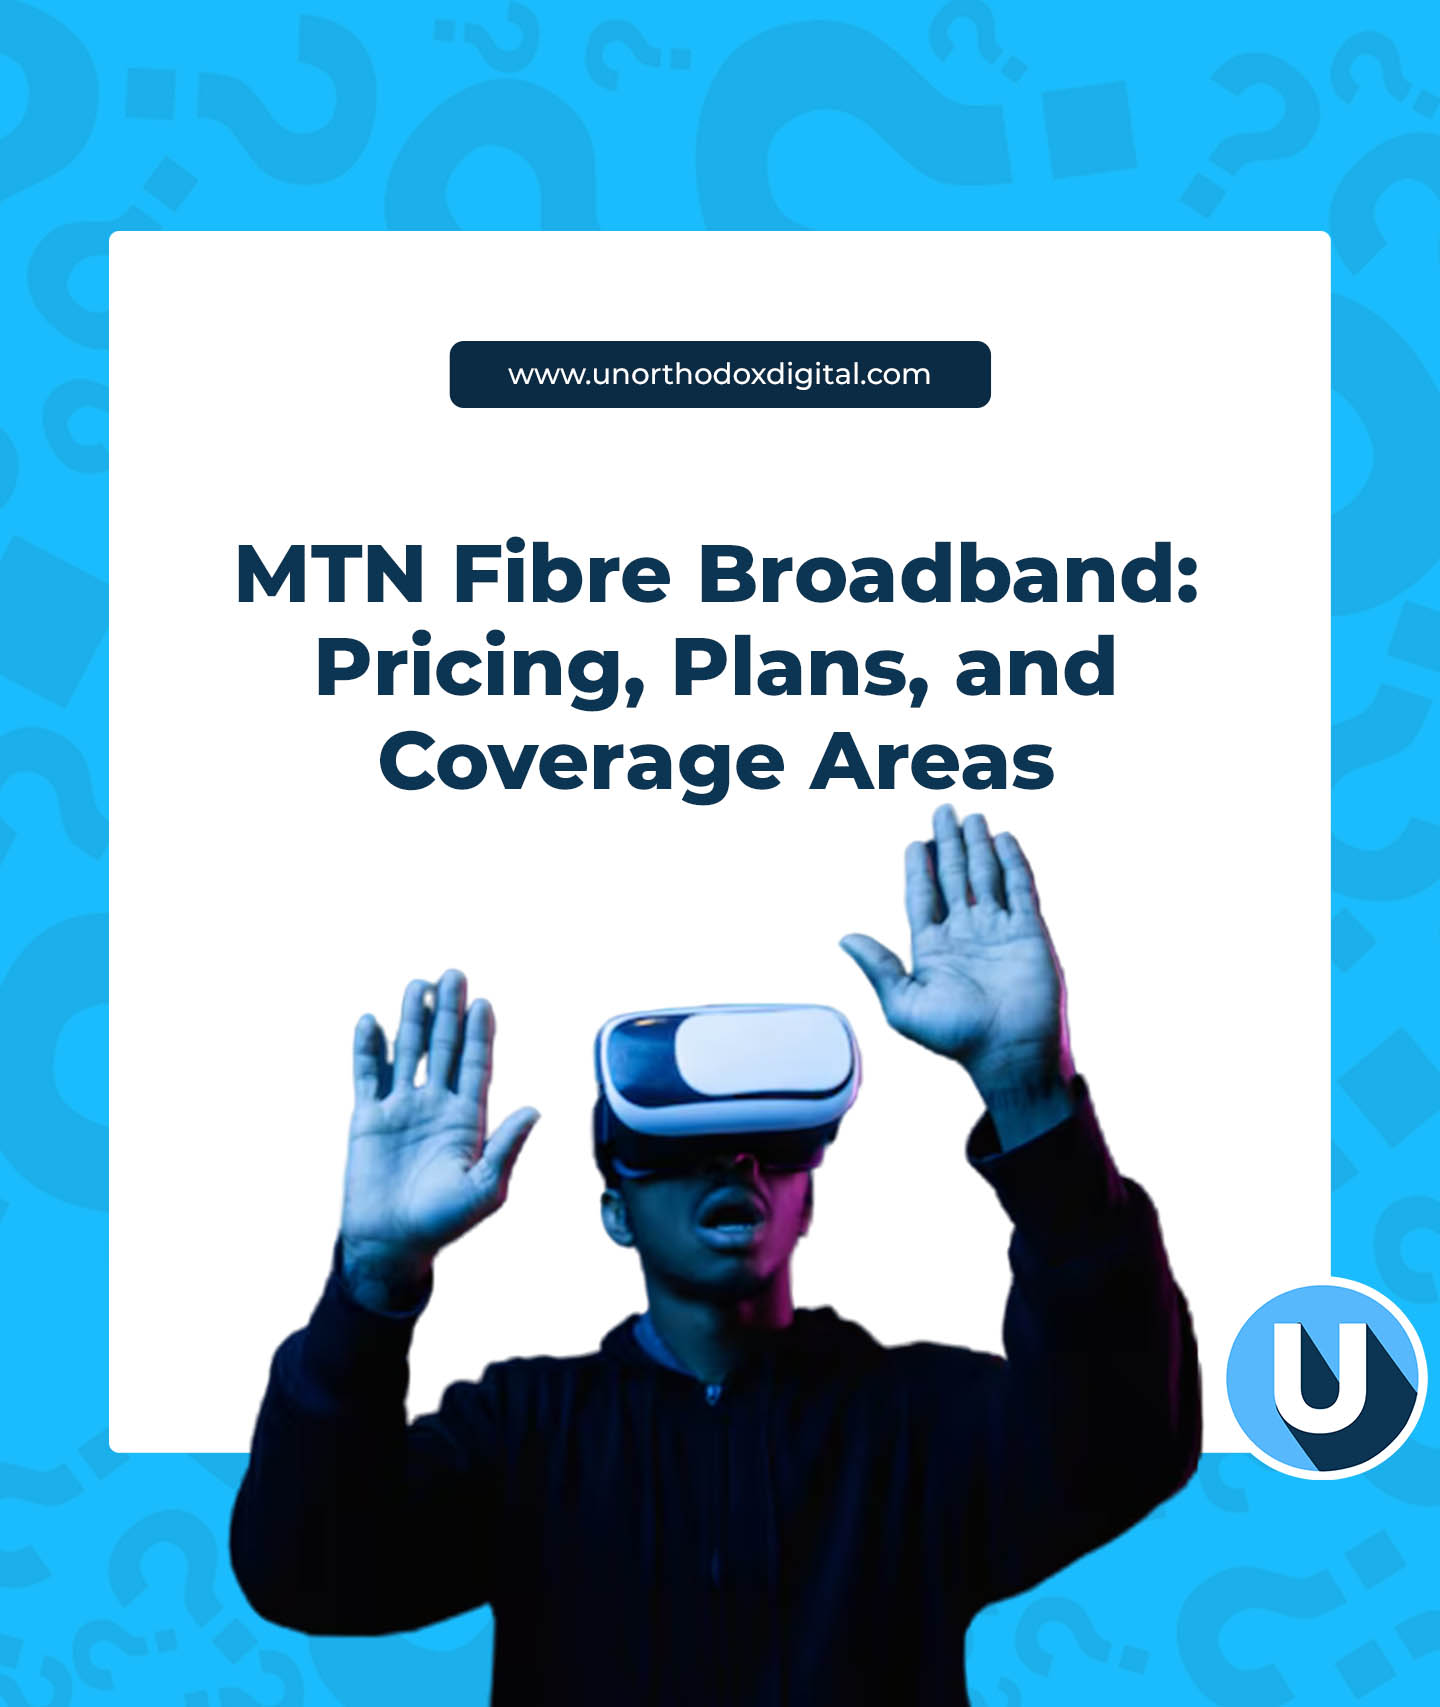
Imagine never having to worry about running out of data. No more surprise messages saying, “You have 10MB left!” or scrambling to buy a new bundle in the middle of an important Zoom call or Netflix binge. Sounds like a dream, right? Well, if you’re an MTN user, you might just be in luck! MTN offers an unlimited data plan—but it’s not as straightforward as you might think. Let’s break it all down in the simplest way possible.
What Is MTN’s Unlimited Data Plan?
MTN’s unlimited data plan is exactly what it sounds like: a plan that gives you internet access without any data caps for a whole month. However, before you get too excited, there’s one important catch—you can only get it through MTN Fibre Broadband. That means it’s not available for regular prepaid or pay-as-you-go users. Instead, it’s meant for people who have installed MTN’s Fibre Broadband at home or work.
Why Would You Want Unlimited Data?
Think about how much data you use in a month. Between YouTube videos, Instagram scrolling, work meetings, and downloading your favorite shows, it adds up quickly. Instead of buying multiple data bundles and running out at the worst times, an unlimited plan gives you peace of mind. No limits, no surprises—just endless browsing, streaming, and downloading.
How to Get MTN’s Unlimited Data Plan
Alright, so you’re interested. How do you actually get this magical, never-ending data? Here’s the step-by-step process:
Step 1: Get MTN Fibre Broadband Installed
First things first, you must have MTN Fibre Broadband. If you don’t already have it, you’ll need to check if MTN offers Fibre Broadband in your area and get it installed at your home or workplace. You can visit an MTN office or check their website to apply.
Step 2: Choose How You Want to Buy the Plan
Once you have Fibre Broadband set up, you can purchase an unlimited data plan in three ways:
Yes, the plan lasts 30 days. You’ll need to renew it every month.
3. Can I Get Unlimited Data on My Phone?
No, this plan is only for MTN Fibre Broadband users. If you’re using a regular prepaid or pay-as-you-go plan, this won’t work.
4. How Do I Pay for MTN Unlimited Data?
You can pay through:
The myMTN App
MTN Mobile Money (MoMo)
USSD code *5057#
If you’re tired of running out of data and want a hassle-free, unlimited internet experience, MTN’s unlimited Fibre Broadband plan is a solid choice. Just make sure you have Fibre Broadband installed first. Once you do, buying unlimited data is as easy as dialing a code or using the myMTN app.
So, what are you waiting for? If MTN Fibre is available in your area, unlock unlimited data today and browse without limits!
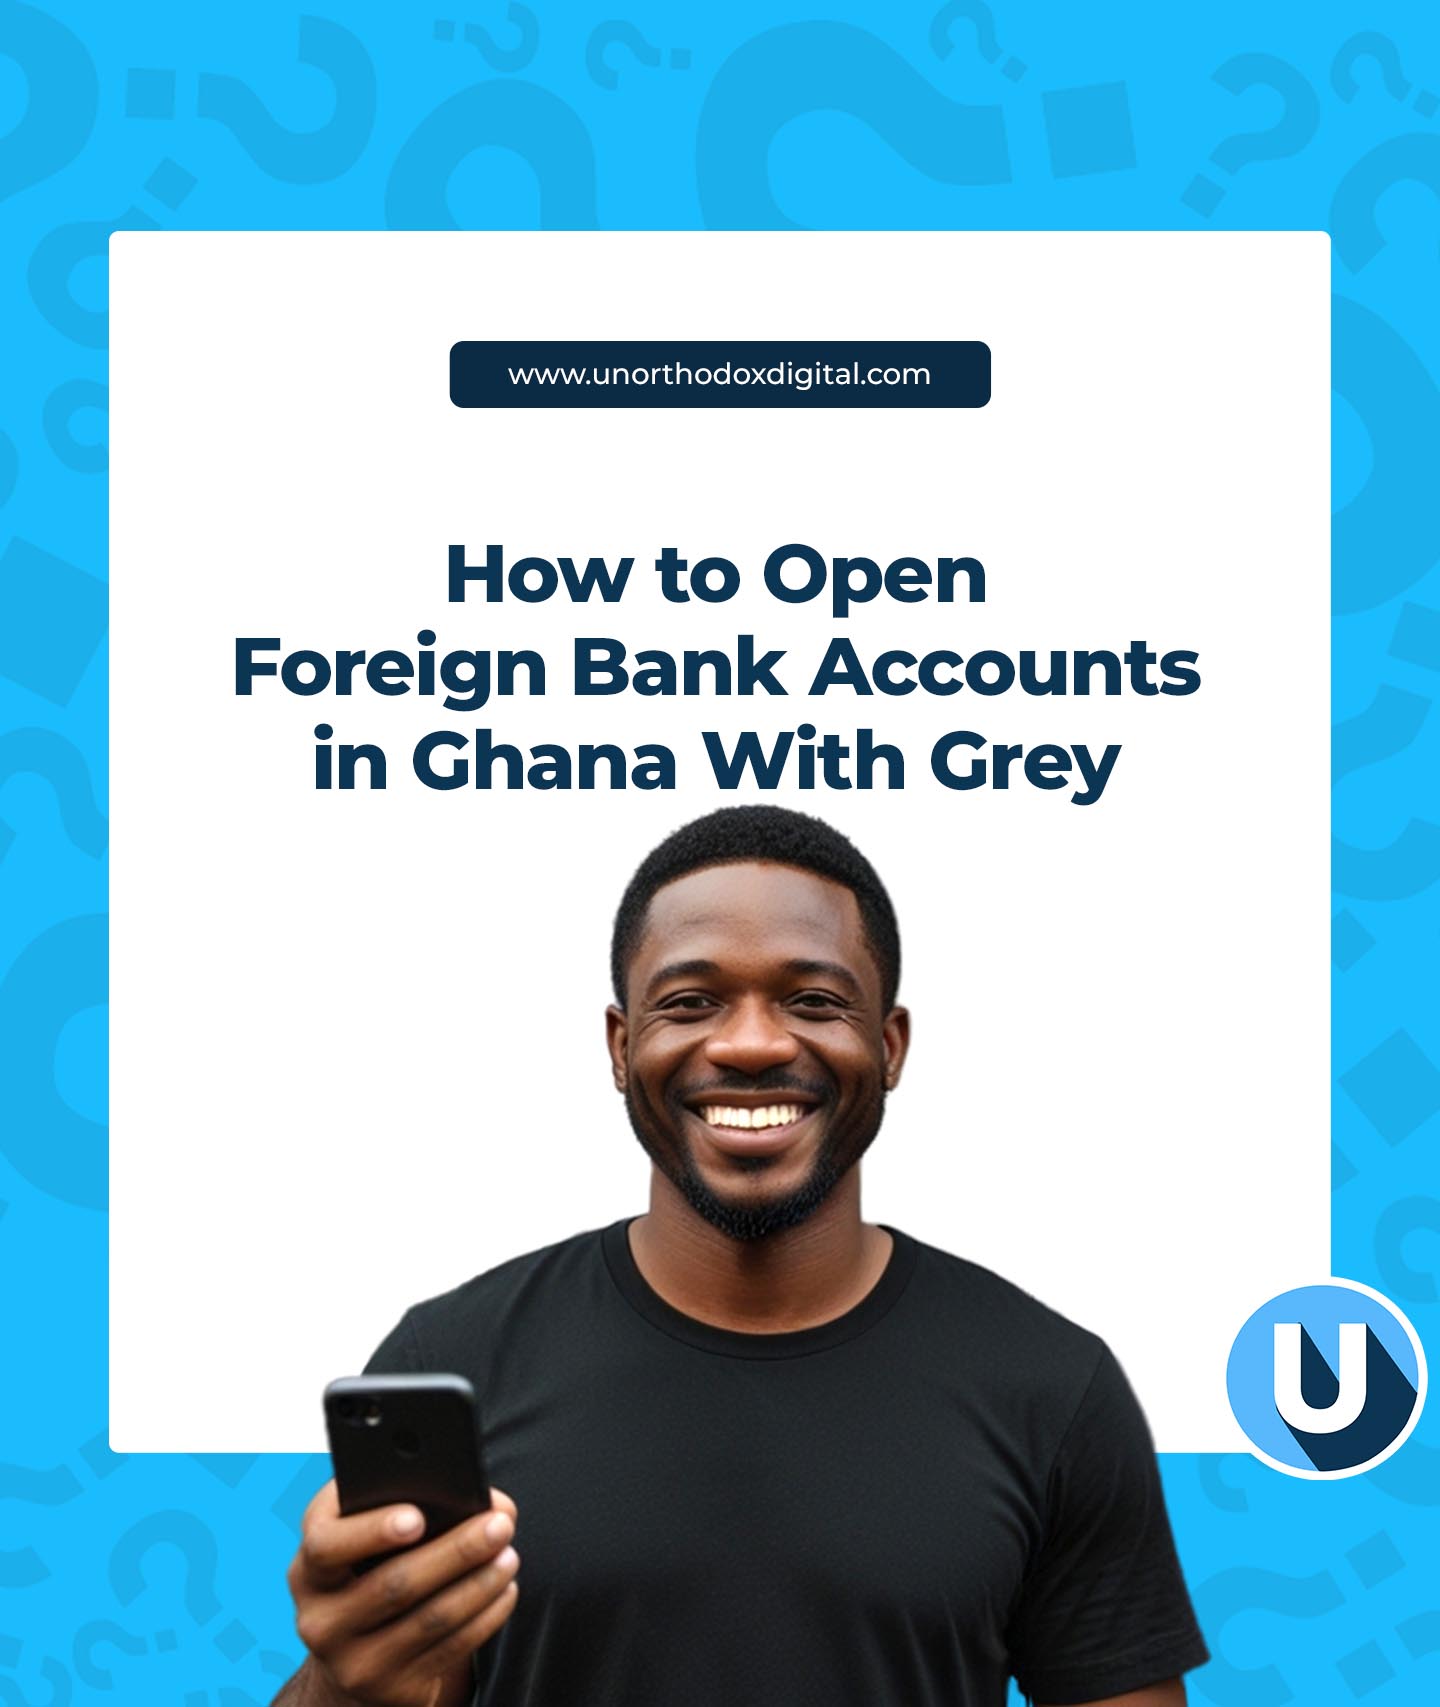
Need an Easy Way to Receive International Payments?
Imagine you’re a freelancer in South Africa, and a client from the U.S. wants to pay you in dollars. Or maybe you run an online store, and international customers prefer paying in euros or pounds. Normally, you’d deal with slow bank transfers, high fees, and exchange rate confusion. But what if you had a simple way to receive and manage foreign currencies right from South Africa?
That’s where Grey comes in! Grey lets you open a US, UK, or EU foreign bank account from South Africa, making it easy to receive international payments, exchange currencies, and withdraw in South African Rand (ZAR)—all without the usual banking headaches.
Let’s dive into how you can open a Grey foreign account today!
What is Grey, and Why Should You Use It?
Grey is a fintech platform that provides foreign bank accounts without the hassle of traditional banks. With Grey, you can open a USD, GBP, or EUR account in minutes—no need to travel or deal with complicated paperwork.
Here’s what you can do with a Grey foreign account:
Receive money from international clients easily
Convert foreign currency to ZAR at competitive rates
Withdraw to your local South African bank account instantly
Use virtual cards for online payments in different currencies
Basically, it’s like having a bank account in the U.S., U.K., or Europe—without leaving South Africa!
Why Open a Foreign Bank Account With Grey?
Grey makes international banking simple, fast, and affordable. Here’s why South Africans are using Grey:
Get paid like a local in multiple currencies – Receive payments in USD, GBP, or EUR directly into your foreign bank account.
Instant withdrawals to South African Rand (ZAR) – No more long wait times to access your funds.
No hidden fees – Traditional banks charge unnecessary fees, but Grey is transparent and cost-effective.
Virtual cards for international payments – Need to pay for global services like Netflix, Amazon, or Spotify? Grey makes it easy.
Perfect for freelancers, remote workers, and businesses – If you earn or spend in foreign currencies, Grey helps you save time and money.
How to Open a Foreign Bank Account in South Africa With Grey (3 Simple Steps!)
Unlike traditional banks that require tons of paperwork, Grey’s process is fully online and takes just a few minutes. Here’s how to get started:
Step 1: Sign Up on Grey
Visit Grey’s website or download the Grey mobile app. Create an account using your name, email, and phone number—it’s just like signing up for any other online service.
Step 2: Complete KYC Verification
To keep everything secure, Grey requires a quick verification process. You’ll need to:
Upload a government-issued ID (South African ID, Passport, or Driver’s License)
Take a quick selfie for identity verification
Provide proof of address (like a bank statement or utility bill)
This process ensures that your account is secure and compliant with regulations.
Step 3: Get Your Foreign Bank Account
Once verified, Grey provides you with a foreign bank account (USD, GBP, or EUR), and you’re good to go! Now, you can send and receive international payments like a pro.
How to Use Your Grey Foreign Bank Account
Now that you have your foreign account, here’s how to make the most of it:
1. Receive Payments From Anywhere
Freelancers, remote workers, and businesses can share their Grey account details with international clients and get paid seamlessly.
2. Convert and Withdraw Money Easily
Got paid $500 in your Grey USD account? Convert it to ZAR at competitive exchange rates and withdraw it instantly to your local South African bank account.
3. Make International Payments
Need to buy software, subscribe to services, or shop online? Use Grey’s virtual cards to make payments in foreign currencies without restrictions.
Frequently Asked Questions About Grey
1. Is Grey a Bank?
No, Grey is a fintech platform that partners with licensed financial institutions to provide foreign bank accounts and payment services.
2. Is Grey Safe?
Yes! Grey uses encryption, identity verification, and other security measures to protect your money and personal data.
3. How Long Does It Take to Open an Account?
Signing up takes just a few minutes, and KYC verification is usually completed within a few hours.
4. Are There Any Hidden Fees?
Nope! Grey is transparent with its fees, and you’ll always see the exchange rates before making a conversion.
Why You Should Open a Grey Foreign Account Today
If you earn or spend money in multiple currencies, Grey is the easiest way to manage international transactions from South Africa.
No paperwork. No hidden fees. Works anywhere in South Africa. Instant withdrawals.
Ready to simplify your international banking? Sign up on Grey today and start managing your foreign payments effortlessly!
Gift cards are like magic keys to your favorite stores. Imagine getting a card that lets you buy exactly what you want—no more pretending to love a gift that’s not really your style! In Brazil, just like in many other countries, gift cards have become a popular way to shop, save, and even give meaningful presents. Whether it’s for gaming, music, movies, or shopping, there’s a perfect gift card for everyone.
Let’s dive into the top five gift cards in Brazil, how they work, and why they’re such a great choice.
1. Brazil Google Play Card
If you’ve ever used an Android phone, you know the Google Play Store is where you find all the best apps, games, movies, and books. A Brazil Google Play gift card lets you load up your account and grab whatever you want without needing a credit card.
How It Works:
Buy a Google Play gift card online or at a store.
Scratch the back to reveal a code.
Enter the code in the Google Play Store, and the money gets added to your account.
Why People Love It:
No need to link a credit card—just use the gift card balance.
Perfect for buying apps, games, and in-game purchases.
Works great as a gift for Android users who love digital content.
2. Brazil Amazon Gift Card
Amazon is like a giant shopping mall where you can buy almost anything. With a Brazil Amazon gift card, you can shop for clothes, electronics, books, and even groceries—all from your phone or computer.
How It Works:
Purchase an Amazon gift card online or at select stores.
Enter the code when checking out on Amazon.
The amount gets added to your account, and you can start shopping.
Why People Love It:
Great for buying just about anything.
No need to enter credit card details.
Makes an easy and thoughtful gift.
3. Brazil Netflix Gift Card
Love watching movies and TV shows? A Brazil Netflix gift card lets you stream your favorite shows without worrying about monthly subscriptions.
How It Works:
Buy a Netflix gift card online or at a store.
Enter the code in your Netflix account.
The balance covers your monthly subscription until it runs out.
Works on any device—TVs, phones, tablets, and laptops.
4. Brazil Steam Gift Card
For gamers, Steam is one of the biggest platforms to buy and play video games. A Brazil Steam gift card gives players access to thousands of games, downloadable content, and even in-game purchases.
How It Works:
Buy a Steam gift card from an online store or gaming shop.
Enter the code in your Steam Wallet.
Use the balance to buy games or other digital content.
Why People Love It:
Lets gamers buy the games they actually want.
No need to use a credit card.
Works for in-game purchases and downloadable content.
5. Brazil iTunes Gift Card
If you’re an Apple user, the Brazil iTunes gift card is your gateway to music, movies, apps, and more. It’s like carrying a wallet full of entertainment wherever you go.
How It Works:
Buy an iTunes gift card online or at a store.
Scratch to reveal the code and enter it in the App Store.
The balance is added to your Apple ID for purchases.
Why People Love It:
Great for Apple users who love apps and music.
No need to link a credit card.
Works for subscriptions like Apple Music and iCloud storage.
Tips for Choosing the Right Gift Card
Picking the right gift card is like picking the perfect present. Here are some tips to help you choose wisely:
Think about the person’s interests – If they love gaming, get them a Steam card. If they’re always watching shows, a Netflix card is the way to go.
Check where they like to shop – An Amazon card is great for online shoppers, while a Google Play or iTunes card is best for app lovers.
Make sure they can use it – Some gift cards only work in specific countries, so always double-check before buying.
Gift cards in Brazil make life easier and gifting more fun. Whether it’s for gaming, shopping, or entertainment, there’s a card for everyone. Plus, they take the guesswork out of gift-giving—no more unwanted gifts, just pure convenience and choice. So next time you’re looking for the perfect present (or just want to treat yourself), consider one of these top Brazil gift cards!
If you’re looking for fast and reliable internet in Ghana, you’ve probably come across two major options from MTN: MTN Turbonet and MTN Fibre Broadband. But which one should you go for? Well, it depends on what you need!
Think of it like this: One is like a fast, portable Wi-Fi hotspot (Turbonet), while the other is like a powerful underground internet pipeline connected directly to your home or office (Fibre Broadband). Still confused? Don’t worry! We’ll break it all down in a simple, friendly way so you can make the best choice.
What’s the Difference Between MTN Turbonet and MTN Fibre Broadband?
At their core, both options provide internet, but they work in very different ways:
Feature
MTN Turbonet
MTN Fibre Broadband
How it Works
Uses a 4G or 5G router to connect wirelessly
Uses underground fibre optic cables
Portability
Portable – you can take it anywhere with MTN coverage
Fixed – installed in one location
Speed
Up to 150Mbps (depends on 4G/5G signal strength)
Up to 60Mbps (but more stable)
Price
GH₵1,500 – GH₵2,500 (router cost)
GH₵150 (installation fee)
Best For
People who move around or don’t have fibre access
Homes and offices that need stable internet
Now, let’s dive deeper into each category so you can decide which one is best for you.
Speed & Reliability: Which One is Faster?
If all you care about is speed, Turbonet seems like the winner with its potential to hit 150Mbps. But here’s the catch:
MTN Turbonet speeds depend on your location. If you’re in an area with weak 4G or 5G coverage, you might get speeds as low as 30Mbps.
MTN Fibre Broadband has lower max speeds (60Mbps), but it’s stable. Because fibre cables are not affected by things like bad weather or network congestion, you’ll get consistent speeds no matter what.
So, if you live in a place with strong 4G/5G signals, Turbonet can be super fast. But if you prefer a steady, no-surprises connection, Fibre Broadband is the way to go.
Portability: Can You Take It Anywhere?
This one is easy!
MTN Turbonet is portable. It’s like a Wi-Fi box that you can move around, as long as you stay within MTN’s network.
MTN Fibre Broadband is fixed. Once installed, it stays in one place—just like your water or electricity connection.
If you need internet in different locations (e.g., home and office), Turbonet is your best bet.
Cost: Which One is More Affordable?
Let’s talk money.
MTN Turbonet costs between GH₵1,500 and GH₵2,500 (depending on the model you choose). You only pay this once, but then you’ll need to buy data regularly.
MTN Fibre Broadband has a low installation fee of GH₵150. After that, you just pay for your data, which is generally cheaper per GB than Turbonet.
If you don’t want to spend too much upfront, Fibre Broadband is more affordable. But if you want flexibility, Turbonet is worth the higher initial cost.
Data Packages: Which One Gives You More for Less?
Let’s compare the data plans:
Price (GHS)
MTN Turbonet (GB)
MTN Fibre Broadband (GB)
25
2.41GB
4.17GB
87
8.69GB
14.54GB
253
91.82GB
158.02GB
516
350.54GB
522.74GB
Fibre Broadband clearly gives you more data for your money. It also has unlimited data plans, which Turbonet doesn’t offer. So, if you download a lot of movies, work from home, or run a business, Fibre Broadband is the better deal.
Power Supply: Will It Work During a Blackout?
Ghana’s power supply can be unpredictable, so what happens when the lights go out?
MTN Turbonet comes with a backup battery that lasts about 10-12 hours.
MTN Fibre Broadband needs a direct power source—so when there’s no electricity, there’s no internet.
If power cuts are common in your area and you need internet at all times, Turbonet is the safer option.
Which One Should You Choose?
Still unsure? Here’s a simple way to decide:
Choose MTN Turbonet if:
You move around a lot or need internet in multiple places.
You live in an area with strong 4G/5G coverage.
You want a backup internet option in case of power outages.
Choose MTN Fibre Broadband if:
You need a stable, reliable connection with unlimited data options.
You don’t plan on moving the connection around.
You want cheaper data packages in the long run.
FAQs
1. Can I use MTN Turbonet anywhere in Ghana?
Yes! As long as you are within MTN’s 4G/5G coverage area, Turbonet will work.
2. How do I check if MTN Fibre Broadband is available in my area?
You can check on the MTN Ghana website or visit an MTN store near you.
3. Can I use normal MTN data bundles on Turbonet?
No, Turbonet requires special Turbonet data bundles.
4. What happens if I move houses with Fibre Broadband?
Since Fibre Broadband is fixed, you’ll need to check if your new home has fibre coverage. If not, you might have to switch to Turbonet or a different internet service provider.
At the end of the day, both MTN Turbonet and MTN Fibre Broadband are great internet options—it just depends on what you need.
If you want portability and potential high speeds, go for Turbonet.
If you want stable, reliable internet with cheaper data, pick Fibre Broadband.
Imagine never worrying about airtime while chatting with your best friend or catching up with family. Sounds great, right? Well, if you’re using MTN Ghana, you can actually make free calls—yes, free! No tricks, no complicated hacks, just legit offers from MTN that let you talk without constantly reloading airtime.
In this guide, I’ll walk you through exactly how to enjoy these free call offers in the simplest way possible. Whether you’re new to MTN or a longtime user, by the end of this article, you’ll know exactly how to call for free, just like a pro.
1. The MTN Free Call Offers
MTN Ghana offers two main ways to make free calls:
Magic Number (Akwaaba Offer) – Perfect for new SIM users, letting you call one special MTN number for free.
Free After One (Nkomode Offer) – Lets you talk for free to any local network after paying for just the first minute.
Both of these are straightforward to activate and can save you a lot of airtime. Let’s break them down.
2. Magic Number: Unlimited Free Calls to One Person
This offer is like having a ‘best friend’ number that you can call as much as you want—without paying a pesewa! But, there’s a small catch:
The free calls last for six months after activating your SIM.
You can only pick one MTN number to call for free.
How to Activate the Magic Number Offer:
Dial *550# on your MTN number.
Select option 8 (More options).
Choose option 1 for “Magic Number.”
Select MTN Free Call Offer.
Enter the MTN number you want to call for free.
Done! You can now call this number free for six months.
Example: Let’s say you just bought a new MTN SIM and activated it today. You can add your mom’s MTN number as your Magic Number, and for the next six months, you can call her anytime without spending a cedi!
3. Free After One (Nkomode): Pay for a Minute, Talk for Longer
This is a fantastic option for everyone—not just new users. It works like this:
You pay for the first minute of your call.
After that, you get extra free minutes to continue talking.
You also receive free mobile data to browse the internet.
There are two versions of this offer:
Free After 1 (FA1) – After paying for the first minute, you get 10 free minutes on that call + 70MB of data (valid for one day).
Free After 1 Extra (FA1 Extra) – You pay for the first minute after every 10 minutes, and in return, you get 60 extra free minutes + 70MB of data (valid for one day).
How to Activate Free After One (Nkomode):
Dial *550# on your MTN number.
Select Free After One.
Choose your preferred package (FA1 or FA1 Extra).
Confirm by selecting Activate.
You’ll receive a confirmation message, and the charge for the first minute will be deducted from your airtime.
Example: Imagine you’re calling your friend to catch up. You pay for the first minute, and suddenly, you get an extra 10 minutes for free. That means more time to chat without worrying about your balance running out.
4. Do These Free Call Offers Expire?
Magic Number: Yes, it expires six months after you activate your new SIM.
Free After One: No, this does not expire! You can keep using it as long as you stay subscribed to the package.
This means if you’re a new MTN user, you can enjoy Magic Number for six months and also use Free After One for as long as you want.
Imagine you’re standing in line at a shop, waiting to send money to a friend. You glance at your watch—this queue is taking forever. Now, imagine if you were the one running a MoMo business, making it super easy for people to send and receive money while earning a steady income yourself. Sounds good, right?
If you’re curious about how to start an MTN Mobile Money (MoMo) agent business in Ghana, you’re in the right place. Let’s break it down step by step in a way that makes sense.
What is an MTN MoMo Agent?
An MTN MoMo agent is someone who helps customers deposit and withdraw money using MTN’s mobile money service. Think of it as running a mini-bank—people come to you to send cash, receive payments, and sometimes even pay bills. In return, you earn a commission for every transaction.
What You Need to Become a MoMo Agent
Before you get started, there are some basic requirements. Here’s what you’ll need:
1. A Registered Business
MTN doesn’t just hand out MoMo agent SIMs to anyone. You need to have a registered business. This means having a business certificate or permit from the Registrar General’s Department or your local municipal office.
Tip: If you’re just starting and don’t have a certificate, you can use a business constitution or write an application letter to MTN.
2. A Valid Ghana Card
This is the official national ID, and you’ll need it to prove you own the business.
3. A Physical Location
You need a proper structure for your MoMo business. This could be a shop, a kiosk, or a MoMo booth. MTN will inspect your location, so make sure it looks professional and secure.
4. Startup Capital
While registering as a MoMo agent is free, you’ll need at least GHS 4,000 as working capital. This ensures you have enough money to handle transactions.
How to Register as an MTN MoMo Agent
There are three main ways to register:
1. USSD Registration (Quickest Option)
Want a simple way to start? Just grab your phone and follow these steps:
Dial *5051#
Select “Register”
Choose your region
MTN will send you an SMS with a reference number
Within 72 hours, an MTN agent will contact you for the next steps, including an inspection of your business location
Click Sign Up, enter your phone number, and verify with an OTP code
Create a username and password
Choose a security question for account recovery
Log in and navigate to “Request SIM”
Select Merchant (MoMo Pay) and complete the form
MTN will review your request, schedule an online training session, and later invite you to their office to collect your agent SIM.
3. Register at an MTN Office
If you prefer face-to-face assistance, visit an MTN branch with your documents. You’ll need to fill out three forms:
Merchant/Agent Form – Business details (name, registration number, etc.)
Account Handler Form – Personal details (name, date of birth, etc.)
Merchant/Agent Agreement – Terms of your partnership with MTN
Once processed, you’ll receive your MoMo agent SIM and be ready to start your business!
Best Locations for a MoMo Business
Where you set up your MoMo business can make or break its success. Here’s what to look for:
Busy areas: Markets, bus stations, and shopping centers attract lots of customers.
Less competition: Avoid areas overcrowded with MoMo agents. MTN requires at least a 50-100 meter distance between agents.
Visibility & accessibility: Set up in an easy-to-spot location with good foot traffic.
Security: Choose well-lit, safe areas with nearby security services.
Complementary businesses: Positioning your MoMo booth near grocery stores, prepaid electricity centers, or eateries can bring in more customers.
Challenges MoMo Agents Face
Starting a MoMo business is great, but it’s not always smooth sailing. Here are some common challenges and how to handle them:
Fraud & Scams – Fraudsters may pose as MTN officials. Always verify before making transactions or sharing information.
Network Issues – Sometimes, transactions get delayed due to system downtimes. Keep customers informed and have a backup plan.
Cash Flow Problems – If you don’t have enough money (either cash or electronic), you might struggle to serve customers. Plan your liquidity wisely.
How Much Do MoMo Agents Earn?
MTN pays MoMo agents based on transactions. Here’s a breakdown:
Cash-Out Commissions:
Below GHS 50 → GHS 0.20 per transaction
GHS 50 – GHS 2,000 → 0.4% of the transaction amount
GHS 2,000 and above → GHS 8 per transaction
Example: If you process GHS 1,000 in cash-out transactions daily, that’s GHS 4 per day or GHS 120 per month—just from one type of transaction!
Frequently Asked Questions (FAQs)
1. Who can become an MTN MoMo agent?
Anyone with a registered business, a Ghana Card, and a proper location can apply.
2. How long does it take to get an agent SIM?
Usually 15 to 20 working days, depending on how quickly you meet the requirements.
3. Is MoMo agent registration free?
Yes, but you’ll need at least GHS 4,000 as startup capital.
4. Can I run a MoMo business from home?
No, MTN requires agents to have a physical location like a shop or booth.
Starting an MTN MoMo agent business in Ghana is a great way to earn money while providing an essential service to your community. If you follow the steps above, get the right documents, and choose a good location, you’ll be on your way to success.
Fincra, a leading B2B payment infrastructure provider, has appointed Emmanuel Babalola as its new Chief Commercial and Growth Officer. This move comes as the company refines its strategy to scale cross-border transactions and expand its reach.
Babalola brings a wealth of experience in fintech and crypto. He previously served as CEO of Bundle, a social payments app for cash and cryptocurrency, before it pivoted in July 2023 to focus solely on its peer-to-peer platform, Cashlink. Before that, he was the Director for Africa at Binance, the world’s largest cryptocurrency exchange.
Fincra CEO Wole Ayodele expressed confidence in Babalola’s ability to drive the company forward. “His track record of scaling platforms, driving innovation, and advocating for financial inclusion aligns perfectly with our mission to build seamless payment rails for Africa. His leadership will be instrumental as we continue to push boundaries and redefine payments across the continent.”
Founded in 2021, Fincra provides APIs that help fintechs develop and scale payment solutions. Since 2023, the company has processed over $10 billion in transactions and serves clients such as Lemfi, OneLiquidity, and Cleva. It also offers an API designed to help Nigerian businesses collect local payments through bank transfers and card transactions. Operating in multiple regions—including Ghana, South Africa, Kenya, Uganda, the UK, Europe, and North America—Fincra is now eyeing expansion into Francophone Africa.
Babalola sees his new role as an opportunity to further his mission of financial empowerment. “Africa’s financial ecosystem is evolving rapidly, and Fincra is at the forefront of building the payment infrastructure powering the next generation of businesses and entrepreneurs. My mission has always been to enable freedom and prosperity for Africa through technology, and joining Fincra is an exciting opportunity to amplify this vision.”
With this leadership addition, Fincra is positioning itself to accelerate growth and innovation in Africa’s digital payment space.
Raenest, a Nigerian fintech specializing in cross-border payments, has secured $11 million in a Series A funding round, bringing its total funding to $14.3 million. The investment will support its expansion into new markets and the introduction of additional financial tools.
The round was led by QED Investors, with backing from Norrsken22, Ventures Platform, P1 Ventures, and Seedstars. This follows Raenest’s earlier funding rounds, including a $700,000 pre-seed round in 2022 and a $2.6 million seed round in 2023.
Expansion Plans and New Features
With operations in Kenya, Ghana, Tanzania, and Uganda, Raenest is now eyeing launches in Egypt and the U.S. The company also plans to roll out new offerings such as expense management, savings, and investment tools to enhance its multi-currency payment solutions.
This investment reflects the growing confidence in African fintech startups. In January 2025 alone, African startups secured $289 million in funding—a staggering 240% increase from the previous year. Notable fintech investments include Moniepoint’s $10 million from Visa and LemFi’s $53 million round.
From Employer of Record to Fintech Powerhouse
Since its launch in 2022, Raenest has transitioned from an Employer of Record (EOR) to a full-fledged fintech platform. It helps freelancers and businesses receive international payments, convert currencies, and manage multi-currency wallets. Users can open global bank accounts, access physical and virtual dollar cards, and transact in USD, EUR, and GBP.
Through its consumer-focused product, Geegpay, Raenest enables freelancers, content creators, and solopreneurs to receive payments from platforms like Upwork, Fiverr, and Gusto. The company reports serving over 700,000 users and processing more than $1 billion in transactions.
Africa’s gig economy is expanding at an annual rate of 20%, yet freelancers and businesses continue to face challenges with cross-border payments. Investors see Raenest as a key player in bridging this gap.
“Africa’s gig economy is growing at an impressive 20% year-on-year, yet cross-border payment challenges persist for workers and businesses alike. Our investment in Raenest reflects our belief that they are unlocking new opportunities by transforming how Africa’s global workforce connects to the world economy,” said Lexi Novitske, General Partner of Norrsken22.
Business Banking and Competitive Edge
In March 2024, Raenest launched its business banking service, quickly positioning itself as a go-to alternative for African startups that lost access to Mercury, a U.S.-based banking provider. According to CEO Alade, the company is profitable and serves around 300 businesses, including Moniepoint, Helium Health, Fez Delivery, and Matta. Since its launch, Raenest’s business banking arm has processed over $100 million in transactions.
Raenest operates in an increasingly competitive cross-border payment space, facing off against Cleva, Grey, and LemFi. However, its ability to serve both businesses and individuals gives it a unique position in the market. While its primary focus has been on Africans living within the continent, Raenest is now looking to extend its reach to Africans in the diaspora as well.
“The mission is to become a trusted financial platform that makes it easier for people to manage their funds globally,” Alade said.
With its latest funding, Raenest is poised to scale further, reinforcing its role in Africa’s evolving digital payments landscape.
Ever been stuck without data, trying to check your airtime, or needing to buy a bundle ASAP? That’s where USSD codes come in—they’re like secret cheat codes for your phone that let you get things done in seconds, no app or internet needed!
USSD (Unstructured Supplementary Service Data) might sound fancy, but it’s really just a simple way to talk to your mobile network using short number combos with * and #. Need to check your balance? There’s a code for that. Want to send a “Please Call Me” when you’re out of airtime? Yep, there’s a code for that too.
Even with mobile apps and online banking making recharges easier, USSD codes are still a lifesaver—especially when your internet is down or you’re in a hurry. Whether you’re on Vodacom, MTN, Telkom, or Cell C, knowing the right codes can save you time, money, and stress.
Below, we’ve gathered the must-know USSD codes for South Africa’s biggest mobile networks, so you’ll always be in control of your airtime, data, and more!
MTN South Africa USSD Codes (Short Codes)
MTN South Africa USSD Codes
Description
*136#
Airtime balance summary
*136*0#
Master USSD Menu
*135*5#
Check WASP subscriptions
*#06#
View your device IMEI
*123*888#
View your MSISDN
*121*number#
Please Call Me
*136*1#
Detailed balances
*136*2#
Buy data, voice, or SMS bundles
*136*3#
Buy or send airtime to another user
*136*4#
Change Tariff
*136*5#
Check your account details
*136*10#
Recharge balance with bank card
*135#
International roaming, voicemail, SIM swap, RICA SIM card
*141*voucher number*cellphone number to be charged
Investing is like planting a tree. You put money in, take care of it, and over time, it grows into something valuable. But just like you wouldn’t plant a tree without checking if the soil is good, you shouldn’t invest without choosing the right platform.
Nigeria has many investment apps promising great returns, but how do you know which ones you can trust? Don’t worry—I’ve got you covered. In this guide, I’ll break down the best investment apps in Nigeria, explaining what they do, how they work, and what makes them worth your time. Let’s dive in!
1. Cribstock
Cribstock is changing the way Nigerians invest in real estate. Instead of needing millions to buy a house or apartment, you can invest in property with as little as N10,000. The platform allows users to own shares in rental properties and earn passive income from rent payments. It’s a great option for those looking to grow wealth through real estate without the hassle of buying or managing properties themselves.
2. PiggyVest
Founded by Odunayo Eweniyi, PiggyVest started as a savings platform but now offers investment opportunities through its Investify feature. With as little as N5,000, you can invest in fixed income, agriculture, and transportation sectors and earn up to 25% returns. If you’re also looking for a way to save money effectively, PiggyVest offers an automatic savings plan with interest rates between 5% and 15% per year.
3. Carbon
Formerly known as Paylater, Carbon is a digital bank that also offers great investment options. It provides three investment plans:
Cash Vault: Lock your money away and earn 11% interest.
FlexSave: A flexible plan with up to 9% interest.
Goals Plan: Set daily, weekly, or monthly targets and earn 9.5% interest. If you’re looking for a mix of digital banking and investment, Carbon is a solid choice.
4. Cowrywise
Cowrywise helps users invest in naira and dollar mutual funds. If you don’t want to put all your eggs in one basket, this app allows you to spread your investments across multiple assets. It also offers different savings plans, including emergency funds and halal savings for ethical investors. Plus, there are no minimum withdrawal restrictions.
5. Bamboo
Bamboo gives Nigerians access to over 3,500 local and international stocks. You can invest in the Nigerian Stock Exchange or major U.S. stock markets. The app’s security features ensure that your investments are safe, and you can start with as little as $20.
6. Trove
Trove is another great app for stock investing. With as little as N1,000, you can buy shares in Nigerian, American, and Chinese companies. It also supports investments in bonds, ETFs, and real estate investment trusts (REITs), making it a versatile option for those looking to diversify their portfolio.
7. Risevest
Risevest focuses on dollar-denominated investments, allowing Nigerians to invest in U.S. stocks, real estate, and Eurobonds. The app boasts an average return of 14% on stock investments, although actual returns depend on market performance. With a minimum investment of just $10, it’s a great way to protect your money from naira fluctuations.
8. Chaka
Chaka makes it easy to invest in both local and international stocks. With as little as N1,000 or $10, you can buy shares in major global markets. Whether you’re an individual or a business looking to invest, Chaka provides a secure and regulated platform.
9. I-invest
I-invest is unique because it lets you invest in Treasury bills, Eurobonds, and fixed deposits. If you prefer low-risk investment options, this app is one of the safest choices. It allows users to track their portfolios in real-time and provides a seamless way to manage investments.
10. GetEquity
GetEquity allows Nigerians to invest in early-stage startups, giving them access to potential high-growth companies before they become mainstream. If you’re interested in venture capital but don’t have millions to invest, this app provides an affordable way to get started.
11. Crowdyvest
Crowdyvest connects investors with businesses in sectors like agriculture, real estate, and transportation. It offers two main plans:
Hyperplan: Low-medium risk investment opportunities spread across different asset classes.
Projects: Project-specific investments with competitive returns. With a minimum investment of N20,000, Crowdyvest allows users to make a positive impact while earning profits.
FAQs About Investment Apps in Nigeria
Q: What’s the best investment app for beginners?
If you’re new to investing, PiggyVest and Cowrywise are great starting points because they’re simple and have low minimum investment amounts.
Q: Is it safe to invest through these apps?
Yes, but always do your research. Look for apps registered with Nigeria’s Securities and Exchange Commission (SEC) and ensure they use strong security measures.
Q: How much do I need to start investing?
It depends on the app. Some allow investments as low as N1,000 (Trove, Chaka), while others require at least N5,000 (PiggyVest) or even N20,000 (Crowdyvest).
Investing doesn’t have to be complicated or risky. The key is to start small, choose the right platform, and stay consistent. Whether you’re interested in stocks, real estate, startups, or mutual funds, there’s an app on this list that fits your needs. So, take that first step today—your future self will thank you!
Staying connected through text messages is still important, whether it’s for a quick “Hey, where are you?” or sending reminders to friends and family. If you use AirtelTigo in Ghana and need SMS bundles, you might be wondering how to get one. Well, here’s the thing: AirtelTigo doesn’t offer standalone SMS bundles, but they do have something called the Too Much Pack, which gives you SMS along with voice minutes and data.
So, if you’re looking to buy an SMS bundle, this guide will show you the quick and easy way to do it—step by step, without any confusion. Let’s dive in!
What Is the AirtelTigo Too Much Pack?
Think of the Too Much Pack as a combo deal. Instead of just buying SMS, you get a package of benefits that includes:
International Direct Dialing (IDD) minutes on higher plans
It’s like ordering a meal at a restaurant—you don’t just get rice; you get rice, chicken, and maybe even a drink. More value for your money!
AirtelTigo Too Much Pack Options
Here’s a breakdown of the different Too Much Pack options you can buy:
Price (GHS)
On-net Minutes
SMS (AirtelTigo Only)
Data
Off-net Minutes
IDD Minutes
Expiry (Days)
0.50
185 mins
–
–
–
–
1
1.00
90 mins
100 SMS
15MB
4 mins
–
1
3.50
145 mins
60 SMS
80MB
10 mins
–
7
5.00
925 mins
100 SMS
185MB
15 mins
3 mins
7
10.00
1855 mins
100 SMS
370MB
45 mins
5 mins
30
20.00
2785 mins
100 SMS
695MB
95 mins
10 mins
30
As you can see, the SMS you get depends on the package you choose. The higher the package, the more benefits you get!
How to Buy the AirtelTigo Too Much Pack (Step-by-Step Guide)
You have two easy ways to buy the Too Much Pack: using a shortcode or through the AirtelTigo mobile app. Let’s go through both options.
Method 1: Buying with a USSD Code
This is the quickest way to subscribe—just dial a code and follow the steps. Here’s how:
Dial *111# on your AirtelTigo phone. This brings up the main menu.
Enter 0 to go to the next page.
Select Voice & Combo Bundles from the options.
Choose Too Much Packs from the next menu.
Pick your payment method—either Airtime or AirtelTigo Money (AT Money). If you use AT Money, you get a 5% discount!
Select your validity period (Daily, Weekly, or Monthly).
Choose the Too Much Pack you want based on your budget and needs.
Confirm your purchase (if using AT Money, enter your PIN to complete the payment).
That’s it! You’re all set with your SMS bundle plus extra perks!
Method 2: Buying via the AirtelTigo Mobile App
If you prefer apps over dialing codes, you can also purchase the Too Much Pack through the AirtelTigo app. Here’s how:
Open the AirtelTigo mobile app (download it if you don’t have it yet).
Tap on Products at the bottom left of the homepage.
Choose Voice & Combo Bundles from the menu.
Swipe through the options and select Too Much Packs.
Pick the bundle that suits you best.
Tap Buy Combo and choose to pay with Airtime or AT Money.
Done! You’ve successfully subscribed.
How to Check Your SMS Balance
After purchasing the Too Much Pack, you might want to know how many SMS messages you have left.
To check your SMS balance, dial *504# and wait for a text message showing your remaining SMS, call minutes, and data balance.
FAQs (Frequently Asked Questions)
Can I buy just an SMS bundle on AirtelTigo?
No, AirtelTigo doesn’t sell standalone SMS bundles. The Too Much Pack is your best option for getting SMS, along with call minutes and data.
Does the SMS in the Too Much Pack work for all networks?
No, the SMS in the Too Much Pack can only be used to send messages to other AirtelTigo numbers.
What if I run out of SMS before my bundle expires?
You can buy another Too Much Pack or use regular airtime to send SMS at the standard rate.
How do I access all AirtelTigo services?
Just dial *111#, and you’ll see all the available options, including data bundles, call packages, and more.
The AirtelTigoToo Much Pack is an affordable way to stay connected with text messages, calls, and data—all in one bundle. While you can’t buy SMS separately, this package gives you more value for your money.
So, the next time you need an SMS bundle, just dial *111# or use the AirtelTigo app to grab a Too Much Pack that works for you!
Ever Struggled With Receiving International Payments?
Let’s say you’re a graphic designer in Nigeria, and a client from the U.K. wants to pay you in pounds. Or maybe you sell products online, but your customers prefer paying in dollars or euros. Normally, this means dealing with high transfer fees, slow processing times, or exchange rate headaches. But what if there was a simpler way?
That’s where Grey comes in! Grey lets you open a US, UK, or EU foreign bank account from Nigeria, making it super easy to send and receive international payments, exchange currencies, and withdraw in Naira (NGN) without stress.
Let’s break it down so you can start using Grey today!
What is Grey, and Why Should You Use It?
Grey is a fintech platform that gives you foreign bank accounts without needing to travel. With Grey, you can open a USD, GBP, or EUR account from Nigeria and use it just like a local account in those countries.
This means:
You can receive money from international clients hassle-free
Convert your foreign currency to Naira instantly
Withdraw to your local bank or mobile wallet with no hidden charges
Basically, it’s like having an international bank account—but 100% online and way easier to set up.
Why Open a Foreign Bank Account With Grey?
Here’s why Nigerians are switching to Grey for international banking:
Get paid like a local in multiple currencies – Whether it’s USD, GBP, or EUR, Grey lets you receive payments directly into your foreign bank account.
Instant withdrawals to Naira – No more waiting days to access your money.
No unnecessary fees – Traditional banks charge crazy fees, but Grey keeps it simple and affordable.
Virtual cards for global payments – Shopping online or subscribing to international services? Grey makes it easy.
Perfect for freelancers, remote workers, and businesses – If you earn or spend in foreign currencies, Grey saves you time and money.
How to Open a Foreign Bank Account in Nigeria With Grey (In 3 Easy Steps!)
Unlike traditional banks, which require tons of paperwork, Grey’s process is completely online and takes just a few minutes. Here’s how:
Step 1: Sign Up on Grey
Visit Grey’s website or download the Grey mobile app. Create an account with your name, email, and phone number—it’s just like signing up for any other online service.
Step 2: Complete KYC Verification
To keep everything safe and compliant, Grey needs to verify your identity. You’ll need to:
Upload a government-issued ID (National ID, Passport, or Driver’s License)
Take a quick selfie for identity verification
Provide proof of address (like a bank statement or utility bill)
This process ensures your account is secure and prevents fraud.
Now that you have your foreign account, what can you do with it?
1. Receive Payments From Anywhere
Freelancers, remote workers, and businesses can share their Grey account details with clients and get paid in their preferred currency.
2. Convert and Withdraw Money Easily
Received $500 in your Grey USD account? Convert it to Naira (NGN) at competitive exchange rates and withdraw it instantly to your local bank or mobile money wallet.
3. Make International Payments
Need to pay for Netflix, buy software, or shop online? Use Grey’s virtual cards to make payments in foreign currencies without any restrictions.
Frequently Asked Questions About Grey
1. Is Grey a Bank?
No, Grey is a fintech platform that partners with licensed financial institutions to provide foreign bank accounts and payment services.
2. Is Grey Safe?
Yes! Grey follows strict security measures, including encryption and identity verification, to keep your money and data safe.
3. How Long Does It Take to Open an Account?
Signing up takes a few minutes, and KYC verification usually takes between a few minutes to a few hours.
4. Are There Any Hidden Fees?
Nope! Grey is transparent about its fees, and you’ll always see the exchange rates before making a conversion.
Why You Should Open a Grey Foreign Account Today
If you earn or spend money in different currencies, Grey is the easiest and most affordable way to manage international transactions from Nigeria.
No paperwork. No hidden fees. Works from anywhere in Nigeria. Instant withdrawals.
Ready to take control of your international finances? Sign up on Grey now and start receiving and sending payments like a pro! 🚀
Mistakes happen. Maybe you meant to send GHS 50 but accidentally sent GHS 500. Or maybe you typed in a friend’s number but ended up sending money to a total stranger. It’s frustrating, right? The good news is that if you act fast, you might be able to get your money back.
MTN Ghana has a process for reversing incorrect Mobile Money (MoMo) transactions, but it’s not instant. You need to follow the right steps and act quickly. In this guide, we’ll break it all down in a simple and easy-to-follow way—like explaining it to a friend who just started using MoMo.
What You Should Know About MoMo Reversals
Before we dive into the step-by-step process, here are a few key things to keep in mind:
You have up to 30 days to report a mistaken transaction. After that, a reversal may not be possible.
If the recipient has already spent or withdrawn the money, getting it back becomes tricky.
The process isn’t instant—it can take up to 15 working days for MTN to investigate and process the reversal.
Not all transactions are reversible. Payments to businesses or service providers (like ECG or Ghana Water) are usually final.
So, if you realize you’ve sent money to the wrong number, don’t wait—take action immediately!
How to Reverse an MTN MoMo Transaction
There are three main ways to try and get your money back:
Method 1: Using the USSD Code (Quickest Option)
This is the fastest way to report a wrong transaction, and you can do it directly from your phone. Follow these steps:
Dial *170# on your phone.
Select Option 6 (My Wallet).
Choose Report Fraud.
Select New Reversal Process.
Enter the recipient’s phone number (the person who received the money).
Confirm that you actually sent the money.
Enter the exact amount that was sent.
Enter the date of the transaction.
Wait for an SMS confirmation from MTN that your report has been received.
Method 2: Calling MTN Customer Care (Best for Complex Cases)
If you prefer speaking to a real person, or if the USSD method doesn’t work, calling MTN customer care is a great option.
Press (*) to speak to a customer service representative.
Provide the following details:
Your phone number
The recipient’s phone number
The date and time of the transaction
The exact amount sent
The transaction ID (if available)
After your report is lodged, you will receive an SMS confirming your complaint.
Now, you wait. MTN will investigate the case, and if the transaction meets the conditions for a reversal, they’ll process it.
Method 3: Contacting the Recipient (If They’re Honest)
Sometimes, the simplest solution is to just call the person who received your money and ask for a refund.
Here’s how to handle the conversation:
Stay calm and polite. No one likes to be accused of theft right away.
Explain that you sent the money by mistake and ask if they can send it back.
If they refuse, remind them that MTN has a process for reversals and that keeping the money might not end well for them.
This method only works if the recipient is honest and willing to cooperate. If they refuse, you’ll have to rely on MTN’s official reversal process.
How Long Does a Reversal Take?
MTN takes up to 15 working days to investigate and process reversals.
Why so long? Because they need to:
Verify that the claim is valid.
Confirm that the recipient hasn’t withdrawn the money.
Contact the recipient and ensure they have enough balance to reverse the transaction.
If the recipient has already used the money, you might have to wait longer until they deposit funds back into their account.
When Can’t a Transaction Be Reversed?
Not all transactions can be undone. A reversal won’t work if:
More than 30 days have passed since the transaction.
The recipient has already withdrawn or spent the money.
The payment was made to a business or service provider (like ECG or DSTV).
The case is disputed, and MTN cannot verify wrongdoing.
So, your best chance of getting your money back is to report the issue immediately!
FAQs
Can I reverse a MoMo payment to a business?
No, payments to businesses or service providers (like ECG, Ghana Water, or DSTV) are usually final. Always double-check before confirming such payments.
What if the recipient refuses to return the money?
If the recipient refuses, MTN will investigate. If they find that the money was wrongly sent and the recipient has enough balance, they’ll process the reversal. However, if the money has already been withdrawn, it becomes difficult to recover.
Can I reverse a MoMo transaction linked to a bank?
It’s not straightforward. If your MoMo transaction was linked to a bank, you should call MTNand your bank immediately for assistance.
Sending money via MoMo is super convenient, but mistakes happen. That’s why you should always double-check the number and amount before pressing send. If you do make an error, don’t panic—just follow the right steps quickly, and you might be able to get your money back.
Need to reach MTN Ghana’s customer care? Whether it’s a missing data bundle, a Mobile Money (MoMo) issue, or a general inquiry, MTN provides multiple ways to get support. Here’s a quick guide to help you connect with them easily.
1. Call MTN Ghana’s Customer Care Number
For instant support, calling MTN is the fastest option:
Q: How do I speak directly to an MTN Ghana customer service agent?
A: Dial 100 from an MTN number or +233 244 300 000 from another network, then follow the prompts.
Q: How long does it take for MTN to respond to emails?
A: Typically 24-48 hours, depending on request volume.
Q: Can I chat with MTN customer care on WhatsApp?
A: Yes, try +233 554 300 000, but responses are mostly automated.
MTN Ghana offers multiple ways to get help—calling 100 is best for urgent issues, while email, social media, and the myMTN app work well for less urgent matters. And if all else fails, a visit to an MTN service center should resolve things.
If you use an Airtel line in Nigeria, you’ve probably heard about the need to link your National Identification Number (NIN) to your SIM card. Sounds complicated? It’s actually pretty simple! Think of it like registering your phone number so it’s officially tied to you—just like writing your name inside your favorite book to show it’s yours.
Why Do You Need to Link Your NIN to Your Airtel Line?
Imagine you had a bunch of SIM cards and no one knew who owned which one. That’s a problem! The Nigerian Communications Commission (NCC) wants to make sure every active mobile number is connected to a real person. This helps reduce fraud, identity theft, and even crime. Plus, if you don’t link your NIN, Airtel might block your line. That means no calls, no texts, and no internet. Yikes!
So, let’s get this done the easy way—with a simple USSD code.
What is a NIN?
Your National Identification Number (NIN) is an 11-digit number assigned to you when you register with the National Identity Management Commission (NIMC). It’s like a digital fingerprint that helps confirm your identity. Just like how your house has a unique address, your NIN is your unique ID in Nigeria’s system.
If you don’t have a NIN yet, don’t worry! You can get one by visiting a NIMC registration center, filling out a form, and getting your biometric data (fingerprints, photo, etc.) captured. After a few weeks, you’ll receive your NIN.
How to Link Your NIN to Your Airtel Line Using USSD
The easiest way to link your NIN is by using a USSD code. No internet needed—just your phone! Follow these steps:
Make sure you have your NIN number.
Dial *346*3*NIN*121097# to generate your Virtual NIN (VNIN).
Dial *996# and follow the prompts to confirm linkage using the VNIN.
Once your NIN is validated, Airtel will send you a final confirmation message.
That’s it! You’ve successfully linked your NIN to your Airtel line. If everything is correct, you won’t have to worry about your line being blocked.
Other Ways to Link Your NIN to Your Airtel Line
While the USSD method is the easiest, there are two other ways to do it: online and via the NIMC mobile app.
1. Link NIN to Airtel Online
If you have internet access, you can link your NIN online:
If you followed the steps and your NIN still isn’t linking, here’s what you can do:
Incorrect details? Double-check your NIN and SIM registration details. If your SIM is registered under a different name, update your details at an Airtel store.
Delayed confirmation? Sometimes, it takes a while for the system to update. Wait a few hours and try again.
SIM registration issues? If you have an old SIM card, it might need a registration update. Visit an Airtel store for assistance.
FAQs
1. Is linking my NIN to Airtel free?
Yes! Airtel won’t charge you for linking your NIN.
2. How long does it take to link?
Most times, it happens instantly. If not, you’ll get a confirmation SMS within a few hours.
3. What happens if I don’t link my NIN?
Airtel may block your line, and you won’t be able to make calls, send texts, or browse the internet.
Linking your NIN to your Airtel line is a quick and necessary process. Using the USSD method takes less than a minute, and if you ever run into issues, Airtel support is there to help.
If you’re an MTN user in Ghana and want to save money on calls and texts, you’re in the right place! MTN Jara is a special offer that gives you extra minutes and SMS at a discounted price. But here’s the catch—it’s only available in certain regions. Don’t worry, though! I’ll walk you through everything you need to know, step by step, in a way that’s super easy to understand. By the end of this guide, you’ll be able to subscribe to MTN Jara like a pro!
What is MTN Jara?
Think of MTN Jara as a VIP deal for prepaid MTN users in Ghana. It’s like getting a secret menu at your favorite restaurant—except instead of food, you get cheaper calls and texts. If you live in or travel to certain regions, you can activate MTN Jara and enjoy huge savings on your mobile expenses.
Who Can Use MTN Jara?
MTN Jara isn’t available everywhere in Ghana. Right now, it’s only for prepaid customers in these regions:
Volta
Oti
Upper East
Upper West
Bono
Bono East
Ahafo
Northern
North East
Savannah
If you’re in these areas, congratulations! You can activate MTN Jara and start saving. If not, well, at least you know what to look forward to if you ever move or visit these places.
MTN Jara Packages and Pricing
MTN Jara isn’t just one plan—it comes in different sizes, kind of like choosing between a small, medium, or large meal at a restaurant. Here’s what you can get:
Package
Cost (GHS)
What You Get
Small
0.76
20 minutes + 10 SMS
Medium
1.41
37 minutes + 10 SMS
Large
2.63
70 minutes + 10 SMS
The best part? These minutes and SMS work on ALL networks, so you can call or text anyone without worrying about extra charges.
How to Subscribe to MTN Jara
Activating MTN Jara is super easy. You don’t need to download an app, visit an office, or do anything complicated. Just follow these steps:
Step-by-Step Guide to Subscribe:
Dial *550# on your MTN line.
Select “Jara” from the options that appear.
Choose your preferred package (small, medium, or large).
Confirm your purchase and wait for a confirmation message.
That’s it! Once you get the confirmation message, your Jara bundle is active, and you can start enjoying cheaper calls and texts immediately.
Important Things to Know About MTN Jara
Before you start making calls like crazy, here are a few key things to keep in mind:
1. Auto-Renewal
MTN Jara renews automatically every day, as long as you have enough credit. If you want to keep enjoying the benefits, make sure you always have enough balance for your chosen package.
2. Unused Minutes and SMS Roll Over
If you don’t use all your minutes or SMS in one day, don’t worry—they don’t disappear! They roll over to the next day, as long as you renew your subscription within 48 hours. But if you don’t renew, any leftover minutes or SMS will expire at 11:59 PM on the second day.
3. Subscription Works From Monday to Saturday
MTN Jara is available every day except Sunday. If you subscribe on a Saturday, your unused minutes and texts will still be available on Sunday, but you won’t be able to renew until Monday.
How to Unsubscribe from MTN Jara
Maybe you want to take a break from MTN Jara, or maybe you don’t need it anymore. Whatever the reason, unsubscribing is just as easy as subscribing.
Two Ways to Unsubscribe:
Send “STOP” to 550 via SMS. You’ll get a confirmation message letting you know you’ve been unsubscribed.
Run out of credit—If you don’t have enough credit when the auto-renewal tries to happen, your subscription will automatically end.
Frequently Asked Questions
1. Does MTN Jara work everywhere in Ghana?
No, it’s only available in selected regions (Volta, Oti, Bono, etc.). If you’re outside these areas, you won’t be able to activate it.
2. Can I use my Jara minutes to call any network?
Yes! Unlike some other bundles that only work for MTN-to-MTN calls, MTN Jara allows you to call any network in Ghana.
3. What happens if I don’t renew my subscription?
Your unused minutes and SMS will expire at 11:59 PM on the second day if you don’t renew within 48 hours.
4. How do I check my Jara balance?
Dial *124# to check your balance and see how many minutes and SMS you have left.
MTN Jara is a fantastic way to save money on calls and texts, especially if you’re in one of the eligible regions. It’s easy to activate, affordable, and works on all networks. Just dial *550# to get started, choose your preferred package, and enjoy cheaper communication!
So, what are you waiting for? If you live in an MTN Jara region, go ahead and activate it now—you’ll thank yourself later!
Picture this: You’re in the middle of streaming your favorite song or sending an important email, and suddenly—bam!—your internet stops working. You check your phone, but there’s no sign of what went wrong. Could it be? Yep, your data is gone.
We’ve all been there, and it’s frustrating. That’s why knowing how to quickly check your AirtelTigo data balance is a lifesaver. Whether you’re using a smartphone or a simple feature phone, checking your data balance is easy. In this guide, I’ll walk you through the fastest ways to do it—step by step—so you never get caught off guard again.
Method 1: Using the USSD Code (Fastest Way!)
If you want to check your AirtelTigo data balance in the simplest way possible, USSD codes are your best friend. No need for the internet, no need to install an app—just a few taps, and you’re good to go.
Here’s how:
Open your phone’s dialer (just like you’re making a call).
Dial *504# and hit the call button.
Wait a few seconds for a message to pop up saying your data balance will be sent via SMS.
Check your messages—you’ll receive a text with your current data balance details.
That’s it! Quick, right? This method works on any phone, whether it’s a basic Nokia or the latest iPhone.
Method 2: Using the My AirtelTigo Mobile App
If you love using apps and prefer a more detailed view of your data usage, the My AirtelTigo app is a great option. However, keep in mind that this method requires an internet connection (so make sure you’re on WiFi if you’re low on data!).
Follow these steps:
Download the My AirtelTigo app from the Google Play Store or Apple App Store.
Open the app and log in using your AirtelTigo phone number.
Tap on Balance Details to see your data balance.
A new screen will show you a full breakdown of your data usage and available balance.
This method is perfect if you want more insights into your data consumption.
Bonus: How to Check Your Data Usage History
Ever wondered where all your data went? Did you binge-watch too many videos, or did an app quietly eat up your MBs in the background? AirtelTigo lets you track your usage so you can stay in control.
Here’s how to check:
Dial *100# and press call.
Select Option 3 for Usage & Subscription History.
Choose Data to see details of your internet consumption.
You’ll get an SMS with a breakdown of your data usage for social media, browsing, and total usage.
This is super useful if you’re trying to manage your data better and avoid running out unexpectedly.
FAQs:
Q: Is it free to check my AirtelTigo data balance?
A: Yes! Checking your balance with *504# or the AirtelTigo app is completely free. However, using the app requires an internet connection.
Q: Can I check multiple data bundles at once?
A: Absolutely. The USSD code *504# and the My AirtelTigo app will both show you all active data bundles on your line.
Q: What if I don’t receive an SMS after dialing 504#?
A: This is rare, but if it happens, try again after a few minutes. If you still don’t get a response, restart your phone or contact AirtelTigo customer care.
Staying on top of your data balance is key to avoiding unwanted surprises. Whether you use the USSD code for quick checks or the AirtelTigo app for a detailed view, you now have all the tools to stay connected without stress.
So next time you’re about to stream a movie or start a video call, take a second to check your data balance—you’ll thank yourself later!
Now, go ahead and give it a try. Dial *504# right now and see how easy it is!
Learn how to borrow airtime or data from MTN Ghana using *506# and stay connected with minimal fees.
Have you ever been in a situation where you’re trying to make an urgent call or stream your favorite music, but your airtime or data runs out? It can be super frustrating, especially when you don’t have any credit left and you need to stay connected. But don’t worry! MTN Ghana has got you covered with a service called XtraTime, which lets you borrow both airtime and data. That means, even if you’re out of credit, you can still make calls, send texts, or browse the web until you top up your balance.
Let’s walk through how you can easily borrow airtime and data from MTN. Trust me, it’s way simpler than you think!
What is MTN XtraTime?
MTN XtraTime is a super helpful service that allows you to borrow airtime or data when you’re running low. Whether you’re making an important call or need to finish that last bit of browsing, XtraTime has your back. However, there are a few things to know before you can start using this service.
Who Can Borrow Airtime or Data on MTN?
Before you start borrowing, make sure you meet the following criteria:
Registered MTN SIM: You need to be using an MTN SIM that’s properly registered.
Prepaid Customer: The service is available to prepaid or pay-as-you-go customers.
On the MTN Network for 3 Months: You should have been using MTN for at least three months.
Low Balance: If you have less than GHS 4 worth of airtime or data, you’re eligible to borrow.
No Unpaid Loans: If you have an outstanding loan from a previous XtraTime borrowing, you need to clear that first.
How to Borrow Airtime on MTN?
Imagine you’ve run out of airtime and need to make a quick call. Here’s what you need to do:
Dial the Code: On your phone, dial *506#. This is the magic number that gets you into the MTN XtraTime service.
Select Airtime Option: After dialing, you’ll see a menu with different options. Choose the one that says “Borrow Airtime” or, if you’re unsure, select Option 3 to see more choices.
Pick the Amount: You’ll be shown different amounts of airtime that you can borrow. Select the one that suits your needs. Don’t worry; there’s something for everyone!
Confirm Your Borrowing: Once you’ve selected your amount, MTN will ask you to confirm. Just press 1 to confirm your choice.
Get Your Airtime: Within a few seconds, you’ll get a message confirming the airtime has been added to your balance. You’re all set!
How to Borrow Data on MTN?
Now, let’s say you need some extra data to finish browsing or watching a video. Borrowing data from MTN is just as simple as borrowing airtime. Here’s how:
Dial the Code: Dial *506# to access the XtraTime service.
Select Data Option: Choose “Request Data Advance” from the menu.
Pick Your Data Bundle: You’ll see a list of data bundles you can borrow. Pick the one that fits your needs. Whether it’s a small amount for checking social media or a bigger bundle for streaming, MTN has you covered.
Confirm the Data Borrowing: After choosing your preferred bundle, you’ll need to confirm by pressing 1.
Receive Your Data: Just like with airtime, MTN will send you a message confirming that your data has been added to your account. Now you can browse to your heart’s content!
How Much Can You Borrow?
The amount of airtime or data you can borrow depends on a few things:
How Much You Use: If you often buy a lot of airtime or data, you’ll have a higher limit to borrow.
Your Repayment History: If you’ve been quick to repay your previous loans, MTN will trust you more and give you the option to borrow more in the future.
Your Limit: Everyone has a specific borrowing limit, which can grow over time if you’re a loyal MTN customer.
So, while you might not be able to borrow a huge amount at first, the more you use and repay XtraTime, the more you can borrow in the future.
How Much Does Borrowing Cost?
While XtraTime is super helpful, it’s not entirely free. MTN charges a small 10% service fee on everything you borrow.
For example, if you borrow GHS 1 worth of airtime, you’ll need to pay back GHS 1.10 when you recharge. If you borrow GHS 10 worth of data, the total cost will be GHS 11.
Here’s a quick tip: When you select the amount to borrow, always double-check the total cost before confirming your transaction. MTN will show you how much you’ll need to repay, so you can decide if it’s okay with you.
How Do You Pay Back the Borrowed Airtime or Data?
You don’t have to worry about remembering to repay your loan. MTN makes it easy by automatically deducting what you owe from your next airtime or data recharge. So, when you top up your balance, the borrowed amount will be deducted first. If you borrow data, the equivalent airtime will be deducted from your next recharge.
For example, if you borrow 500MB of data for GHS 3, plus a service fee of GHS 0.30, you’ll repay the total of GHS 3.30 the next time you top up.
Can You Borrow 1GB of Data?
Yes, but there’s a catch! Borrowing 1GB or more of data is usually reserved for long-time, loyal customers who frequently use the service. Your limit depends on how active you are on MTN’s network and your borrowing history. The more you use XtraTime and pay back on time, the higher your limit will get.
Borrowing airtime or data on MTN in Ghana is a quick and easy way to stay connected when you need it most. With just a few simple steps, you can borrow airtime for calls or get some extra data for browsing, all without having to wait for a top-up.
So next time you’re caught without airtime or data, just dial *506#, follow the simple prompts, and you’re good to go! Don’t forget to repay your loan the next time you recharge to keep your borrowing limit growing.
If you’ve ever received a gift card you didn’t need, you’re not alone. Many people in Nigeria choose to sell their unwanted gift cards for cash, but not all gift cards are equal. Some fetch way higher rates than others, making them more profitable to sell. So, which gift cards should you be looking out for in 2025? Let’s break it down in the simplest way possible.
Why Do Gift Cards Have Different Rates?
Gift card rates fluctuate based on demand, supply, and market conditions. The more people want a specific gift card, the higher its resale value. Think of it like sneakers—a rare pair from a popular brand sells for much more than an average pair you can find anywhere. The same goes for gift cards.
Top 10 Gift Cards with the Highest Rates in Nigeria (2025)
1. Steam Gift Card
Gamers love Steam, making Steam gift cards one of the most valuable in Nigeria. Whether it’s for purchasing new games or in-game items, the demand for these cards remains high. A $100 Steam card can sell for around 80,000 to 85,000 Naira.
2. Apple / iTunes Gift Card
Apple products and services are always in demand, which makes iTunes gift cards highly valuable. These cards are used for buying apps, music, and subscriptions. A $100 iTunes gift card typically sells for about 75,000 to 85,000 Naira.
3. Google Play Gift Card
Just like Apple gift cards, Google Play cards are widely used for buying apps and games on Android devices. A $100 Google Play gift card can sell for around 70,000 to 90,000 Naira.
4. Amazon Gift Card
Amazon is one of the biggest online shopping platforms in the world, so Amazon gift cards hold strong value. If you have a cash receipt, you can sell a $100 Amazon gift card for up to 75,000 Naira.
5. Razer Gold Gift Card
Razer Gold is another favorite among gamers, especially those who buy in-game items. The high demand for these cards means they trade for excellent rates. A $100 Razer Gold gift card can go for about 82,000 Naira.
6. Sephora Gift Card
Beauty enthusiasts and makeup lovers drive the demand for Sephora gift cards. A $100 Sephora gift card sells for about 65,000 to 75,000 Naira.
7. eBay Gift Card
eBay gift cards allow users to shop for a variety of items online. Due to their demand, they sell for high rates. A $100 eBay gift card can trade for around 75,000 Naira.
8. AMEX (American Express) Gift Card
AMEX gift cards are widely accepted for purchases in different stores, making them a valuable option for resale. A $100 AMEX gift card can be sold for around 70,000 to 90,000 Naira.
9. Walmart Gift Card
Walmart gift cards can be used to buy products online or in physical Walmart stores. Their versatility keeps their resale value high. A $100 Walmart gift card sells for about 70,000 Naira.
10. Nike Gift Card
Nike gift cards are a great option for people who love sneakers and sportswear. They can be used on the Nike website or in stores. A $100 Nike gift card can be sold for about 65,000 Naira.
Other Notable Mentions
Footlocker Gift Card – Popular among sneaker lovers, trades for good rates.
Vanilla Gift Card – A great alternative to Visa/MasterCard gift cards.
FAQs About Selling Gift Cards in Nigeria
Q: Where Can I Buy Gift Cards in Nigeria?
A: In Nigeria, you can easily buy gift cards on Grey. You place an order and receive your gift card details almost instantly at the best rates.
Q: Where Can I Sell Gift Cards in Nigeria?
A: You can sell gift cards on various online platforms that offer high rates and fast payouts like GiftCardsToNaira. Be sure to check for a reliable platform with good customer reviews.
Q: How Do I Check My Gift Card’s Current Rate?
A: Gift card rates fluctuate, so it’s best to use an online gift card rate checker to see the latest prices before selling.
Q: What Affects the Value of a Gift Card?
A: Factors like brand popularity, market demand, and whether you have a cash receipt can influence how much your gift card is worth.
Selling gift cards in Nigeria can be a great way to make extra cash, especially if you know which cards fetch the highest rates. Whether you’re trading gaming cards like Steam and Razer Gold or shopping cards like Amazon and Walmart, always check the latest rates to maximize your earnings.
Now that you know which gift cards are worth the most, which one do you have sitting in your wallet? It might be time to cash in!
Imagine you’re a freelance writer in Ghana, and a client in the U.S. wants to pay you in dollars. Or maybe you’re an online shopper who finds the perfect gadget, but the seller only accepts payments in euros. If you’ve ever struggled with getting paid internationally or making purchases in foreign currencies, you’re not alone. That’s where foreign bank accounts come in, and Grey makes the process super easy.
Whether you’re a freelancer, remote worker, business owner, or just someone who deals with money from different countries, having a foreign bank account can save you a ton of stress (and fees!). But how do you open one in Ghana without the usual bank headaches? Let’s break it down.
What is Grey, and Why Should You Care?
Grey is like your digital passport to international banking. It allows you to open a US, UK, or EU foreign bank account while living in Ghana. That means you can receive money from clients, employers, or family abroad without struggling with high transfer fees, long delays, or hidden charges.
Think of it like having a local bank account in those countries—without ever stepping foot there. The best part? It’s all online, and you don’t need to visit a physical bank or deal with stacks of paperwork.
Why Open a Foreign Bank Account With Grey?
Here’s why people in Ghana love using Grey for foreign banking:
Get paid from anywhere – If you work with international clients, you can receive payments in USD, GBP, or EUR without hassle.
Instant withdrawals – Convert your funds to Ghanaian Cedis (GHS) and withdraw straight to your local bank or mobile money.
No hidden fees – Traditional banks love sneaky charges. Grey keeps it transparent.
Virtual cards – Want to shop or pay for online services in dollars or euros? Grey’s got you covered.
Works for freelancers, remote workers, and businesses – Whether you’re a content creator, software developer, or running an e-commerce store, Grey simplifies international transactions.
How to Open a Foreign Bank Account in Ghana With Grey (In 3 Easy Steps!)
Unlike traditional banks, where opening an account can take days or weeks, Grey lets you do everything online in just a few minutes. Here’s how:
Step 1: Sign Up on Grey
Go to Grey’s website or download the Grey mobile app. You’ll need to enter some basic details like your name, email, and phone number. It’s as easy as signing up for social media.
Step 2: Complete Your KYC (Know Your Customer) Verification
To keep everything secure, Grey needs to verify your identity. Don’t worry—it’s simple. You’ll need to:
Upload a government-issued ID (like your Ghana Card, Passport, or Driver’s License).
Take a quick selfie to confirm it’s really you.
Provide proof of address (a utility bill or bank statement works).
This step is important to prevent fraud and comply with financial regulations.
Step 3: Get Your Foreign Bank Account Details
Once your account is verified, Grey provides you with foreign account details in the currency you choose (USD, GBP, or EUR). Now, you can send and receive money like a local in over 40 countries!
How Do You Use Your Grey Foreign Account?
Now that you have your foreign bank account, what can you do with it?
1. Receive Payments From Anywhere
If you work with international companies, just share your Grey account details with them. They can send money directly to your foreign account just like they would for someone in the U.S. or UK.
2. Withdraw Money to Your Local Bank or Mobile Money
Let’s say you receive a $500 payment in your Grey USD account. You can convert it to Ghanaian Cedis (GHS) and withdraw it instantly to your local bank or MTN Mobile Money, Telecel Cash, or AirtelTigo Money.
3. Pay for International Services
Want to pay for Netflix, Adobe, or buy something from an online store that only accepts dollars or euros? Use Grey’s virtual cards to make payments without worrying about exchange rates or bank restrictions.
Common Questions People Ask About Grey
1. Is Grey a Bank?
Nope! Grey isn’t a traditional bank. It’s a fintech company that partners with regulated financial institutions to provide foreign bank accounts and payment solutions.
2. Is Grey Safe?
Yes! Grey follows strict security measures, including encryption and KYC verification, to keep your money and data safe.
3. How Long Does It Take to Open an Account?
It usually takes just a few minutes to sign up, and KYC verification can take anywhere from a few minutes to a few hours.
4. Are There Any Hidden Fees?
Nope. Grey is transparent about fees, and you can check exchange rates before converting your money.
Why You Should Get a Grey Foreign Account Today
If you’re tired of struggling with expensive and slow international payments, Grey is the solution you need. It’s fast, simple, and saves you from all the usual banking frustrations.
✅ No paperwork. ✅ No hidden fees. ✅ Works from anywhere in Ghana. ✅ Instant withdrawals.
This article explains how to load a Glo card in Nigeria using the USSD code *311*Voucher PIN# and other available methods.
Stuck with a Glo recharge card and unsure how to load it? No worries! Whether you’re new to Glo or just need a refresher, this guide will walk you through the easiest ways to load your Glo airtime. We’ll cover USSD codes, online methods, and even some troubleshooting tips—so by the end, you’ll know exactly how to recharge your Glo line like a pro.
How to Load a Glo Recharge Card Using USSD
The most common way to recharge your Glo line is through a USSD code. This method works on all mobile phones, whether it’s a basic feature phone or the latest smartphone.
Step-by-Step Guide:
Scratch the silver panel on your Glo recharge card to reveal the 15-digit PIN.
Dial *311*Voucher PIN# on your phone (replace “PIN” with the actual numbers on your card).
Press OK/Send and wait for a confirmation message.
Dial *310# to check your new balance.
Example: If your Glo recharge card PIN is 123456789012345, you’ll dial:
*311*123456789012345#
That’s it! Your Glo line is now recharged.
Alternative Recharge Methods
If you don’t have a physical recharge card, don’t worry! There are other ways to add airtime to your Glo number.
1. Online Recharge (Via Bank USSD or Website)
If you prefer a cashless method, you can recharge Glo airtime directly from your bank or the Glo website.
Via Bank USSD: Dial *805#, select your bank, and enter the amount you want to recharge.
Choose a payment method and complete the transaction.
How to Load Glo Card Using the Glo 4X Code
Want four times the value of your recharge? Use the special Glo 4X recharge code:
Buy a Glo recharge card.
Dial *323*PIN# (replace “PIN” with your 15-digit recharge code).
Press OK/Send and enjoy 4X your recharge amount!
For example, if you recharge ₦500, you’ll receive ₦2,000 in airtime bonuses.
Common Issues & How to Fix Them
Even though recharging Glo airtime is simple, sometimes things go wrong. Here are some common problems and how to solve them.
1. Invalid Recharge Code
Double-check that you entered the correct 15-digit PIN.
Make sure you scratched the card properly and didn’t misread any numbers.
Ensure you’re dialing *311*Voucher PIN# and not another code.
2. Airtime Not Credited
Sometimes, there’s a delay due to network issues. Wait a few minutes and check your balance by dialing *310#.
If the airtime is still missing, contact Glo customer support by dialing 121.
3. Recharging a Glo Card on the Wrong Network
Glo recharge cards only work on Glo lines. If you mistakenly try loading it on another network, you’ll get an error message.
Always confirm your SIM card before entering the recharge code.
FAQs
What is the USSD code to load Glo recharge card?
The code to load a Glo recharge card is *311*Voucher PIN#.
How do I recharge Glo airtime with a bank USSD code?
Dial *805#, select your bank, and follow the instructions to complete your recharge.
What is the Glo 4X recharge code?
To get 4X your airtime, use *323*PIN# instead of the regular recharge code.
Can I recharge my Glo line online?
Yes! You can recharge via the Glo website or through your bank’s mobile app.
Now that you know how to load a Glo recharge card, you can stay connected anytime, anywhere. Whether you prefer using a physical recharge card, a bank USSD code, or online methods, Glo makes it easy to top up your line.
Next time someone asks, “How do I load a Glo card?” you’ll have the answer ready. Happy recharging!
If you use MTN in Ghana, you probably know there are tons of offers for data, calls, and even mobile money services. But with so many choices, how do you find the best deal? Don’t worry—I’ve got you covered! This guide will break down all the MTN offers in Ghana in a way that’s super easy to understand. Let’s dive in!
MTN Data Bundles
MTN offers different data packages to fit your browsing needs. Whether you just want to chat on WhatsApp, stream movies, or work online, there’s a bundle for you.
1. Basic Data Bundles (No Expiry)
These bundles don’t expire, so you can use them whenever you want.
Prices range from GHS 0.03 to GHS 350 (1.06MB to 92.88GB).
How to buy:
Dial *138#
Select “Buy Data Bundle”
Choose “For Self” or “For Others”
Pick your preferred data package
Pay with MoMo or airtime
2. MTN Zone Bundle
The MTN Zone Bundle is a discounted data package that lasts only 24 hours.
MTN Ghana has a package for everyone—whether you need affordable data, cheap call bundles, or financial services. Now that you know the best MTN offers, you can pick the ones that fit your lifestyle and budget!
So, you’re looking to grab the AirtelTigo 30 GB data bundle, right? You’ve heard that it’s a fantastic deal, and you want to know exactly how to get it. Well, here’s the thing: the 30 GB bundle is no longer available, but don’t worry—there’s still a way to get lots of data with AirtelTigo. In this article, I’ll walk you through the details of how you can check if you’re eligible for AirtelTigo’s exclusive offers, how to buy the best available data bundles, and how to make sure you’re getting the most out of your internet.
Understanding the AirtelTigo Data Bundles
Before we dive into the steps for getting your data, let’s quickly go over the data packages AirtelTigo currently offers. That way, you’ll know exactly what’s available.
AirtelTigo Data Packages Available Right Now
15 GB for GHS 30 – Valid for 10 days
10 GB for GHS 20 – Valid for 5 days
5 GB for GHS 10 – Valid for 3 days
These options are perfect if you’re someone who loves to stream, game, or simply browse the internet. And while the 30 GB bundle isn’t available anymore, these packages still offer great value for your money.
Is the 30 GB Bundle Gone Forever?
Yep, the AirtelTigo 30 GB data offer is no longer available. But don’t panic! The good news is that you can still get a 15 GB bundle, which can be purchased twice if you want a total of 30 GB (though the 30 GB won’t be valid for 30 days like before). So, if you’re someone who loves streaming or downloading, these new packages should have you covered.
Step-by-Step: How to Check Your Eligibility for the 15 GB Data Bundle
Now, let’s talk about how to get started. The first thing you’ll need to do is check if you’re eligible for the 15 GB data bundle. AirtelTigo offers this bundle to selected customers, so it’s not available to everyone—yet! Here’s how you can check:
1. Dial *499#
This is the magic number. Dial it, and the system will tell you if you’re eligible for the bundle. Don’t worry, you won’t be charged for dialing this number.
2. Wait for a Text Message
Once you’ve dialed *499#, you’ll receive a text message. This text will confirm whether you’re eligible to get the bundle. If you’re eligible, you’ll be good to go. If not, don’t stress—it might just be a matter of time until you become eligible.
3. What if You’re Not Eligible?
If you’re not eligible for the bundle yet, don’t give up! The eligibility is decided randomly by AirtelTigo’s system. To increase your chances, just keep using your AirtelTigo number regularly, and stay connected. Over time, you may get selected for the bundle.
4. Check for Other Offers
If you’re not eligible for the 15 GB bundle, there might be other offers available to you. AirtelTigo sometimes has different promotions running, so it’s a good idea to keep an eye on their website or dial *499# from time to time to see if something new pops up.
How to Buy the AirtelTigo 15 GB Data Bundle
If you get that “You’re eligible!” message, congratulations! You can now go ahead and purchase the 15 GB bundle. Here’s how to do it:
1. Dial *499# Again
Dial *499# once more, and this time, you’ll see options on your screen. It’s as simple as following the prompts to get your data.
2. Select Option 1 for the 15 GB Data Bundle
Once you’ve dialed *499# and seen the options, choose Option 1 to select the 15 GB data bundle.
3. Choose Your Payment Method
AirtelTigo gives you a couple of ways to pay for your data bundle. You can either use your airtime balance or pay through AirtelTigo Money (if you have an account set up). Pick whichever option is easiest for you.
4. Confirm Your Purchase
Once you’ve selected your payment method, you’ll be asked to confirm your purchase. Double-check everything, and once you confirm, the data will be added to your account.
5. Start Enjoying Your Data!
That’s it! You’ll receive a confirmation SMS saying your data is ready to use. Enjoy surfing the web, streaming videos, or whatever else you do with your data.
What if You Want More Than 15 GB?
So, let’s say you’re really craving 30 GB of data. If you’re eligible for the 15 GB offer, you can actually purchase it twice! By doing so, you’ll have 30 GB of data, though the validity period won’t extend. It’s still a pretty good option if you really need a lot of data.
However, if you don’t want to deal with buying multiple bundles, there’s an alternative. AirtelTigo offers a 30 GB BigTime bundle for GHS 200. This bundle lasts for 30 days, so it might be the perfect option if you need lots of data without the worry of buying smaller bundles.
Keep an Eye on Your AirtelTigo Offers
The AirtelTigo 30 GB data bundle is no longer available, but don’t worry! There are still great options out there for getting plenty of data, like the 15 GB bundle. Whether you’re eligible or not, the most important thing is to stay connected, keep using your AirtelTigo number, and check for offers regularly.
Remember, these bundles are perfect for people who need a lot of data for things like streaming movies, playing games, or working from home. By following the steps above, you’ll be able to get the best AirtelTigo data package that suits your needs.
So, go ahead and dial *499# to see what’s available to you today. And hey, if you’re not eligible yet, don’t worry—your time will come! Keep enjoying your AirtelTigo services, and soon, you’ll be surfing the web with ease.
Ever been out of airtime but really needed to call someone? Maybe you just needed a quick chat with a friend, or you had to let a family member know something urgent. That’s where the “Please Call Me” service comes in handy! It’s a free way to ask someone to call you back when you can’t make a call yourself.
The best part? All major networks in South Africa—MTN, Vodacom, Telkom, and Cell C—offer this feature. In this guide, I’ll walk you through exactly how to send a “Please Call Me” on each network in the easiest way possible. Let’s get into it!
What Is a “Please Call Me” Message?
A “Please Call Me” message is a free SMS that you can send to someone when you don’t have airtime. It simply tells them to call you back. Think of it like knocking on someone’s door when you can’t enter their house—you’re letting them know you’re there and need their attention.
Each mobile network in South Africa has a unique code you can dial to send this message. Let’s go through each one step by step.
The recipient will receive a message asking them to call you back.
Cell C allows you to send up to 10 “Please Call Me” messages per day.
Extra Tips & Things to Keep in Mind
You can send “Please Call Me” messages to any number, even if they’re on a different network.
This service is completely free, so you won’t be charged for sending the message.
If you’ve reached your daily limit, you’ll have to wait until the next day to send more.
“Please Call Me” messages are useful in emergencies when you have no airtime.
Some networks may not allow international “Please Call Me” messages.
Why Use “Please Call Me”?
Still wondering why this service is so popular? Here are some real-life situations where “Please Call Me” can save the day:
You run out of airtime – You’re about to call someone, but your airtime is finished. Instead of stressing, just send a “Please Call Me” and wait for them to call you.
Emergency situations – Maybe you need to reach someone urgently but have no data or airtime. This is a quick way to let them know you need help.
You’re borrowing someone’s phone – If you don’t have your phone with you but need to contact someone, you can use this trick on a borrowed phone (as long as it’s on your network).
The “Please Call Me” service is one of the most useful features offered by South African mobile networks. Whether you’re out of airtime, in an emergency, or just need someone to call you back, this free service is a lifesaver.
Now that you know exactly how to send a “Please Call Me” on MTN, Vodacom, Telkom, and Cell C, you’ll never be stuck without a way to communicate. Try it out the next time you need a callback!
Did this guide help you? Share it with friends who might need it too!
So, you’re out and about, and your phone battery is running low, or maybe you’re just out of airtime, but you really need someone to call you back. That’s where the “Please Call Me” feature on MTN comes in handy! It’s like sending a quick, friendly tap on the shoulder saying, “Hey, can you give me a call when you get a chance?”
Here’s how you can send a “Please Call Me” on MTN in South Africa:
Open your phone dialer – the place where you make calls (don’t worry, it’s not hard to find!).
Type in this code: *121* followed by the phone number of the person you want to reach. For example, if you want to ask your friend with the number 0834511923 to call you, you’d dial *121*0834511923#.
Hit the call button – like you’re calling them, but it’s really just sending a request for them to call you!
That’s it! The person you sent it to will receive a message saying “Please Call Me” with your phone number. Easy, right?
Just keep in mind, you can send up to 5 “Please Call Me” messages on MTN every day. So if you’re out of airtime a few times in the day, you’ve got a bit of room to work with.
And just like that, you’ve sent a simple request asking for a call back—no airtime needed, just a little tap on the digital shoulder! Simple, right?
Now you’ve got this down, and you’re ready to stay connected—no matter where you are or what’s going on with your phone.
Ever been out of airtime but really needed to reach someone? Maybe you’re trying to call your mom, a friend, or even your ride home, but your balance is sitting at a big fat zero. Don’t worry—Cell C’s “Please Call Me” feature has got your back!
This handy service lets you send a free message asking someone to call you. It’s like tapping them on the shoulder and saying, “Hey, I need to talk!” without spending a cent.
Let’s break it down step by step, so you’ll never be stuck without a way to get in touch again.
Open your phone’s dialer (the screen where you type in phone numbers).
Dial *111*, followed by the phone number of the person you want to contact. For example, if you want to send a “Please Call Me” to 0812345678, you would dial:*111*0812345678#
Press the call/send button.
That’s it! The person will receive a message saying, “Please Call Me,” along with your phone number so they know who’s trying to reach them.
How Many ‘Please Call Me’ Messages Can You Send?
Cell C lets you send up to 10 ‘Please Call Me’ messages per day. So, if you’re in a tight spot and need to reach multiple people, you’re covered. Just use them wisely—you don’t want to spam your contacts!
Why Is This Feature Useful?
Imagine these situations:
You’re out of airtime and need a ride home. You can send a ‘Please Call Me’ to your friend or taxi service.
Your phone bill isn’t paid yet, but you need to talk to someone urgently. Just shoot them a message so they can call you back.
You’re in an emergency situation. Maybe you’re stuck somewhere, and you need help. This quick message could be a lifesaver.
What If the Person Doesn’t Call Back?
Sometimes, people miss messages or don’t check their phones right away. If it’s urgent, try sending a second ‘Please Call Me’ (as long as you haven’t hit your daily limit). If they still don’t respond, you might need to find another way to contact them—maybe borrow a phone or send a text if you have a little airtime left.
Does It Work on Any Phone?
Yes! Whether you’re using a simple feature phone (those old-school ones with buttons) or a fancy smartphone, the ‘Please Call Me’ works just the same.
The ‘Please Call Me’ feature is one of those little lifesavers that everyone should know about. It’s quick, free, and incredibly useful when you’re out of airtime but still need to reach someone. Now that you know how to use it, you’ll never be stuck without a way to get in touch again!
So, next time you’re low on airtime, just dial *111*[phone number]#, hit send, and wait for that callback!
Netflix is like the go-to place for movies, series, and documentaries, right? Whether you’re a fan of thrilling dramas, laugh-out-loud comedies, or binge-worthy shows, Netflix has something for everyone. But before you can dive into that massive collection of content, you have to pick the right Netflix plan. This choice affects how much you pay each month, the quality of what you watch, and how many people can watch at once.
So, let’s break it all down and explore the Netflix plans available in South Africa, their pricing, and what you get with each one.
Netflix’s 4 Plans: Which One is Right for You?
Netflix offers four main subscription plans, each designed to meet different needs. The plans are easy to understand, but they offer different features like video quality, how many screens you can watch on at once, and how much you’ll pay.
Mobile Plan (480p) – ZAR 49/month This plan is the most affordable and designed for people who only want to watch Netflix on their phones or tablets. If you’re someone who enjoys watching on-the-go (think during your daily commute or waiting for a friend), the Mobile Plan is for you.
Video Quality: 480p (Standard Definition)
Supported Devices: Mobile phones and tablets
Simultaneous Streams: 1
While the video quality isn’t the sharpest, it’s fine if you’re watching on a small screen. And at only ZAR 49 a month, it’s a pretty solid deal.
Basic Plan (720p) – ZAR 99/month The Basic Plan is a bit of a step-up. It gives you HD quality (720p), which means the picture looks sharper compared to the Mobile Plan. If you like to watch on your TV or computer (not just your phone), this plan works for you.
Video Quality: 720p (HD)
Supported Devices: TV, computer, mobile phone, tablet
Simultaneous Streams: 1
While the Basic Plan doesn’t let you watch on multiple devices at once, it’s still a good option for individuals or small households.
Standard Plan (1080p) – ZAR 159/month The Standard Plan is for people who want Full HD (1080p). This means better picture quality, especially on larger screens like a TV. Plus, it lets two devices stream at once. So, if you and your sibling or partner like to watch Netflix at the same time but on different screens, this plan works perfectly.
Video Quality: 1080p (Full HD)
Supported Devices: TV, computer, mobile phone, tablet
Simultaneous Streams: 2
At ZAR 159 a month, it’s not the cheapest, but the quality upgrade from the Basic Plan makes it a great middle option for small families or people who like to watch on different devices.
Premium Plan (4K + HDR) – ZAR 199/month If you want the best of the best, the Premium Plan is the way to go. With 4K resolution and HDR (High Dynamic Range), your shows and movies will look incredibly sharp and vivid, especially on big screens. Plus, it supports up to 4 devices streaming at once, making it perfect for larger households.
Video Quality: 4K Ultra HD + HDR
Supported Devices: TV, computer, mobile phone, tablet
Simultaneous Streams: 4
This plan is the most expensive at ZAR 199, but if you’re all about super-clear pictures and enjoy watching with family or friends at the same time, it’s worth the price.
A Simple Breakdown of Netflix’s Plans in South Africa
Plan
Price per month
Video Quality
Devices Allowed
Simultaneous Streams
Mobile
ZAR 49
480p (SD)
Mobile only
1
Basic
ZAR 99
720p (HD)
TV, computer, mobile, tablet
1
Standard
ZAR 159
1080p (Full HD)
TV, computer, mobile, tablet
2
Premium
ZAR 199
4K + HDR
TV, computer, mobile, tablet
4
Which Netflix Plan Should You Choose?
Your choice depends on your needs, budget, and how you like to watch Netflix. Here’s a quick guide to help you choose:
If you’re on a tight budget and watch on your phone: The Mobile Plan (ZAR 49) is perfect for you. It’s super affordable and gives you Netflix anywhere you go.
If you’re watching on a larger screen like a TV and want HD quality: The Basic Plan (ZAR 99) is a good middle option. It’s affordable and gives you HD quality on a TV, computer, or tablet, but remember, it only lets you stream on one device at a time.
If you’re in a small household or share Netflix with one other person: The Standard Plan (ZAR 159) offers Full HD quality and lets you stream on two devices at the same time. Great if you and a friend or family member want to watch different shows at once.
If you have a big family or want the best quality: The Premium Plan (ZAR 199) is the top choice. With 4K + HDR quality and the ability to stream on up to 4 devices at once, you can enjoy Netflix with your family or friends without any hiccups.
A Reliable Internet Connection Makes All the Difference
Now, no matter which plan you choose, one thing is super important: your internet connection. Streaming Netflix, especially in HD or 4K, requires a good internet connection. If your connection is slow, you might experience buffering (when your show stops to load) or poor video quality. So, it’s important to make sure your internet speed matches your plan. For higher quality (like 1080p or 4K), you’ll need a faster internet connection.
For Mobile and Basic Plans (480p and 720p): A standard connection should be fine.
For Standard and Premium Plans (1080p and 4K): You’ll need a faster, more reliable connection to avoid buffering.
Some Pros and Cons of Each Plan
Let’s take a quick look at the advantages and drawbacks of each plan:
Mobile Plan (480p)
Pros: Super affordable, great for watching on a small screen, perfect for one person.
Cons: Limited to mobile devices, lower video quality (not HD).
Basic Plan (720p)
Pros: Affordable, good for watching on bigger screens like TVs, decent quality.
Cons: Only one stream at a time, no 4K or HDR.
Standard Plan (1080p)
Pros: Full HD quality, supports 2 devices at once, good balance of price and features.
Cons: Higher price than Basic, still no 4K.
Premium Plan (4K + HDR)
Pros: Best quality with 4K + HDR, can stream on 4 devices at once.
Cons: The most expensive, requires a fast internet connection.
A Quick Note About Netflix’s Changes
In some countries, Netflix has been experimenting with new plans, like ones that have ads or cost less. But in South Africa, Netflix still focuses on ad-free plans. So, you don’t have to worry about any ads popping up during your favourite shows, at least for now.
Choosing the right Netflix plan comes down to how you watch, where you watch, and how much you want to spend. If you’re just starting with Netflix or watching mostly on your phone, the Mobile Plan could be perfect. But if you want to share Netflix with a couple of people, the Standard Plan or Premium Plan might be better suited for you.
No matter what you choose, Netflix offers a variety of plans that make it easy to find something that fits your lifestyle. Now you’re ready to dive into the world of Netflix and enjoy your favourite shows with just the right plan!
Have you ever found yourself in a situation where you needed to reach someone but didn’t have enough airtime to make a call? Or maybe you’re just in an area with bad signal and can’t get through? Well, Vodacom’s “Please Call Me” feature is a lifesaver for times like these! It’s a quick and free way to ask someone to call you back—perfect for when you’re low on airtime or can’t make a direct call. Don’t worry if this sounds confusing, though! By the end of this article, you’ll know exactly how to use it like a pro.
What is a “Please Call Me”?
Let’s break it down. A “Please Call Me” is a service from Vodacom that allows you to send a text to anyone asking them to call you back. It’s like knocking on someone’s door and saying, “Hey, can you please give me a call when you get a chance?” without actually making the call yourself. Super handy, right? This service works even when you’re out of airtime or have a poor network connection.
The best part? It works on any network. So whether the person you’re trying to reach uses Vodacom, MTN, Cell C, or Telkom, you can send them a request to call you back.
Why Would You Need “Please Call Me”?
There are plenty of reasons why you might need this service:
Running low on airtime: We’ve all been there, right? You’re trying to make an urgent call but realize you have no airtime. Instead of stressing, you can simply send a “Please Call Me” message and wait for the call to come to you!
Bad signal or no reception: Sometimes you’re in a place with no signal or a super weak connection. In those moments, calling is out of the question, but you can still send a “Please Call Me” to let someone know you’re trying to reach them.
Emergency situations: If you’re in a situation where you need help but can’t make a call, a “Please Call Me” message can be your way of asking someone to check in on you.
How to Send a “Please Call Me” on Vodacom: Step-by-Step
Now that you understand what “Please Call Me” is, let’s get into how to send one. It’s super easy, and I’m going to walk you through it step by step.
Step 1: Open the Dialer or Messaging App
First, you’ll need to open the phone’s dialer or messaging app. You know, the usual app you use to make calls or send texts.
Step 2: Enter the Recipient’s Number
Once the app is open, it’s time to enter the number of the person you want to contact. Here’s where you’ll input their phone number, but make sure it’s correct! You don’t want to accidentally send your message to the wrong person.
Dial the following code: *140* followed by the recipient’s phone number, and then close it with #.
For example, if you want to send a “Please Call Me” to the number 0821502903, you would type this into the dialer: *140*0821502903#.
Step 3: Optional: Add a Personal Message
Some versions of the service allow you to add a little personal note to your “Please Call Me” message. If you need to make the request more urgent or just want to explain why you need the call, feel free to add a brief message.
For instance, you could say, “Please call me back ASAP!” or “I need to talk to you about something important.” But remember, keep it short—there’s not a lot of space for long messages.
Step 4: Hit Send
Once you’ve entered the number and added a custom message (if you want), double-check to make sure everything is right. Then, press send, and the “Please Call Me” message will be delivered to the recipient.
That’s it! You’re done. It’s really that simple.
What Happens Next?
Once you’ve sent the “Please Call Me” message, the person you contacted will get a text saying that you need them to call you back. They don’t need to worry about calling you at a specific time or worrying about their airtime—they can just call you back when they’re able to.
If they’re on Vodacom, it’s free for both of you! If they’re on a different network, they might be charged for the call, but it’s still a great way to get in touch without worrying about airtime on your end.
Alternatives to “Please Call Me”
While the “Please Call Me” feature is super useful, there are also other ways to reach out if you can’t make a call. Let’s take a look at some of them:
Direct Calls: If you have airtime, the fastest way to reach someone is just to call them directly.
Text Messages (SMS): If you can’t make a call but have enough airtime, you can always send a text. It’s quick and gets your message across.
Instant Messaging Apps: If you’re on Wi-Fi, you can use apps like WhatsApp or Facebook Messenger to send messages or even make voice calls.
Email: For non-urgent or more detailed communication, email is another option.
Frequently Asked Questions (FAQs)
1. How long does it take for the recipient to get the message?
The “Please Call Me” message usually gets delivered almost immediately. But if there are network issues or the recipient’s phone is off, there might be a slight delay.
2. Can I send a “Please Call Me” message more than once?
You can! However, Vodacom might put a limit on how many messages you can send in a certain period, so be mindful of that.
3. What if the person doesn’t call me back?
If they don’t respond right away, you can try sending a follow-up text or, if possible, calling them again later. You can also consider using other ways to get in touch, like messaging them through social media or WhatsApp.
4. Can I send a “Please Call Me” internationally?
Unfortunately, the “Please Call Me” feature typically works only within the same country or network. If you’re trying to contact someone overseas, you might want to use another method, like WhatsApp or email.
Pros and Cons of “Please Call Me”
Like anything, the “Please Call Me” service has its ups and downs. Here’s a quick look at the advantages and potential drawbacks:
Pros:
Free: Sending a “Please Call Me” is completely free, which makes it an affordable option when you don’t have airtime.
Quick: It’s an instant way to let someone know you need them to call you back.
Great for Emergencies: If you need help but can’t call directly, it’s a useful backup plan.
Works on all networks: Whether your friend uses Vodacom, MTN, or any other network, you can send them a request.
Cons:
Message Length: The message is short, so you can’t explain everything in detail.
Recipient’s Response: It’s up to the recipient to respond, and sometimes they might not be able to call back right away.
Privacy: Sending a “Please Call Me” will reveal your phone number, which might be a concern for some people.
Network Issues: If there are network problems, your message might not go through.
Vodacom’s “Please Call Me” is a simple, free, and effective way to get in touch with someone when you can’t make a call yourself. Whether you’re out of airtime, have a weak signal, or just need someone to get back to you, this feature is a great tool to have in your phone. By following the easy steps above, you’ll be able to send your request in no time, and stay connected with those who matter most.
So, the next time you find yourself needing a quick call back, just send a “Please Call Me”!
Imagine this: You need to call someone urgently, but your airtime balance is sitting at a big fat zero. No problem! Telkom has a nifty little trick up its sleeve called the “Please Call Me” service. It’s a simple, free way to ask someone to call you back when you can’t make the call yourself. Whether it’s an emergency or you just ran out of airtime at the worst possible moment, this guide will show you exactly how to send a “Please Call Me” on Telkom.
What is a “Please Call Me”?
A “Please Call Me” is a free message you can send from your Telkom phone to someone else, asking them to call you back. It’s like tapping a friend on the shoulder and saying, “Hey, call me when you can!” This is super useful when you:
Run out of airtime and need to contact someone.
Need to reach a friend, family member, or even a co-worker in a pinch.
Are you in an emergency and can’t make a call yourself?
Now, let’s get straight to the point—how do you actually send one?
Step-by-Step Guide to Sending a “Please Call Me” on Telkom
Step 1: Open Your Phone’s Dialer
This is the app you use to make calls. It usually looks like a little phone icon on your screen. Open it up!
Step 2: Dial the Special Code
Here’s the magic number: 140 followed by the person’s phone number. It looks like this:
*140*Recipient’s Number#
For example, if you want to send a “Please Call Me” to someone with the number 0702244424, you would dial:
*140*0702244424#
Once you’ve typed that in, press the call button.
Step 3: Wait for Confirmation
You’ll get a confirmation message letting you know that your request has been sent. At the same time, the person you’re trying to reach will get a message that says something like:
“Please call [Your Number] back.”
And that’s it! Now you just wait for them to call you back.
Pro Tips for Using “Please Call Me” Effectively
Sending a “Please Call Me” is easy, but here are some tips to make sure you’re using it the right way:
Use it when it really matters – If you keep spamming someone with “Please Call Me” messages, they might start ignoring them. Keep it for times when you actually need a callback.
Make sure you have the right number – Double-check before you send it! You don’t want to send your callback request to the wrong person (awkward!).
Know the limits – Some networks limit the number of “Please Call Me” messages you can send per day. If it’s not working, you might have hit your daily cap.
When Should You Use “Please Call Me”?
Now that you know how to send a “Please Call Me,” when should you actually use it? Here are a few real-life examples:
You’re out of airtime but need to talk to a friend – Maybe you just want to catch up, but you’re low on credit. No worries, send them a quick “Please Call Me” and wait for them to ring you back.
You’re in an emergency – If you find yourself in a situation where you really need help and can’t make a call, this feature can be a lifesaver.
You’re coordinating plans – Maybe you’re trying to meet up with someone and need a quick chat but ran out of airtime. A “Please Call Me” can let them know to get in touch.
The “Please Call Me” feature on Telkom is one of those small but super handy tools that can save the day when you’re out of airtime. It’s free, easy to use, and can help you stay connected even when your balance says otherwise.
Next time you’re stuck without airtime, just remember: *140*Recipient’s Number#, hit the call button, and let Telkom do the rest!
Are you looking to grab an hourly data bundle from MTN Ghana? If so, you might have already realized that MTN doesn’t actually offer an hourly data bundle. But don’t worry—there are still plenty of affordable data bundles MTN offers that work for all kinds of internet needs, and in this article, I’m going to tell you all about them!
In this easy-to-follow guide, I’ll explain some of the best alternatives to an hourly bundle, like the Midnight bundle, Kokrokoo, and Social Media bundles. I’ll also show you exactly how to activate these packages, step-by-step, so you can be surfing the web in no time. Let’s dive in!
Why Doesn’t MTN Ghana Have an Hourly Bundle?
You may be wondering, “Why doesn’t MTN Ghana offer an hourly data bundle?” The truth is, MTN doesn’t have a specific package that’s priced just for each hour. But here’s the cool part: They still have bundles that are really affordable and give you plenty of data for your browsing, even though they’re not structured by the hour.
Instead of an hourly bundle, MTN offers data packages that last for different periods of time, with some bundles designed for specific hours of the day. These bundles are super flexible and can be activated whenever you need them.
Let’s Explore the MTN Data Bundles You Can Activate
Since there isn’t an hourly bundle, let’s look at the great alternatives you can use throughout the day to stay connected. I’m going to break down these bundles, so you can pick the one that fits your needs best.
1. Midnight Bundle (12 AM – 5 AM)
One of the most popular bundles MTN Ghana offers is the Midnight Bundle. This special package gives you access to internet data from 12 AM to 5 AM. It’s perfect for night owls who love browsing the web late into the night or for those who want to do some serious downloading while they sleep.
Here’s how it works:
Flexi Option: You choose how much data you want! For example:
GHS 0.01 = 17.67 MB
GHS 2.99 = 5.16 GB
Standard Option: Fixed price for 7.27 MB at GHS 3.
How to Activate the Midnight Bundle:
Dial *138#
Choose the Midnight bundle option.
Pick the plan that works best for you (either the Flexi or Standard package).
You can use this bundle until 5 AM, and if you don’t use up all your data, you can save it for the next night!
This bundle is really great if you want to get things done during the quiet hours, like binge-watching your favorite shows, downloading files, or browsing social media without using up all your daytime data.
2. Kokrokoo Bundle (5 AM – 8 AM)
If you’re an early bird and need some data to kick-start your day, the Kokrokoo Bundle is for you! This package is available between 5 AM and 8 AM, so it’s perfect for checking emails, scrolling through your social media feed, or catching up on the news in the morning.
Here’s what you get with the Kokrokoo Bundle:
GHS 1.24 gets you 400 MB of data and 30 minutes of free on-net calls. How cool is that?
How to Activate the Kokrokoo Bundle:
Dial *138#
Select the Kokrokoo option.
Once activated, you’ll have 400 MB of data and 30 minutes of talk time to use between 5 AM and 8 AM.
This is a perfect choice if you don’t want to burn through your daytime data first thing in the morning. It’s also a good option if you’re someone who loves to make early morning calls or video chats with friends and family.
3. Social Media Bundles (Unlimited Social Media Browsing)
We all know how much time we spend scrolling through social media these days—whether it’s Facebook, Instagram, WhatsApp, Twitter, or TikTok. MTN Ghana has got you covered with Social Media Bundles that allow you to stay connected without worrying about your regular data usage.
Here’s what MTN offers:
Flexi option: You can choose your own data amount, and the bundle can be customized based on your needs.
Standard options: These are affordable, set-priced bundles:
GHS 1 = 70.87 MB
GHS 5 = 354.36 MB
GHS 10 = 708.72 MB
How to Activate the Social Media Bundles:
Dial *138#
Enter 99 for More options.
Select Social Media bundles from the list and choose the one that fits your social browsing habits.
Whether you want to post an update on Facebook, reply to messages on WhatsApp, or scroll through TikTok videos, these bundles give you plenty of data for just social media usage. Perfect for when you’re just interested in catching up on your feeds without burning through your main data.
How to Check Your Data Balance
It’s always good to keep an eye on how much data you have left, especially if you’re using one of these bundles. To check how much data you have remaining, you can do the following:
You’ll get a text message with the details of how much data you have left on your active bundles.
This way, you’ll always know when to top-up or when you can switch to a different bundle.
A Quick Recap: MTN’s Best Data Alternatives to the Hourly Bundle
Even though MTN Ghana doesn’t offer a specific hourly data bundle, they’ve got some awesome alternatives that will still keep you connected at all hours of the day.
Midnight Bundle: Data from 12 AM – 5 AM. Ideal for late-night browsing or downloading.
Kokrokoo Bundle: Data from 5 AM – 8 AM. Perfect for early morning browsing and calling.
Social Media Bundles: Keep your social feeds updated without using up your regular data.
Stay Connected with MTN’s Affordable Bundles
While MTN Ghana doesn’t have an hourly bundle per se, their other bundles are an excellent way to get affordable, flexible data throughout the day. Whether you’re an early riser, a night owl, or a social media enthusiast, MTN has a data package that will suit your needs.
Just follow the steps I’ve shared to activate the bundles, and you’ll be browsing, chatting, and streaming with ease. Don’t forget to check your data balance often, and you’ll always know exactly when it’s time to grab another bundle. So go ahead, pick the bundle that fits your lifestyle, and enjoy the internet with MTN Ghana!
Ever wished you could get cheap data and talk time just when you need it most? Well, MTN’s Kokrokoo Bundle is like a secret morning treasure! For just GHS 1.24, you get 400MB of data and 20 minutes of voice calls, available daily from 5 AM to 8 AM. That’s perfect for catching up on messages, streaming music, or making quick morning calls.
But how do you buy it? Don’t worry—it’s super easy! I’ll walk you through the steps, like explaining to a friend, so you can start enjoying this early bird offer right away.
Method 1: Buying the Kokrokoo Bundle Using a USSD Code
This method is great if you want something quick and don’t have internet access. Here’s how you do it:
Dial *138# on your MTN line.
A menu will pop up. Select 1 to proceed with buying a bundle.
Look for “Kokrokoo Bundle” and select it.
A message will appear showing the terms. Choose 1 to confirm.
Next, select 1 to buy for yourself (or choose another option if buying for someone else).
Select 1 for the GHS 1.24 package.
Choose 1 to confirm the purchase.
Pick your preferred payment method (MTN MoMo is the easiest).
If you chose MoMo, enter your PIN to complete the payment.
You’ll receive an SMS confirming your Kokrokoo bundle purchase!
Quick Tip: An Even Faster Shortcut!
You can also buy the Kokrokoo bundle directly through MTN MoMo by dialing *170#, selecting the right option, and following the prompts. This saves you a few extra clicks!
Method 2: Buying the Kokrokoo Bundle Using the MTN Mobile App
If you prefer using an app instead of dialing codes, MTN’s mobile app has you covered. Here’s what to do:
Open the MTN Mobile App (download it if you haven’t already).
Tap on Shop (it’s at the bottom left).
Select Data from the menu.
Choose Others.
Find Kokrokoo Bundle and tap it.
Select the package (GHS 1.24 for 400MB + 20 minutes).
Choose your number and tap Next.
Pick your payment method (MoMo, Airtime, etc.).
If using MoMo, you’ll receive a prompt—just approve it to complete the purchase.
You’ll get a confirmation message that your bundle is active.
Why Use the MTN App?
No need to memorize codes.
A clean, simple interface makes it easy to find your data bundles.
You can track your usage and balances in real time!
How to Check Your Kokrokoo Bundle Balance
Now that you’ve activated the bundle, how do you check how much data or talk time you have left? Simple!
Option 1: Using a USSD Code
Dial *124# to see your general data balance.
If you have multiple active data plans, dial *138#, then:
Select 1 to proceed.
Choose 99 for More options.
Select 7 for More again.
Tap on Check Bundle Balance.
You’ll receive a pop-up showing your remaining Kokrokoo bundle balance.
Option 2: Using the MTN App
Open the MTN App and go to the Balances section.
Tap on Data to view all your active bundles, including Kokrokoo.
Frequently Asked Questions (FAQs)
1. Does the MTN Kokrokoo bundle expire?
Yes, but only at 8 AM! Any unused data or talk time vanishes, so make sure to use it within the active period.
2. Can I buy the Kokrokoo bundle for someone else?
Absolutely! Just follow the USSD method above, and instead of selecting “Buy for Self,” choose the option to buy for another MTN number.
3. What happens if I already have another active data plan?
No worries! From 5 AM to 8 AM, your internet will automatically switch to the Kokrokoo bundle. After 8 AM, it will go back to your normal data plan.
4. Can I buy the bundle at any time of the day?
Yes! You can purchase it at any time, but remember, you can only use it between 5 AM and 8 AM.
Is the Kokrokoo Bundle Worth It?
If you’re an early riser who loves catching up on social media, reading emails, or making quick calls in the morning, the Kokrokoo Bundle is an absolute steal—perfect for continuing your browsing after using MTN Midnight Bundles.
For just GHS 1.24, you get enough data to scroll through TikTok, watch YouTube tutorials, or even send a couple of voice notes without stressing about your main data balance. Plus, those 20 free minutes of calls? Perfect for checking in with friends, family, or even making business calls before the day gets hectic.
So, why not give it a try? Activate your MTN Kokrokoo Bundle today and make your mornings brighter!
If you’re a night owl who loves streaming, downloading, or browsing when the world is quiet, MTN’s Midnight Bundle is a game-changer.
This affordable data plan gives you more for less between 12 a.m. and 5 a.m., making it perfect for students, remote workers, and anyone who enjoys uninterrupted late-night internet access. The best part? You can buy it in seconds using *138# or the MyMTN app. Here’s everything you need to know.
Flexi Bundle – This lets you choose how much data to buy, starting from as little as GHS 0.01 for 17.67 MB, up to GHS 2.99 for 5.16 GB.
Standard Bundle – This is a fixed package priced at GHS 3, giving you 7.27 GB of data.
You can buy as many as you need in a single night, and any unused data rolls over to the next day. Pretty cool, right?
How to Buy MTN Midnight Bundle
You have two simple ways to purchase the Midnight Bundle: via USSD code or the MyMTN app.
Option 1: Using USSD Code (*138#)
This is the best method if you don’t have internet access. Follow these steps:
Dial *138# on your phone.
Select 1 to proceed with buying a bundle.
Choose Midnight Bundles from the menu.
Press 1 to agree to the terms.
Select Buy for Self (or choose another option if buying for someone else).
Pick your preferred bundle option:
Flexi – Enter the amount you want to spend.
Standard – Select the GHS 3 package.
Confirm your purchase.
Select your payment method (MoMo, airtime, etc.).
Complete the payment, and you’ll receive a confirmation message.
Quick and easy!
Option 2: Using the MyMTN App
If you have internet access, this method gives you a smoother experience with a visual interface.
Open the MyMTN app on your phone.
Tap Shop at the bottom menu.
Select Data.
Scroll down and choose Others.
Tap Midnight Bundle and select either Flexi or Standard.
If choosing Flexi, enter the amount you want to buy and press Continue.
Choose Me (your number) and tap Next.
Select your payment method and complete the purchase.
Boom! Your Midnight Bundle is ready to use.
How to Check Your Midnight Data Balance
Keeping track of your data usage is just as easy. You can check your balance using either USSD or the MyMTN app.
Option 1: USSD Code
Dial *138#.
Select 1 to proceed.
Choose 99 for more options.
Select 7 for additional options.
Choose Check Bundle Balance.
A pop-up will display your data balance, including the Midnight Bundle.
Option 2: MyMTN App
Open the MyMTN app.
Tap on Data under the Balances section.
Your Midnight Bundle balance will be displayed along with your other data balances.
Easy, right?
Frequently Asked Questions (FAQs)
1. When can I use the Midnight Bundle?
The MTN Midnight bundle is only valid between 12 a.m. and 5 a.m.
2. Can I buy multiple Midnight Bundles in one night?
Yes, you can purchase multiple bundles if you need more data.
3. Does the MTN Midnight Bundle expire?
No, unused data rolls over to the next day.
4. Can I use the Midnight Bundle during the day?
No, the data can only be used between 12 a.m. and 5 a.m.
MTN’s Midnight Bundle is a fantastic way to enjoy affordable, high-speed data when the network is less congested. Whether you’re downloading movies, attending late-night Zoom calls, or simply scrolling through social media, this bundle has you covered. Just dial *138# or use the MyMTN app to get started!
Now go ahead and grab your Midnight Bundle—happy browsing!
Welcome to the Ultimate myMTN Ghana App Guide, where we’ll walk you through everything you need to know about using this handy app.
Whether you’re looking to buy data, manage your MoMo transactions, or find out how to get the best deals, this guide has got you covered. So, let’s dive in and make your mobile experience with MTN a breeze!
What is the myMTN Ghana App?
Think of the myMTN Ghana app as your personal MTN assistant right in your pocket. It’s a super helpful app for both Android and iOS devices that gives you access to all of MTN Ghana’s products and services. Whether you want to top up your airtime, check your data balance, manage your Mobile Money (MoMo), or even enjoy some cool entertainment, this app makes it all easy. Plus, it’s free to download and use!
How to Get Started: Install and Log In
Getting started with the myMTN Ghana app is quick and simple. Here’s what you need to do:
Download the App
For Android: Go to the Google Play Store and search for “myMTN Ghana.”
For iOS: Head to the Apple App Store and search for “myMTN Ghana.”
Log In
Open the app after it’s installed and tap on “Get Started”.
Enter your MTN mobile number.
You’ll receive a verification code (also known as OTP) via SMS. Enter that code into the app.
That’s it! You’re now logged in and ready to explore all the cool features.
What Can You Do with the myMTN Ghana App?
Now that you’re logged in, let’s talk about all the things you can do with the app. Whether you need more data for streaming or want to send money through MoMo, everything is at your fingertips!
1. Buy Data Bundles
If you’re always running out of data or looking for a specific package, the myMTN app makes it super easy to buy data. You can choose from:
Regular Data Bundles: For everyday internet use.
Mashup: The MTN Mashup Bundle is a flexible bundle that gives you both talk time and data.
Just4U: Just as the name implies, the Just4U bundle provides subscribers with specially customized offers just for you, based on your usage.
Social Media Data: If you love scrolling through social media apps like Instagram, Twitter, or Facebook, these bundles are perfect for you.
Call Abroad Offers: Stay connected with family and friends around the world! Whether it’s Canada, the USA, or India, there are special deals just for international calls.
Airtime Transfers: Send airtime to anyone, anytime—whether it’s another MTN number or a different network.
3. Mobile Money (MoMo) Services
Even though MTN has a dedicated MoMo app, the myMTN app lets you manage your MoMo account too. Here’s what you can do:
Check Your MoMo Balance: Keep track of how much money you have in your MoMo wallet.
Send Money: Transfer money to other MTN MoMo accounts, different mobile networks, or directly to a bank.
Withdraw Money: You can easily cash out your MoMo balance at an MTN service center.
Get Your Transaction History: Review your past transactions and even get detailed statements sent to your email.
4. Business Services
Running a business or thinking of starting one? The myMTN Ghana app also offers special services for businesses:
SME Plus: This is designed for small and medium businesses. It includes special voice, data, and SMS bundles, as well as free calls during certain hours.
Business Hub: Access useful tools for businesses, like Webwiz for website management or Business Messenger for easy communication.
5. Entertainment
The app isn’t just about work—it’s about fun too! You can enjoy entertainment services like:
Vuclip Videos: Watch movies and TV shows directly from the app.
Socca Chat: Stay updated with soccer news and chat with fellow fans.
Bookmate: Read eBooks from a huge library of titles.
6. Help and Support
Got a question or need help? The app’s Help and Support section makes it easy to reach out to MTN:
Contact Us: Get in touch with customer support via phone, email, or social media.
Find a Store: Need to visit an MTN office? The app shows you the nearest MTN stores, complete with their locations and contact details.
7. Other Cool Features
The app also offers a few more features that make it even better:
Request Broadband: Need fast internet at home? Request MTN fibre broadband and check if it’s available in your area.
Get an e-SIM: No physical SIM card needed—just request an e-SIM if your phone supports it.
Manage Subscriptions: View and manage all your subscriptions, like Caller Tunez, Data, or any MTN service.
Managing Your Account: Keeping Things in Check
One of the best things about the myMTN Ghana app is how easy it is to manage your account. You can check your data balance, voice minutes, and airtime right from the homepage. And if you ever run low on something, you can top up quickly or buy new bundles.
You can also view your usage history to see how much data you’ve used over the past week or month. This helps you stay on track and avoid surprises when it’s time to renew your bundles.
Troubleshooting: When Things Don’t Go as Planned
Sometimes, things don’t go smoothly—no app is perfect, right? If you ever run into trouble, here are a few things you can try:
Restart Your Device: A simple restart can sometimes fix minor issues.
Update the App: Check for updates in the app store. MTN often releases bug fixes or improvements.
Reinstall the App: If the app isn’t opening, try deleting it and installing it again.
Free Up Space: Make sure your phone has enough storage to run the app properly.
If these steps don’t solve the problem, you can always reach out to MTN customer support via the app.
Why You Should Use the myMTN Ghana App
The myMTN Ghana app is an easy way to stay in control of your MTN services. It helps you:
Save Time: Instead of calling customer service or going to a store, you can handle everything right from your phone.
Access Exclusive Deals: From special data bundles to business offers, there’s always something just for you.
Stay Updated: You can quickly check your balance, track your usage, and manage your services with ease.
And that’s it! With the myMTN Ghana app, you have everything you need to manage your MTN services in one place. It’s easy to use, packed with features, and designed to make your life simpler. Whether you’re a regular user, a business owner, or just someone who wants to save time, this app is your one-stop-shop for all things MTN.
So, next time you need to check your balance, buy a data bundle, or make a MoMo transfer, just pull up the myMTN Ghana app and get it done in seconds. It’s like having a mini MTN store in your pocket—how cool is that?
Learn how to activate, buy, and manage your MTN Data Zone Bundle in Ghana using the *135# shortcode with our easy guide.
Ever found yourself with no data or stuck with expensive calls when you need them most? We’ve all been there, right? Luckily, MTN Ghana has a solution that can help you save some cash and stay connected with the MTN Data Zone Bundle. Whether you’re chatting with friends, browsing the web, or checking social media, this bundle has some cool perks. Let me walk you through everything you need to know—step by step—on how to activate and use this bundle like a pro!
What Is the MTN Data Zone Bundle?
Before we dive into the “how-to,” let’s quickly go over what this bundle is all about. The MTN Data Zone Bundle is a super handy way to get discounts on calls and cheap data, which can save you a lot of money. With the Zone Bundle, you get up to 75% off on your call rates, so it’s perfect if you need to make those quick calls without burning through your airtime. Plus, it lets you grab affordable data bundles that can last you the whole day, but remember—they expire after 24 hours. So, use them wisely!
What Do You Need to Get Started?
To start using the MTN Data Zone Bundle, you need a few basic things:
A registered MTN number – This means your number should be registered under your name (simple stuff!).
A bit of airtime – You need to have enough balance on your phone to buy the bundle, so top-up your airtime first.
A little patience – Don’t worry; it’ll only take a few minutes to set up!
Got these things ready? Awesome, let’s get into the fun part: activating and using the bundle.
How to Activate the MTN Data Zone Bundle
Activating the MTN Data Zone Bundle is super simple. If you’ve ever used USSD codes before, you’ll be right at home here! Follow these steps:
Dial *135# on your phone. This is the magic code that opens up the MTN Zone menu.
Select “Activate.” Once you dial *135#, you’ll see a menu pop up on your screen. Choose the Activate option.
Wait for the confirmation message. After you activate it, you should get a message confirming that you’ve successfully joined the MTN Zone Bundle. Simple, right?
That’s it! You’re officially in the MTN Zone, and now you’re ready to buy your data bundle and enjoy those sweet savings.
How to Buy MTN Data Zone Bundles
Now that you’ve activated the MTN Zone, let’s grab some data! Here’s how you can buy data bundles through the MTN Zone:
Dial *135# again.
Yes, you’ll dial the same *135# to access the MTN Zone menu again.
Choose “Zone Bundles.” From the list, select the Zone Bundles option. This will take you to the data offers available.
Select “Data Zone Bundles.” Once you’re in the Zone Bundles section, choose Data Zone Bundles to view the different data options.
Pick the data bundle that suits you. You’ll see a list of data bundles with their prices and the amount of data you get. For example, you might see options like 281MB for GHS 2.09 or 692MB for GHS 4.19. Choose the one that fits your needs!
Confirm your purchase. After selecting your bundle, it will ask you to confirm the purchase. Select Yes to buy your data.
Once you’ve confirmed, your data bundle will be activated, and you’ll receive a text message with all the details of your new bundle. Yay, you’re all set!
How to Check Your MTN Data Zone Balance
It’s always good to know how much data you’ve used and how much is left, right? Here’s how you can check your MTN Data Zone balance:
Dial *135# again.
Choose “Zone Bundles.”
Select “Zone Balance” from the options. This will show you how much data you have left in your MTN Data Zone Bundle.
After that, you’ll get a message showing your remaining balance. If you’re running low, you can always buy more data bundles, so you’re never caught without.
MTN Data Zone Bundle Pricing
Now, let’s talk about the prices. MTN has recently updated the Zone Bundles, so the options are a little different than before. Here are the current offers:
281MB for GHS 2.09 (Good for browsing or light social media use)
425MB for GHS 3.19 (Perfect for browsing and checking emails)
692MB for GHS 4.19 (Great if you need to stream videos or download apps)
You can buy these bundles whenever you want, and they’re valid for 24 hours from the time of purchase, so use them up within a day!
Some Important Things to Know About MTN Data Zone Bundles
Before you start using the MTN Zone Bundle, here are a few quick things to keep in mind:
Expiry: Your data will expire after 24 hours. Make sure to use it up before it disappears!
Non-transferable: You can’t share your data or airtime with others. It’s all for you!
No MoMo payments: You can’t use MTN Mobile Money (MoMo) to pay for your Zone Bundles. Just make sure you’ve got enough airtime.
Unlimited? The MTN Zone Bundle isn’t unlimited, but it’s still a pretty great deal for the price.
Frequently Asked Questions (FAQs)
1. Can I share my MTN Zone Bundle with others?
Unfortunately, you can’t share your MTN Zone Bundle with other people. It’s a personal bundle just for you!
2. Is there an unlimited data option in the MTN Zone?
Nope, the MTN Zone Bundle doesn’t offer unlimited data. But it’s still a great deal for the amount of data you get!
3. What if I want 1GB of data?
Currently, there’s no 1GB data bundle in the MTN Zone. But don’t worry! You can check out other data options through the *138# or *141# codes for different bundles.
The MTN Data Zone Bundle is a great way to save money on data and calls when you’re low on airtime. It’s affordable, easy to use, and gives you great discounts on calls, plus cheap data bundles for your daily needs. Whether you’re making calls or browsing the web, this bundle helps you stay connected without the stress of running out of credit.
So, next time you find yourself needing some extra data or airtime, remember: MTN’s Zone Bundle has your back. Just dial *135#, pick your bundle, and you’re good to go!
We all know the feeling of picking up our phone, realizing the battery’s fine, but the airtime? Not so much. It’s like having a car without gas—you can’t go anywhere, and your phone’s practically useless without it. But don’t worry! Recharging your Glo airtime is super simple, and I’m here to walk you through it like we’re chatting over a cup of coffee.
Why You Need Airtime
First off, let’s talk about why airtime is so important. Without airtime, you can’t make calls, send texts, or use mobile data. Think of it as fuel for your phone. Whether you’re calling a friend, sending a quick text, or binge-watching videos on YouTube, airtime makes it all possible. It’s pretty much essential for making sure your phone does what you want it to do.
Now, let’s jump into how you can recharge that airtime quickly and easily, no matter where you are!
Different Ways to Recharge Your Glo Airtime
There are a few ways to recharge your Glo airtime, and I’m going to break them down for you step by step. We’ll start with the easiest method and work our way through the others.
1. Recharge via USSD Code
This is probably the quickest way to recharge, and it’s available even if you don’t have internet access. Here’s how to do it:
Step 1: Scratch the back of your Glo recharge card to reveal the 15-digit PIN (like peeling the silver panel off a lottery ticket).
Step 2: Open your phone’s dialer and type in the following code: *311*<15-digit PIN># For example, if your PIN is 12345 67890 12345, you would dial: *311*123456789012345#
Step 3: Hit send, and you’ll get a message confirming your recharge.
That’s it! You’re ready to call, text, or surf the web.
2. Recharge with Glo 4X Method
The 4X method is pretty similar to the USSD method, but it uses a different code. Some people find this method easier, so I’m including it here:
Step 1: Scratch the card to reveal your 15-digit PIN.
Step 2: Dial: *323*<15-digit PIN># For example: *323*123456789012345#
Step 3: Hit send, and your airtime will be added to your balance!
You’ll get a confirmation message letting you know everything worked fine. If you’re someone who likes having options, you might prefer this one.
3. Recharge Online (No Scratch Cards Needed!)
If you don’t want to deal with scratching cards or if you’re out and about, online recharging might be the way to go. It’s also really fast, and the best part? You don’t need to leave your house!
Step 2: Tap on the “Recharge” button and select “Airtime”
Step 3: Tap on the “Recharge Now” button
Step 4: Enter your Glo phone number.
Step 5: Choose the amount of airtime you want.
Step 6: Pay through your bank or payment platform of choice.
Step 7: Wait for the confirmation message, and boom—you’re recharged!
This is a great option if you’re busy or don’t have a physical recharge card on hand.
4. Recharge Through Your Bank Using USSD
Some of you might not even know this, but you can recharge using USSD codes from your bank. Here’s how it works:
Step 1: Dial *805# on your phone.
Step 2: Follow the prompts, select your bank, and then choose how much airtime you want to buy.
Step 3: After confirming the details, the airtime will be added to your account.
It’s pretty similar to using online recharge, but it’s nice because you can do everything right from your phone.
Common Issues with Glo Airtime Recharge
While the methods are simple, sometimes things can go wrong. Here are a couple of issues you might face and how to fix them:
1. Invalid Recharge Error
This usually happens when you mistype the 15-digit PIN or try to recharge on the wrong network. Make sure you’re entering the correct digits and that you’re using a Glo recharge card for your Glo phone number.
Solution: Double-check the PIN, and make sure you’re dialing the correct code. If everything’s right but it still doesn’t work, give Glo’s customer service a call for help.
2. Insufficient Balance Error
Sometimes, your airtime may not reflect right away, especially if there’s network congestion or an issue with the recharge platform.
Solution: Wait a few minutes and check your balance again by dialing #310#. If the issue persists, try recharging again or reach out to Glo support.
What Can You Do with Your Glo Airtime?
Now that you’re all recharged, let’s talk about what you can actually do with that airtime. The fun part!
Make Calls: Whether it’s a quick check-in with a friend or a long chat with family, you need airtime to talk.
Send Text Messages: Sometimes, a text is all you need, and having airtime lets you stay in touch.
Access the Internet: Want to check social media or watch videos? Airtime lets you buy data plans.
Gift Airtime: You can send airtime to someone else as a gift—pretty cool, right?
So, there you have it! Whether you’re at home, in a store, or out on the go, there’s a way for you to recharge your Glo airtime in minutes. The key is choosing the method that works best for you, and now you know all the options.
Airtime is more than just a top-up; it’s your phone’s fuel to make calls, send texts, and surf the web. And when you’re recharged, you’re always ready to stay connected!
Now, next time you realize you’re running low, you’ll know exactly what to do. Quick, easy, and hassle-free—just the way it should be.
If you’re setting up MTN internet on your phone, you need the right Access Point Name (APN) settings. Follow this guide to configure your device for seamless browsing, whether you use Android or iPhone.
MTN Ghana APN Settings Summary
Setting
Value
Name
MTN
APN
internet
MCC
620
MNC
01
APN Type
default, supl, email
APN Protocol
IPv4
APN Roaming Protocol
IPv4
Bearer
Unspecified
Setting Up MTN Internet on Android
Go to Settings > Network & Internet.
Tap Mobile Network > Advanced > Access Point Names (APN).
Tap the + sign to add a new APN.
Enter the APN settings from the table above.
Save the settings and set this APN as default.
Restart your phone if necessary.
Setting Up MTN Internet on iPhone
Go to Settings > Mobile Data > Mobile Data Network.
Under APN, enter internet.
Leave Username and Password blank.
Exit settings (changes are saved automatically).
Restart your iPhone if needed.
MTN Ghana MMS Settings
Setting
Value
Name
MTN Ghana MMS
APN
mtn mms internet
MMSC
172.17.3.7
MMS Proxy
172.17.3.5
MMS Port
8080
MCC
620
MNC
01
APN Type
mms
APN Protocol
IPv4
APN Roaming Protocol
IPv4
Setting Up MMS on Android
Go to Settings > Mobile Network > Access Point Names.
Add a new APN and enter the MMS settings above.
Save and set it as default.
Setting Up MMS on iPhone
Go to Settings > Messages.
Enable MMS Messaging.
How to Improve MTN Internet Speed in Ghana
Update your phone’s software to ensure optimal performance.
Clear cache to free up storage and improve speed.
Close background apps to reduce bandwidth usage.
Use a signal booster if you’re in a low-signal area.
Frequently Asked Questions (FAQs)
1. What’s the APN for MTN Ghana?
The APN is internet.
2. How Do I Know if My SIM Is 4G-Enabled?
Check Settings > Mobile Network > Preferred Network Type. If you see 4G or LTE, your SIM supports 4G.
You’ve probably heard that creating a great article title is important. It helps grab people’s attention and makes them want to click and read more. But did you know there’s another title lurking behind the scenes that could help your article get more views and clicks? It’s called the meta title, and although it might not be as visible as your main article title, it plays a big role in getting your content found on the internet.
If you’ve ever wondered what exactly the meta title does or why it matters for SEO (Search Engine Optimization), you’re in the right place. Today, we’re going to dive into why using a different meta title from your article title can be a smart move for your website and help you get more traffic.
Let’s break it down step by step. Ready? Let’s go!
What’s the Meta Title, Anyway?
Before we dive into how it works, let’s first understand what a meta title actually is. Think of the meta title as the title of your article for search engines. It’s like your article’s headline, but it doesn’t always look the same as the title that appears on your page. When you search for something on Google or another search engine, the meta title is the text you see in the search results. It appears as a clickable link that leads you to your article or website.
For example, imagine you’re searching for tips on “How to Train Your Dog.” You might see a result that says:
“10 Easy Dog Training Tips for Beginners – Pet Care Guide”
That’s the meta title! It’s a little different from what the actual article title might say, but it’s carefully written to encourage you to click.
Why Does the Meta Title Matter?
Here’s the thing: Your meta title helps search engines decide what your article is about, which can impact how it ranks on search results pages. If the meta title doesn’t match the content of your article or it’s not optimized for the right keywords, you might not show up in searches for topics you want to be found for.
But wait, there’s more! The meta title also affects how people decide whether to click on your link when they see it in the search results. So, not only does it help your article rank better, but it can also encourage people to actually click and read. Let’s look at how all this works.
1. Targeting Different Keywords with Your Meta Title
Here’s a cool trick: You can use your meta title to target keywords that might not quite fit in your main article title. This helps you show up for more search queries, which means more people might find your article.
Let’s say you’ve written an article titled “Tips for First-Time Dog Owners.” That’s a great title for your readers, but it might not be as optimized for search engines. What if you changed the meta title to something like:
“Essential Dog Care Tips for First-Time Owners – Dog Training Guide”
This meta title targets keywords like “dog care tips” and “dog training guide,” which could help your article show up for searches related to training dogs, not just owning them.
By carefully selecting keywords for your meta title, you can reach more people who are searching for what you’re writing about, even if they don’t use the exact words from your article title.
2. Boosting Your Click-Through Rate (CTR)
Your meta title is often the first thing people see when they search for something on Google or other search engines. So, it needs to be enticing—a little like a sign in a store window that makes you want to go inside.
A great meta title can convince someone to click on your article instead of the one right next to it. You want to make sure your meta title is clear, interesting, and useful to the person searching.
Imagine you’re searching for a recipe for chocolate chip cookies. You might see two results:
“Chocolate Chip Cookie Recipe”
“The Best Homemade Chocolate Chip Cookie Recipe You’ll Ever Try”
Which one sounds more exciting? The second one, right? It grabs your attention and makes you think, “I have to click on this!” That’s the power of a well-crafted meta title. It’s all about making the searcher want to find out more.
3. Making the Most of Character Limits
Google and other search engines have a character limit for meta titles, usually around 60–70 characters. If your meta title is too long, it might get cut off in the search results, which means people might miss out on key information.
So, when you’re writing your meta title, you need to be smart about how you use those characters. This is one reason why you might want to make your meta title a little different from your article title. Your article title might be longer or more detailed, but your meta title should be punchy and concise.
“Multi TV Installation Guide: Setup, Channels & Frequencies”
It’s still clear, and it fits within the character limit, making it more likely to show up properly in search results.
4. Better Alignment with Search Intent
When people search for something on Google, they’re looking for answers. The meta title is your chance to show them exactly what they’re going to find in your article. If the meta title matches what they’re hoping to see, they’ll be more likely to click.
Let’s say someone searches for “dog training tips for puppies.” If your meta title is “Training Tips for Puppies: A Beginner’s Guide,” they’ll know right away that your article is what they’re looking for. On the other hand, if your meta title is “How to Take Care of Your Dog” (which is related but less specific), they might skip your link and click on one that’s more tailored to their exact search.
By tweaking your meta title to match the search intent of the person looking for information, you improve your chances of ranking higher in search results and getting more clicks.
5. Avoiding Keyword Cannibalization
Keyword cannibalization is when you use the same keywords for multiple articles on your site. This can confuse search engines, because they might not know which article to rank for that keyword. By creating different meta titles for similar articles, you can avoid this problem.
For example, let’s say you have two articles about dog training:
“The Ultimate Guide to Dog Training for Beginners”
“10 Tips to Train Your Dog Like a Pro”
If both articles have the same meta title, like “Dog Training Tips,” search engines might not know which one to rank. But if you use different meta titles, like:
“Dog Training for Beginners: A Complete Guide” for the first one
“Expert Tips for Professional Dog Training” for the second one
It’s clear to search engines (and readers) that these articles are different, even though they’re both about dog training.
In the world of SEO, the meta title might not get as much attention as the article title, but it’s still super important. It helps your article rank better, encourages people to click on your link, and makes sure your content reaches the right audience. By crafting a meta title that’s different from your article title, you can target more keywords, improve your click-through rates, and keep everything aligned with what people are searching for.
So, the next time you’re writing an article, don’t forget about your meta title! It’s a small change that can make a big difference in how many people find and read your content.
FAQs About Meta Titles and SEO
1. What is the difference between title and meta title in SEO?
The title is what appears on your webpage, usually as a headline at the top of an article or blog post. The meta title, on the other hand, is the title that search engines display in search results. The meta title is often written differently to optimize for SEO and encourage more clicks, while the article title is usually written to engage readers once they land on the page.
2. Does changing the meta title affect SEO?
Yes! Changing the meta title can impact your search rankings and click-through rate (CTR). A well-optimized meta title with relevant keywords can help improve your ranking on Google, while a more compelling and click-worthy title can increase the number of people who click on your link in search results.
3. Why is a site’s meta title important when it comes to SEO?
The meta title helps search engines understand what your page is about, making it easier for your content to appear in relevant searches. It also influences whether people click on your link when they see it in search results. A strong, well-optimized meta title improves visibility, attracts more visitors, and enhances your site’s overall SEO performance.
4. What is the meta title tag in SEO?
The meta title tag is an HTML element (<title>) that defines the title of a webpage for search engines and browsers. It appears in search engine results as the clickable headline for a webpage. This tag is placed inside the <head> section of the HTML code.
5. Do meta tags matter for SEO?
Yes, but some matter more than others. The meta title and meta description tags are still important for SEO because they impact how your page appears in search results and influence click-through rates. However, other meta tags, like the meta keywords tag, are no longer used by Google for ranking purposes.
6. Is the meta tag placed between <title> and </title>?
No, the meta tag is separate from the title tag. The <title> tag is used for the meta title, while other meta tags (such as meta descriptions and meta keywords) are placed within the <head> section but outside of the <title> tag.
For example:
<head>
    <title>Best Dog Training Tips for Beginners</title>
    <meta name="description" content="Learn essential dog training tips to help your puppy become well-behaved.">
</head>
The <title> tag contains the meta title, while the <meta> tag provides additional information like the page description.
MTN Fibre Broadband is one of the most popular internet options in Ghana. If you’re looking for a fast and reliable internet connection, this might be the solution you’ve been searching for. But what exactly is MTN Fibre Broadband, how much does it cost, and where can you use it? Let’s break it all down in a way that’s easy to understand!
What is MTN Fibre Broadband?
Imagine that the internet is like a big highway for data to travel. MTN Fibre Broadband uses something called fibre optic cables—thin strands of glass or plastic—to send this data super fast. These cables work by using light signals to carry data, which makes them incredibly fast and reliable. Unlike other types of internet, fibre optic cables are great at keeping the speed high, even if you’re far away from the source.
How is it Different from Other Internet Options?
You may have heard of MTN’s Turbonet router or pocket MiFi, which also give you internet access. But they’re a bit different from MTN Fibre Broadband. Here’s a quick comparison to help you understand:
MTN is constantly expanding the areas where Fibre Broadband is available. It’s a great option if you live in cities, but if you’re outside of the big cities, it might not be available just yet. Here are some of the areas where you can get MTN Fibre Broadband:
Greater Accra: Adenta, East Legon, Labone, Cantonments, and more
Kumasi: Atasomanso
Other Locations: Check the MTN website for updates and new areas!
Before you commit, it’s always a good idea to check availability in your area on the MTN website or through their myMTN app.
MTN Fibre Broadband Pricing and Plans
MTN offers several Fibre Broadband packages to suit different needs. Whether you’re a casual user who just needs to check emails or a heavy user who streams videos all day, there’s a plan for you. Let’s dive into the main options.
1. Akwaaba Offer (For New Users)
This is a special deal for people who are new to MTN Fibre Broadband. You get installation and a data bundle, and there are a few options to choose from:
This plan offers specific amounts of data at fixed prices. Choose the one that fits your usage needs:
5.24GB for GHS 30
8.75GB for GHS 48
9.31GB for GHS 150
195.97GB for GHS 300
3. Unlimited Bundles
If you don’t want to worry about running out of data, this plan gives you unlimited access, though your speed will depend on the package you choose:
10Mbps for GHS 754.40
20Mbps for GHS 1,104
30Mbps for GHS 1,972.25
45Mbps for GHS 4,059.50
60Mbps for GHS 4,634.50
4. Flexi Bundle
The Flexi Bundle is super flexible. You can buy any amount of data you want, starting from GHS 25 to GHS 5,000. It’s a great option if you have unique needs or want to customize your plan.
How Fast is MTN Fibre Broadband?
MTN Fibre Broadband gives you a super fast internet connection. With speeds up to 60 Mbps, it’s perfect for things like streaming movies, playing games online, and working from home. In fact, tests have shown download speeds of around 55.05 Mbps and upload speeds of 62.21 Mbps—that’s pretty fast!
If you go for the Unlimited Bundle, you’ll get speeds that vary depending on which plan you choose. The slowest speed is 10Mbps, which is still pretty good for browsing and video calls. The fastest is 60Mbps, which is great for heavy usage.
How to Get MTN Fibre Broadband
Getting MTN Fibre Broadband is easy—here’s how to do it:
Visit the MTN Broadband Website: Check if Fibre Broadband is available in your area.
Use the myMTN App: You can also request broadband through the app. Just launch it, go to More, then select Request Broadband and follow the steps.
Call MTN: You can also call MTN customer service to find out more and get started.
Once you’re ready to go, installation costs GHS 150, but there are often promotions where this fee is bundled into the cost of the plan, so you might not have to pay it separately.
How to Buy Data on MTN Fibre Broadband
There are a few ways to buy data for your Fibre Broadband:
Through the myMTN App:
Open the app, select Data Bundles, then choose Fibre and Turbonet Bundles.
Pick your plan, choose your payment method, and you’re all set!
Checking your data balance is simple! You can either:
Open the myMTN app and look for your balance under Balances.
Dial *5057#, then select Check Balance.
Troubleshooting: How to Connect to MTN Fibre Broadband
Connecting to MTN Fibre Broadband is pretty easy. Just follow these steps:
Turn on the WiFi on your device (like your phone or laptop).
Find the name of your Broadband or Router in the WiFi options.
Select it and enter the password to connect.
And that’s it—you’re online and ready to browse!
MTN Fibre Broadband is a great choice for anyone looking for fast, reliable internet in Ghana. With flexible pricing, fast speeds, and the convenience of multiple ways to buy data, it’s a top contender for your home or office internet. Whether you’re just browsing, streaming movies, or working from home, MTN Fibre Broadband has a plan that’s right for you.
So, check if it’s available in your area, choose the right package for you, and enjoy fast, seamless internet!
In today’s digitally-driven world, the landscape of work, especially in the tech industry, is rapidly evolving. With the rise of remote work, software developers across Africa have an unprecedented opportunity to connect with global job markets right from their homes. This guide will walk you through finding remote software development opportunities and provide insight into potential earnings.
Best Websites for Finding Remote Developer Jobs
Finding the right platform is the first step towards landing a great remote software development job. Here are some top websites where you can begin your search:
WeAreDevelopers.com: This site offers a plethora of job listings specifically targeted at developers. It’s a goldmine for those looking to work with European and global tech companies.
Remote.co: A robust resource for finding remote jobs across various sectors, including tech. The site is well-curated and updated regularly with new openings.
WeWorkRemotely.com: As one of the largest remote work communities, WeWorkRemotely provides a wide range of job postings that cater specifically to software developers.
Remotive.io: This platform is fantastic for developers interested in startups and tech companies that are fully remote. The site also offers valuable resources to help you succeed in the remote work environment.
Tunga.io: Particularly beneficial for African developers, Tunga.io focuses on connecting talent from Africa with tech companies in need of skilled developers.
Glassdoor: While not exclusively for remote jobs, Glassdoor offers a comprehensive listing of job opportunities, including remote positions. It also provides reviews and salary data, which can be incredibly helpful.
How Much Do Remote Software Developers Make?
The earning potential for remote software developers can vary widely based on several factors, including geographical location, experience, the specific technologies mastered, and the nature of the contract or company hiring. Generally, salaries for remote developers can range from moderate to highly competitive, reflecting traditional in-office roles.
Entry-Level Developers: Beginners without much experience might find opportunities that offer learning on the job with starting salaries ranging from $15,000 to $30,000 annually.
Mid-Level Developers: Developers with a few years of experience and a good grasp of multiple programming languages or specializations in high-demand technologies can expect salaries ranging from $30,000 to $70,000.
Senior Developers: Experienced developers who can manage teams, architect software solutions, or have expertise in niche areas might earn anywhere from $70,000 to over $100,000 annually.
Maximizing Your Chances
While knowing where to look is crucial, securing a remote job also requires you to stand out. Here are a few tips to enhance your visibility and appeal to prospective employers:
Build a Strong Portfolio: Showcase your projects, especially those that you’ve taken from concept to completion. Include a variety of works that demonstrate your versatility and skill depth.
Continuously Learn: The tech field is ever-evolving. Keeping up with the latest programming languages, tools, and technologies is crucial.
Cultural Fit and Communication: For remote roles, employers often look for candidates who can seamlessly integrate into their teams. Demonstrating strong communication skills and an ability to work independently are crucial.
Optimize Your Application: Tailor your resume and cover letter to highlight your remote work skills and previous remote work experience if any.
Frequently Asked Questions (FAQs)
1. What are the best websites to find remote software development jobs in Africa?
Some excellent websites include WeAreDevelopers.com, Remote.co, WeWorkRemotely.com, Remotive.io, Tunga.io, and Glassdoor.
2. How much can I expect to earn as a remote software developer in Africa?
Salaries vary widely but typically range from $15,000 to over $100,000 annually, depending on experience and expertise.
3. What skills increase my chances of getting a remote software development job?
Proficiency in high-demand programming languages, experience with popular development tools and platforms, strong communication skills, and a proven track record with remote work can significantly enhance your prospects.
4. How can I stand out when applying for remote developer jobs?
Build a strong portfolio, keep your skills up-to-date, ensure your application materials are customized for each job, and showcase any previous remote work experience.
With these tips and resources, you’re well on your way to finding a rewarding remote software development job that not only pays well but also offers the flexibility and challenges that come with working from anywhere.
Alright, let’s talk about something super important but ridiculously easy to forget—your BVN! If you’ve ever tried to complete a bank transaction and got stuck because you couldn’t remember those 11 digits, you’re not alone. The good news? You don’t need to visit a bank or dig through old messages to find it. You can check your BVN right from your phone, no matter what network you use—MTN, GLO, Airtel, or 9mobile.
Now, let’s break it down in a way that makes perfect sense.
What is a BVN, and Why Does It Matter?
Think of your BVN (Bank Verification Number) as your financial fingerprint. It’s a unique 11-digit number assigned to you when you register with any Nigerian bank. Just like your fingerprints are one-of-a-kind, your Bank Verification Number ensures that only you can access your bank account, no matter how many banks you use. It helps prevent fraud, identity theft, and all that messy stuff banks deal with daily.
In simple terms: No Bank Verification Number, no banking.
So, whether you’re opening a new account, applying for a loan, or making a big transfer, you’ll likely need to provide your Bank Verification Number. That’s why it’s important to always have it handy!
How to Check Your BVN on Any Network
Here’s the easiest way to check your BVN on any mobile network in Nigeria:
Pick up the phone you used to register for your BVN (this is important—if you try using a different line, it won’t work!).
Dial *565*0# on your phone.
Wait a few seconds for your 11-digit BVN to pop up on your screen.
Write it down or save it somewhere secure (you don’t want to keep paying to check it again and again!).
That’s it! Super simple, right?
Heads Up: It’s Not Free
Checking your BVN costs ₦20 per request, so try not to do it more than necessary. If you’re the forgetful type, take a screenshot, save it in your notes, or write it down in a safe place.
Common Issues and How to Fix Them
Sometimes, things don’t go as smoothly as expected. If you run into issues, here’s what might be happening:
• You’re using the wrong phone number – Remember, you must use the number linked to your BVN registration. If you registered your Bank Verification Number with an MTN line, using an Airtel line won’t work.
• You have insufficient balance – If you don’t have at least ₦20 airtime, the request won’t go through. Make sure you have enough credit before dialing the code.
• Network issues – If the code doesn’t work immediately, don’t panic. Wait a bit and try again, especially if your network signal is weak.
• Your line isn’t registered for BVN – If your phone number was never linked to your Bank Verification Number, you might need to visit your bank to update your details.
Frequently Asked Questions (FAQs)
1. Can I check my BVN online?
No, Bank Verification Numbers aren’t publicly available online for security reasons. However, some banks allow you to check through their mobile apps.
2. Is my BVN the same across all my bank accounts?
Yes! No matter how many bank accounts you have, your Bank Verification Number stays the same.
3. Can I change my BVN?
Nope. Your Bank Verification Number is yours for life. But if there’s an issue, like a name mismatch, you can update your details at your bank.
4. Is it safe to share my BVN?
Not really. Your Bank Verification Number alone won’t let someone steal your money, but combined with other personal details, it could be risky. Only share it when necessary.
Your BVN is a big deal, but checking it doesn’t have to be. With one simple USSD code (*565*0#), you can find your Bank Verification Number in seconds—no long queues, no stress. Just make sure to use the right phone number, have ₦20 airtime, and keep your Bank Verification Number safe.
Now that you know how to check your BVN anytime, anywhere, you’ll never have to panic when a bank form asks for it. Easy, right?
Have you ever wondered how banks know it’s really you when you walk in or make a transaction? Well, it’s all about something called your Bank Verification Number (BVN). In this article, we’ll explore exactly what a BVN is, why it’s so important, and how it helps keep your money safe.
Imagine your BVN as a super important, secret code that only belongs to you, and it helps banks and other financial institutions know exactly who you are. Let’s break this down in a way that’s simple to understand!
What Is a BVN?
A Bank Verification Number is an 11-digit number that acts like your bank ID. It’s a special number that’s unique to you, like a fingerprint, and it’s used across all banks in Nigeria. The goal of the BVN is to help keep your banking experience safer by ensuring that only you can access your bank accounts and make transactions.
Think of it this way: In school, you probably had a student ID, right? Your BVN is a little like that, but for the banking world. It’s like your passport to the banking system. If you’ve got a Bank Verification Number, you don’t need to keep showing your ID every time you go to the bank. It’s that important!
Why Do You Need a BVN?
Let’s talk about why BVNs were introduced in the first place. Have you heard of something called identity theft? It’s when someone pretends to be you to steal your money. Scary, right? The Bank Verification Number is there to protect you from people who might try to trick the system and take your hard-earned cash.
By linking your biometrics (like your fingerprints and face) with a unique 11-digit number, banks can verify that it’s really you making the transaction. It’s much harder for someone to steal your money when the bank can make sure it’s you.
One Person, One BVN
Here’s a rule to remember: One person gets only one BVN. You might be tempted to think, “Hey, if I open an account at another bank, maybe I can get a new BVN.” But nope, that’s not how it works. Your Bank Verification Number is attached to you and all the accounts you have, no matter which bank you’re using.
So, if you open an account at Bank A, Bank B, and Bank C, they’ll all be linked to the same BVN. This makes banking easier because all your accounts can be tracked under one unique number.
But here’s the thing—don’t ever try to get more than one BVN. It’s illegal and could cause major problems. So, just stick to the one you’ve got.
How Do You Get a BVN?
Now you might be wondering, “How do I actually get my BVN?” Well, it’s pretty simple! You’ll need to visit a bank (yes, physically), because you can’t register for a BVN online. When you get to the bank, they’ll ask for your personal details, take your fingerprints, and snap a photo of you. All this info helps to make sure no one can steal your identity.
Once you’ve done all that, you’ll get your 11-digit BVN sent to your phone via SMS in a day or so. It’s that easy! You can then link that BVN to your other bank accounts.
What Happens If I Change My Details?
People’s details change from time to time—maybe you move to a new house, change your name, or get a new passport. Don’t worry! If anything changes about your details, you can go back to the bank where you registered your BVN and update your information. The great news is that your BVN stays the same, no matter what changes.
How Does BVN Protect You?
Remember the biometric system we talked about earlier? It’s not as fancy as a retina scan, but it’s still pretty smart. The bank takes your fingerprints and your photo, and these are stored in the bank’s system along with your BVN.
This is where it gets cool: If someone tries to steal your bank account and pretend to be you, the bank will compare their fingerprints and face to the ones they have on file. If they don’t match, the fraudster can’t get into your account. That’s why it’s so important to protect your BVN—because it keeps your accounts safe.
What If I Forget My BVN?
It happens to the best of us—sometimes we forget things. If you forget your BVN or misplace it, don’t panic! You can always go back to the bank where you registered your BVN and ask them to look it up for you. It’s just one of those things that’s easy to fix.
BVN and International Banking
Another cool thing is that Bank Verification Numbers aren’t just useful for Nigerian banks. International banks are starting to recognize the BVN system too, so it can help you when you travel abroad or make transactions with international banks.
What If I Don’t Have a BVN?
Okay, so here’s the catch: If you don’t have a Bank Verification Number, you won’t be able to make certain banking transactions. Banks are serious about this. For example, if you want to withdraw money from a Bureau de Change or do international money transfers, they’ll ask for your BVN.
But don’t worry—if you still don’t have one, you won’t lose access to your accounts. You’ll just be limited to what you can do with them until you get that number.
The BVN Card
After you get your BVN, some banks will issue you a BVN card. Think of it like your ATM card, but with your Bank Verification Number on it. This card will make your banking experience much easier because, instead of showing different ID cards every time, you can simply flash your BVN card. Pretty cool, right?
What’s the Bottom Line?
Your Bank Verification Number (BVN) is much more than just an 11-digit code. It’s your personal ID in the banking system, and it keeps your accounts safe from fraud. Whether you’re withdrawing cash, making payments, or applying for a loan, your BVN will make banking more secure and faster.
To sum it up:
One person = one BVN
Your BVN is unique to you and linked to all your accounts
It helps protect your accounts from fraud
You can update your details at the bank if needed
And if you lose or forget your Bank Verification Number, it’s easy to find it again!
So, next time you hear someone talking about their BVN, you’ll be able to confidently explain how it works and why it’s so important. And remember, your Bank Verification Number is like your special ID card—take care of it and keep it safe!
Ready to Get Your BVN?
Head to your nearest bank today, and get your unique BVN so you can enjoy safe, smooth banking. No more worries about fraud or identity theft—just secure, easy transactions!
Let’s make banking safer, one Bank Verification Number at a time!
Have you ever wanted to send some of your mobile data to a friend or family member on MTN? Maybe your sibling ran out of data while streaming their favorite show, or your best friend just needs a little extra for WhatsApp. If you’re wondering how to transfer data from MTN to MTN in Ghana, here’s the deal—you can’t. But don’t worry, there’s still a way to help!
Wait… MTN Data Transfer Isn’t Available?
That’s right. MTN Ghana no longer allows direct data transfers between users. It might sound disappointing, especially if you’ve done it in the past, but MTN has made sure there’s still a simple way to share data with others. Instead of transferring, you can buy data bundles directly for someone else. It works just as well, and the best part? It’s super easy.
How to Buy Data for Another MTN User in Ghana
Think of it as buying airtime for someone, but instead, you’re sending them data. Whether your friend needs a small bundle for a quick internet check or a big package for heavy browsing, here’s how you can do it:
Method 1: Using USSD Code (138#)
This is the fastest way to send data. Just follow these steps:
Dial *138# on your phone.
Select “Proceed to Buy Bundle.”
Choose “Buy Data Bundle.”
Select option 2 to buy for someone else.
Enter the recipient’s phone number and confirm it.
Pick the data bundle you want to buy.
Confirm your selection.
Choose your payment method (MoMo or airtime balance).
If you’re using MoMo, enter your PIN when prompted.
You’ll receive a confirmation message once the purchase is successful.
Easy, right? Now, your friend has data, and they can keep browsing without interruption!
Method 2: Using the MyMTN App
If you prefer using an app instead of dialing codes, MTN has got you covered.
Open the MyMTN App (Download it from the Google Play Store or App Store if you don’t have it yet).
You’ll get a confirmation message once the transaction is successful.
MTN Data Bundles You Can Buy for Others
MTN Ghana offers different types of data packages you can gift to friends and family:
Standard Data Bundles – These are your regular data packages that work for browsing, social media, and streaming.
MTN Mashup – The MTN Mashup bundle is a combination of data and voice minutes. Perfect if the person needs both internet and call time.
AFA Bundle – The AFA Bundle is a combination of data, voice minutes, and SMS. Ideal for people who love texting and calling as much as they browse.
FAQs About MTN Data Transfers
1. Can I transfer my MTN data bonus to another user?
No, MTN doesn’t allow you to share bonus data with others.
2. Can I share my MTN data with someone on another network?
No, data sharing only works within MTN. You can’t send data to AirtelTigo or Vodafone users.
3. What if I send data to the wrong number?
Unfortunately, data purchases are non-refundable. Double-check the recipient’s number before confirming the transaction.
Even though MTN Ghana no longer offers direct data transfers, you can still help your loved ones stay connected by buying data for them. It’s quick, easy, and just as effective. Next time a friend runs out of data, you’ll know exactly what to do!
So, go ahead—be the hero your friends and family need. Happy browsing!
Imagine you and your friends have a secret club where calling each other costs way less than usual. That’s kind of what MTN Ghana’s AFA Bundle is like—but for professionals! It’s a special bundle offered by MTN in partnership with Prepeez Limited, designed to help people like farmers, traders, healthcare workers, and drivers stay connected affordably.
With the AFA Bundle, once you’re signed up, you get extra minutes to call other registered members in your group, plus data, SMS, and voice minutes to use however you like. And the best part? It’s pretty cheap!
AFA Bundle Packages and Pricing
You can choose between weekly and monthly bundles, with or without data. Here’s a simple breakdown:
Package
Cost (GHS)
On-net Minutes
Off-net Minutes
CUG Minutes*
SMS
Data
Weekly (No Data)
3
60
7
200
10
–
Weekly (With Data)
3
45
7
200
10
100MB
Monthly (No Data)
10
250
30
500
25
–
Monthly (With Data)
10
180
30
500
25
250MB
*CUG (Closed User Group) minutes let you call other AFA bundle users at no extra cost.
Quick Example:
Think of CUG minutes like a family plan. If you and your coworkers all sign up for AFA, you can talk to each other a lot more without worrying about running out of airtime.
How to Register for the AFA Bundle
Here’s where it gets a bit tricky. You can’t just dial a code and sign up like before. Now, you need to register through Prepeez Limited or an AFA agent.
Registration Steps:
Contact Prepeez Limited directly (if you can reach them). Their phone number is 030 397 0927, and their email is [email protected].
If you don’t hear back from them, you can register through an AFA agent for a small fee (between GHS 10 and GHS 20).
Be careful—only use agents recommended by people you trust to avoid scams.
How to Buy an AFA Bundle
Once you’re registered, buying a bundle is super easy:
Dial *1848#.
Choose “Buy AFA Bundle.”
Select the package you want (weekly or monthly, with or without data).
You’ll get a confirmation SMS once your purchase is successful.
How to Become an AFA Agent
Want to make some extra cash? You can become an AFA agent and help others sign up while earning commissions.
Unfortunately, MTN doesn’t handle this directly—it’s managed by Prepeez Limited. Since reaching them can be difficult, your best bet is to visit an MTN office for more details.
Frequently Asked Questions (FAQs)
1. Can I share my AFA bundle with other MTN users?
Nope! The AFA bundles can not be shared. They are strictly for the use of the one who purchased it.
2. Does unused data or minutes roll over?
No, any unused balance for the MTN AFA bundle does not roll over. It expires at the end of the subscription period.
3. How do I check my AFA bundle balance?
To check your AFA bundle balance, just dial *124#, and your remaining balance will pop up on your screen.
4. Can I buy multiple AFA bundles in a month?
Yes, you can buy as many AFA bundles you need! There are no restrictions when buying more than one bundle in a month.
The MTN AFA bundle is a great way to save money while staying connected. Whether you’re a market trader calling suppliers, a farmer coordinating with buyers, or a driver staying in touch with customers, this bundle keeps your communication costs low.
Just be sure to register with a trusted source and choose the best package for your needs. Ready to get started? Dial *1848# after registering and enjoy your affordable calls and data!
Transferring MTN credit is a quick and handy way to share airtime with friends and family, especially when they’re running low and need to make that urgent call or send a text. Whether you’re helping out a buddy or just moving some airtime between your own numbers, the process is straightforward. Let’s break it down in a super simple way so anyone can follow along. Ready? Let’s go!
What Are Your Options for Transferring MTN Credit?
MTN offers three main methods for transferring credit:
myMTN App – If you’re a smartphone user, this app makes life easy.
MTN Me2U Service – A shortcode-based method for quick transfers.
We’ll walk through all three methods step by step so you can choose the one that works best for you.
Method 1: Using the myMTN App
The myMTN app is a free app available on both the Google Play Store and the Apple App Store. If you haven’t downloaded it yet, don’t worry—it only takes a few minutes.
Steps to Transfer Credit via the myMTN App:
Download and Open the App: If you haven’t already, search for “myMTN” in your app store and install it. Open the app and log in with your MTN number.
Go to the “Shop” Section: Tap on “Shop” in the app menu.
Select “Airtime” and Choose “New Recipient”: Enter the recipient’s phone number and tap “Next.”
Enter the Amount: Specify how much airtime you want to transfer and press “Next.”
Choose a Payment Method: Select your preferred payment method (e.g., MoMo or airtime balance).
Confirm and Pay: If you’re using MoMo, you’ll get a prompt to enter your PIN. Once the transaction is complete, you’ll receive a confirmation message.
And that’s it! Easy, right?
Method 2: MTN Me2U Service
The MTN Me2U service is a great option for transferring credit directly using a USSD code. All you need is the Me2U code (*198#) and your four-digit PIN. If you’ve never used Me2U before, don’t worry—we’ll guide you through setting it up.
Steps to Use the MTN Me2U Service:
Dial *198#: Open your phone’s dialer and call the shortcode.
Activate the Service (First-Time Users): If it’s your first time using Me2U, select “Activate” and create a four-digit PIN. This PIN keeps your transfers secure, so make it something easy to remember but hard for others to guess.
Start the Transfer: Dial *198# again and select “Transfer.”
Enter the Recipient’s Number: Carefully type in the phone number of the person you’re sending credit to.
Input the Amount: Enter the amount of airtime you want to send.
Add the Decimal Value: If the amount includes pesewas, type them in. For example, enter “50” for 50 pesewas or “0” if it’s a whole number like 5 GHC.
Enter Your PIN: Input the PIN you created earlier.
Confirm the Transfer: Press 1 to confirm. You’ll get a confirmation message once it’s done.
Important Note:
There’s a small fee of 10 pesewas for each Me2U transfer, so keep that in mind!
Method 3: Using MTN MoMo
If you already use MTN Mobile Money (MoMo), you can easily transfer airtime directly from your wallet. This is especially handy if you don’t have enough airtime in your balance but have money in your MoMo account.
Steps to Transfer Credit via MoMo:
Dial *170#: This is the main code for accessing MTN Mobile Money services.
Select “Airtime & Bundles” and Choose “Airtime”: Follow the menu prompts.
Choose “Others” to Send Airtime to Another Number: This lets you transfer credit to someone else.
Enter the Amount: Type in the airtime amount you want to send.
Enter the Recipient’s Number: Double-check the number to make sure it’s correct.
Confirm the Details: You’ll be asked to review the transaction. Press 1 to confirm.
Enter Your MoMo PIN: Input your PIN to complete the transfer.
Transaction Complete: You’ll receive a confirmation message. And that’s it!
Can You Transfer Credit to Other Networks?
Yes! MTN allows you to send airtime to users on other networks like AirtelTigo and Telecel. The process is similar to transferring airtime to another MTN user, but you need to specify the recipient’s network.
Steps for Transferring Credit to Other Networks:
Use the myMTN App or MoMo Code: Follow the same steps outlined above.
Select “Other Networks”: When asked to choose a network, pick the one the recipient is using.
Enter the Recipient’s Number and Amount: Double-check the details to avoid mistakes.
Complete the Payment: Depending on your payment method, enter your PIN to finalize the transaction.
Quick Tips to Avoid Mistakes
Double-Check Numbers: Always confirm the recipient’s phone number before sending credit. Once it’s gone, you can’t reverse it.
Keep Your PIN Secure: Never share your MoMo or Me2U PIN with anyone.
Confirm Details: Take a moment to review the transfer details before hitting “Confirm.”
Beware of Scammers: If anyone claims they need your PIN for a “service” or “promotion,” it’s a scam. Hang up or ignore them.
Frequently Asked Questions (FAQs)
1. How do I transfer credit from MTN to MTN?
You can transfer credit from MTN to MTN in three simple ways:
Using the MyMTN App: Download and open the app, go to “Shop,” select “Airtime,” enter the recipient’s phone number and amount, then confirm payment.
Using the MTN Me2U Code: Dial *198#, select “Transfer,” enter the recipient’s number, amount, and your Me2U PIN, then confirm the transaction.
Using MTN Mobile Money (MoMo): Dial *170#, select “Airtime & Bundles” > “Airtime,” choose “Others,” enter the amount and recipient’s number, then confirm with your MoMo PIN.
2. How do I transfer MTN airtime to another MTN number?
You can transfer MTN airtime to another number via:
MTN Me2U Service: Dial *198#, create or use your existing Me2U PIN, and follow the prompts to transfer the airtime.
Mobile Money: Dial *170#, navigate to “Airtime & Bundles” > “Airtime,” then follow the steps to send airtime to another MTN number.
MyMTN App: Open the app, go to “Shop,” select “Airtime,” enter the recipient’s details and amount, and confirm the transaction.
3. How can I transfer airtime from MTN to MTN without PIN?
Unfortunately, a PIN is required to transfer airtime via the MTN Me2U service (*198#). However, if you use the MyMTN App or Mobile Money, you won’t need a separate Me2U PIN; you only need to authenticate with your MoMo PIN or app credentials. This makes it easier if you don’t have a Me2U PIN set up.
4. How to transfer MTN data to another MTN number in Ghana?
Select the option for “Data Bundles” or “Data Gifting.”
Choose “Buy for Others” or “Gift Data.”
Enter the recipient’s MTN number.
Select the data bundle you want to transfer and confirm the purchase.
Alternatively, you can use the MyMTN App to gift data by navigating to the “Data” section and following the prompts.
And there you have it—three simple ways to transfer MTN credit in Ghana! Whether you’re using the MyMTN app, Me2U service, or Mobile Money, MTN makes it easy to share airtime with those who need it. Just follow the steps above, and you’ll be a pro in no time. For more handy tips, check out our article where we’ve listed all the essential MTN short codes you need to know!