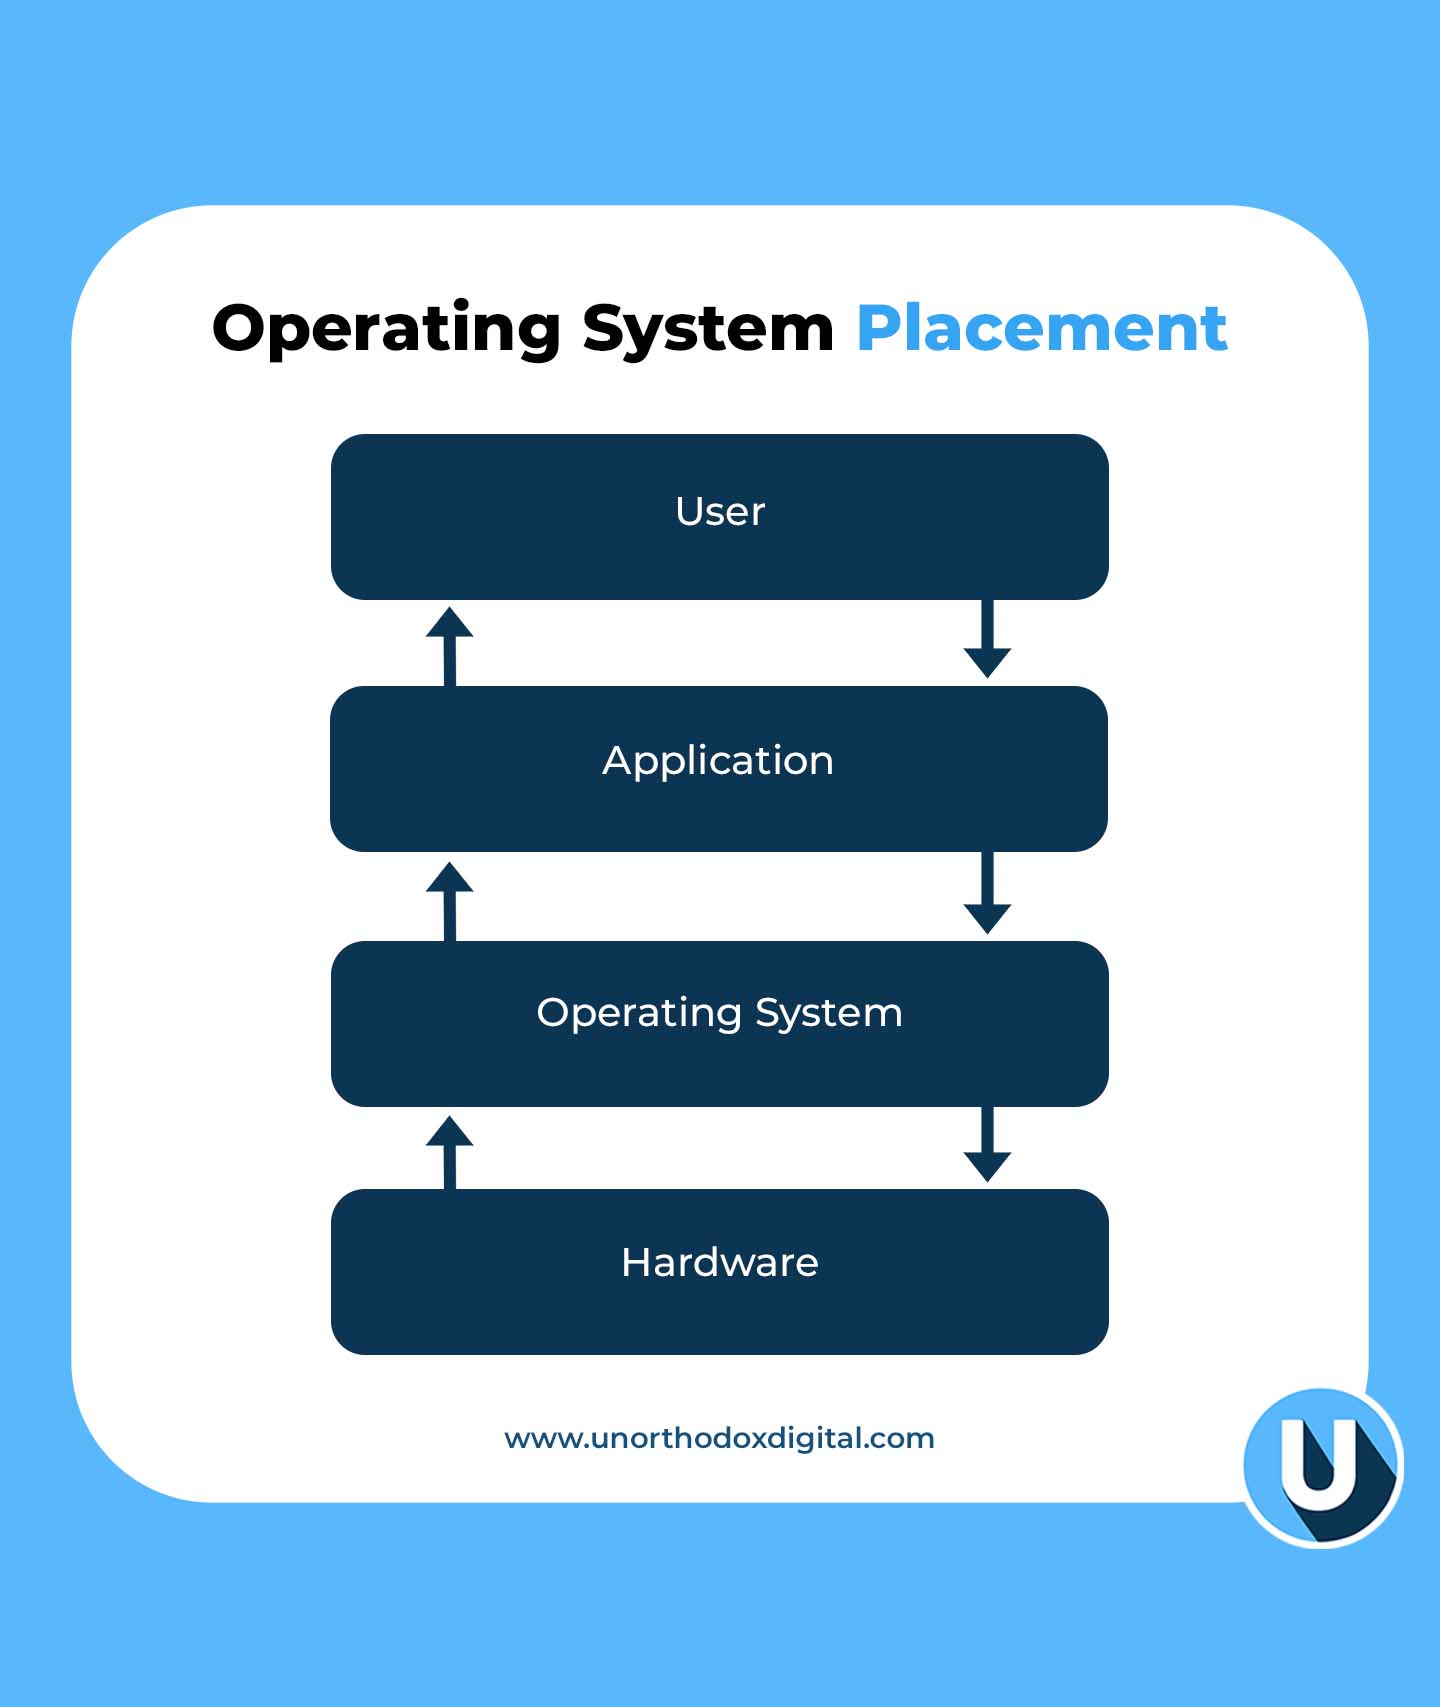
Let’s say your computer is like a big school. Inside this school, there are students (apps), teachers (files), and lots of classrooms (hardware like memory, keyboard, etc). But someone needs to make sure everyone knows where to go, follows the rules, and uses the resources fairly. That someone is the Operating System, or OS.
What is an Operating System?
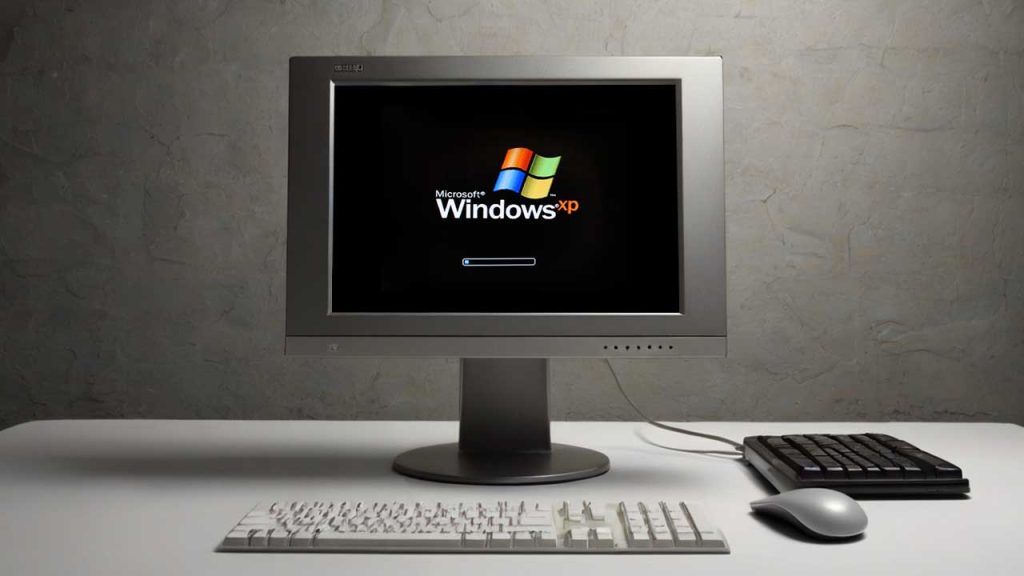
An operating system is the main boss of your computer. It controls how everything works together. Without it, your computer would just sit there—doing nothing—like a robot without instructions.
A Simple Way to Think About It:
If your computer was a restaurant:
The apps are chefs.
The ingredients are your files and data.
The kitchen tools (like stoves and ovens) are your hardware.
And the Operating System? It’s the kitchen manager making sure everything runs smoothly—no fires, no mess, and every chef gets what they need.
Why Do We Need an Operating System?
Here’s what the OS does behind the scenes:
Function
What It Does
Simple Example
Manages programs
Runs your apps and tells them when to start/stop
When you open YouTube and switch to Word, the OS keeps them both working
Handles memory
Gives space to programs in RAM
Like assigning lockers to students
Controls hardware
Talks to devices like printers and keyboards
You press a key, the OS tells the computer what letter you want
Provides a user interface
Shows you icons, windows, and buttons
That screen you click and type on? That’s the OS in action
Keeps things secure
Protects files and apps
Like a security guard making sure no one breaks into your locker
You might not see all of this happening, but the OS is always working in the background, like a superhero in disguise.
Each one has its strengths and fits different needs, just like different cars for different roads.
What Does an Operating System Actually Do?
Let’s zoom in on its main responsibilities.
1. Process Management
When you open a game and a browser at the same time, the OS decides how much power each one gets. It’s like a referee making sure every player follows the rules and no one cheats.
2. Memory Management
Your computer has a limited amount of memory (RAM), so the OS decides which app gets how much. If there’s not enough space, it’ll pause one or swap it out temporarily.
3. File Management
All your files—pictures, documents, downloads—are kept in folders. The OS helps you:
Create files
Save them
Move them
Delete them
It also makes sure two apps don’t try to edit the same file at the same time.
4. Device Management
Have you ever printed something or plugged in a USB? The OS is behind that, making sure:
Your printer gets the file
Your USB drive shows up
Your mouse and keyboard work smoothly
5. Security
Before you log in with your password, the OS checks it. It also keeps apps from snooping around where they shouldn’t.
6. User Interface
That desktop with icons and folders? The OS creates that. Without it, you’d be typing commands like a hacker in a movie just to open Chrome.
Different Types of Operating Systems (With Simple Comparisons)
Let’s break this down into a simple table to help you remember:
Like a group project where each student handles a piece
Network OS
Manages computers connected in a network
Like a teacher giving assignments to students in different classrooms
Real-Time OS
Responds instantly
Used in robots, medical machines, or autopilots
Multiprocessing OS
Uses many CPUs at once
Like several chefs cooking the same meal together
Single-user OS
One person at a time
Your laptop at home
Multi-user OS
Many people use it at once
A school computer lab
Embedded OS
Built into small devices
Like your microwave or smartwatch
Cluster OS
Connects multiple machines as one powerful system
Like a team of supercomputers acting like a single brain
So, How Do You Choose the Right Operating System?
It depends on what you’re using your device for.
Factor
Why It Matters
Tip
Price
Some OS are free, others cost money
Linux = free, Windows/macOS = paid
Ease of Use
Some are more user-friendly
macOS is easy for beginners
App Compatibility
You need apps that work with the OS
Gamers often choose Windows
Security
Some OS protect your data better
macOS and Linux are known for security
Support
Can you get help when it breaks?
Windows has more tutorials and help forums
If you’re just browsing the internet and watching YouTube, Android or Windows is great. If you’re doing coding or server stuff, Linux might be your best friend.
Real-Life Scenarios to Understand the OS Better
Let’s say:
You open WhatsApp → OS finds the app, opens it, and keeps it running.
You plug in headphones → OS switches audio from speaker to headphones.
Your phone rings during a game → OS pauses the game and shows you the call.
All of this happens in seconds—and you barely notice. But without the OS, your computer or phone would be like a fancy brick.
What If There Was No Operating System?
Imagine:
No icons to click
No apps to open
No way to type, play music, or browse the internet
You’d have to write code just to open a file. That’s how it was in the super old days. Luckily, modern OS handles all the hard stuff so you don’t have to.
Fun Fact: What Is a System Call?
A system call is like raising your hand in class.
When an app (like Chrome) needs to do something important—like access the internet—it asks the OS through a “system call.” The OS then checks:
Is this app allowed to do that?
Is the resource (like network or file) available?
If yes, the OS lets it happen. If not, it says, “Try again later.”
Quick Recap Table
Key Term
Simple Meaning
OS (Operating System)
The boss of your device
App
A worker that needs help from the OS
Hardware
The physical parts of the device (like keyboard, screen)
Memory
Temporary space to run things
File
A piece of saved information (like a photo or doc)
Interface
What you see and click
Security
Locks and guards for your files
System Call
An app politely asking the OS for something
Understanding operating systems doesn’t have to be hard. They’re just the behind-the-scenes managers that help your devices actually do things. Whether you’re texting, watching a video, writing an essay, or printing your homework, the OS is working quietly in the background making sure everything clicks.
So next time your laptop freezes or your phone updates its system, you’ll know exactly what’s going on. And maybe—even just a little—you’ll appreciate your operating system like the silent helper it is.
Late payments lead to phone locking until dues are settled.
What Is MTN Pick and Pay Later?
MTN Pick and Pay Later is a simple way to buy a smartphone without paying the full amount upfront. If you’re an eligible MTN Ghana customer, you can pick a device, pay part of the price immediately, and cover the rest in smaller payments over four or six months using MTN Mobile Money (MoMo).
Think of it like buying a school bag on credit—you pay a little now and the rest later, but you still get to use the bag immediately. The same applies here: you get the phone now and pay in installments.
Who Can Use MTN Pick and Pay Later?
Not everyone can use this service. MTN has a system to check if you qualify, mainly based on how you use your MTN line and Mobile Money. Here’s what you need:
Remember, you must bring your Ghana Card when collecting your device.
What Phones Can You Get with MTN Pick and Pay Later?
The available smartphones may change based on stock and your eligibility. Right now, MTN offers Samsung devices such as:
Available Smartphones
Samsung Galaxy A05
Samsung Galaxy A15
Samsung Galaxy A25
How Much Interest Do You Pay?
The total cost of your phone includes a fixed interest rate, which depends on the device and payment plan you choose. When you request a device using the MoMo shortcode, MTN will show you the exact interest amount before you confirm.
What Happens If You Miss a Payment?
If you don’t make your payment on time, MTN gives you a 24-hour grace period to catch up. If you still don’t pay, your phone will be locked, making it unusable until you clear the outstanding balance.
If you’re looking for a new smartphone but can’t pay the full price upfront, MTN Pick and Pay Later is a great way to spread out the cost while staying connected.
If you use MTN Nigeria, you’ve probably seen or used short codes—those simple numbers you dial on your phone to get things done quickly.
Think of them as magic keys that unlock different services without needing the internet or customer care agents. Whether you want to check your airtime, buy data, or even borrow credit, there’s a short code for that!
In this guide, we’ll break everything down in a way that’s super easy to understand. By the end, you’ll know exactly which codes to use, when to use them, and why they matter. Let’s dive in!
What Are MTN Short Codes?
MTN short codes (also known as USSD codes) are quick commands you dial on your phone to perform different tasks. Instead of stressing over customer care or searching for options in an app, just punch in a few numbers, and boom—you’re sorted!
Imagine your phone is like a remote control, and these codes are buttons that get things done instantly. Need airtime? Press the right “button” (dial the right code), and your problem is solved in seconds.
Essential MTN Short Codes You Should Know
Here’s a handy table with some of the most useful MTN short codes:
Now let’s break down some of these codes further so you can understand exactly how they work.
How to Recharge Airtime on MTN
Running low on airtime? No problem! Here’s how to top up in seconds:
Buy an MTN recharge card.
Scratch off the silver coating to reveal the PIN.
Dial *311*PIN# and hit send.
You’ll get a confirmation message that your airtime has been credited.
If you prefer buying airtime online or through your bank, this short code won’t be necessary. But when you have a scratch card, this is the fastest way to load it!
How to Check Your MTN Airtime Balance
Not sure how much credit you have left? Dial *310#, and your balance will pop up on your screen. You’ll also get an SMS with the details.
It’s always smart to check your balance before making calls or browsing the internet to avoid surprises.
How to Borrow Airtime on MTN
Sometimes, you need airtime urgently, but your wallet says, “Not today!” That’s where MTN’s “XtraTime” service comes in—you can borrow airtime and pay later.
Steps to Borrow Airtime:
Dial *303#.
Select the amount you want to borrow (MTN will show you how much you qualify for).
Confirm your request.
The borrowed amount will be credited to your account, minus a small service charge.
Remember, the next time you recharge, MTN will automatically deduct what you owe!
How to Buy Data on MTN
Want to browse the internet, stream videos, or chat on WhatsApp? You’ll need data! Here’s how to buy a data bundle:
Dial *312#.
Choose from the list of available data plans.
Select your preferred plan and confirm.
You’ll receive an SMS confirming your purchase.
Simple, right? Now you’re all set to surf the web without stress.
How to Share Data with Friends and Family
Got extra data? You can share it with friends using MTN Data Gifting.
To Transfer Data:
Dial *321#.
Select “Gift Data.”
Enter the recipient’s MTN number.
Choose the amount of data you want to send.
Confirm your transfer.
Boom! Your friend now has data, thanks to you.
How to Check Your Data Balance
If you want to know how much data you have left, just dial *323#, and MTN will send you a message with your current data balance. This helps you manage your internet usage so you don’t run out unexpectedly.
How to Link Your NIN to Your MTN Line
In Nigeria, linking your National Identification Number (NIN) to your MTN line is a must. If you haven’t done this yet, here’s how:
Dial *785#.
Enter your 11-digit NIN.
Confirm the submission.
You’ll get a message confirming that your NIN has been linked.
If you run into any issues, you may need to visit an MTN office to complete the process.
Other Important MTN Short Codes
Some short codes haven’t changed and still serve their usual functions:
Short codes save you time. Imagine you need to borrow airtime but don’t know the code—you’d have to search online, ask a friend, or call customer care. With this guide, you have all the essential codes in one place, so you can get things done fast.
Now that you know the most important MTN short codes, navigating your mobile services should be a breeze. Whether it’s buying airtime, checking your balance, or linking your NIN, you now have the “cheat codes” to do it all effortlessly.
Bookmark this page or save these codes somewhere handy—you never know when you’ll need them. And if you found this helpful, share it with someone who might need it too!
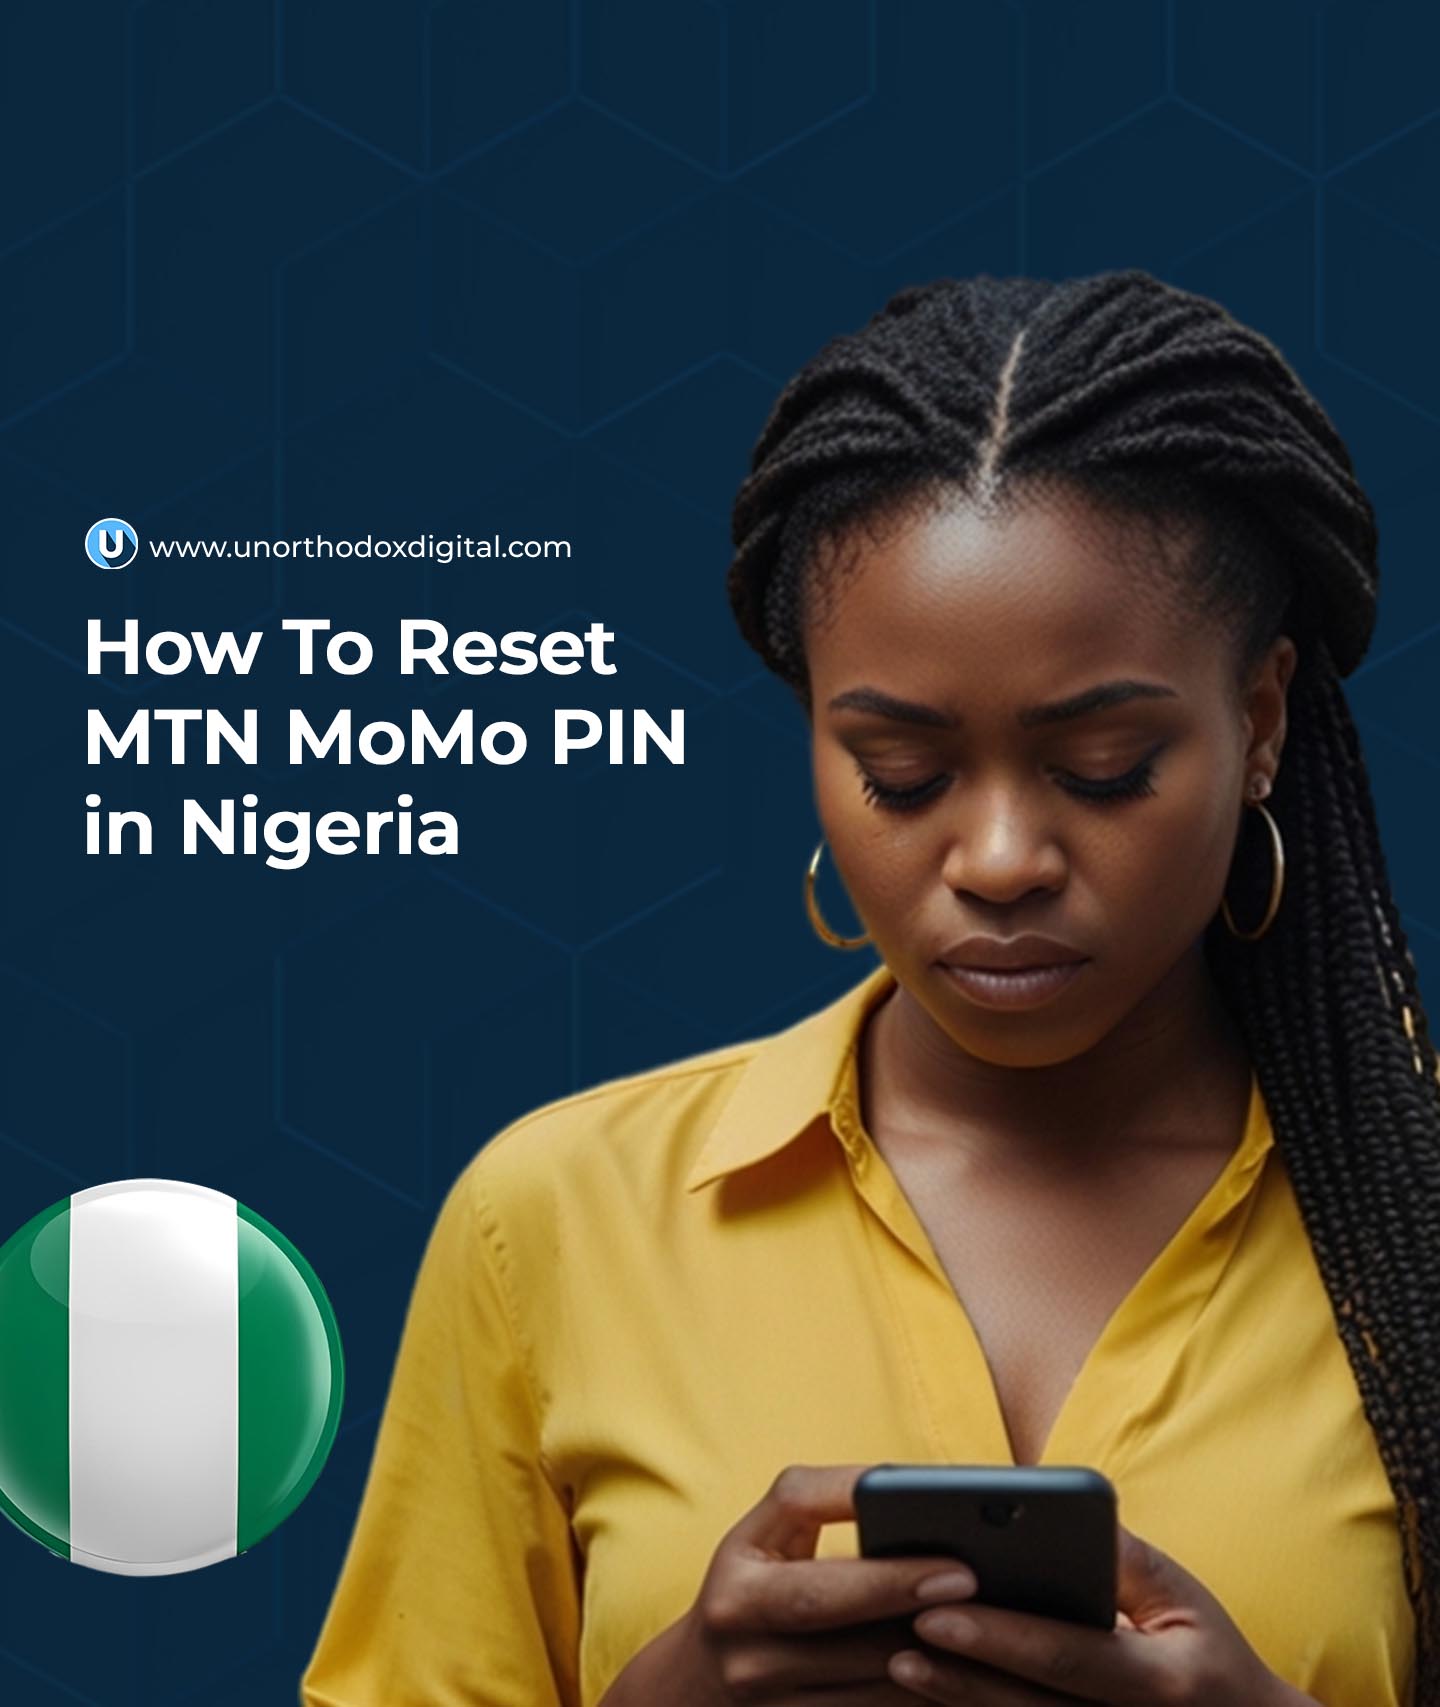
Learn how to reset your MTN MoMo PIN in Nigeria using *671# with simple steps for secure access to your account.
Forgetting your MTN MoMo PIN can be frustrating, but don’t worry—you can reset it quickly and easily. Think of it like forgetting the key to your piggy bank. You wouldn’t throw the whole piggy bank away, right? Instead, you’d find a way to get a new key. That’s exactly what we’re going to do with your MoMo PIN.
In this guide, I’ll show you the simple steps to reset your MTN MoMo PIN in Nigeria, plus a few tips to keep it safe in the future.
What is an MTN MoMo PIN, and Why is it Important?
Your MTN MoMo PIN is a four-digit number that protects your mobile money account. It’s like the secret code you use to unlock a treasure chest. Without it, no one (not even you!) can access your MoMo wallet.
If you enter the wrong PIN too many times, your account may be blocked for security reasons. That’s why it’s important to reset your PIN as soon as you forget it.
Steps to Reset Your MTN MoMo PIN in Nigeria
MTN makes it easy to reset your MoMo PIN using a simple USSD code. Follow these steps:
Dial *671# on your MTN line. Think of this as knocking on the MoMo door—it gets you started!
Select option 8 for ‘Account Management’. This is like choosing the right tool for the job. You’re telling the system that you want to manage your account.
Choose option 3 to reset your PIN. This is where you get to set up a new PIN. Just follow the prompts on your screen.
Enter a new four-digit PIN. Pick something you’ll remember but that’s hard for others to guess. Avoid birthdays or easy sequences like 1234.
Confirm your new PIN. Enter it again to make sure there are no mistakes. Think of this as double-checking a padlock before walking away.
Once you complete these steps, your new PIN is ready to use. Easy, right?
What If You Can’t Reset Your PIN Using USSD?
Sometimes, things don’t go as planned. If you run into any issues while trying to reset your MoMo PIN, here’s what to do:
Problem
Solution
You forgot your phone number is linked to MoMo
Dial *671# to check if your number is registered.
USSD code isn’t working
Ensure you have good network coverage and enough airtime.
Your account is locked
Call MTN customer support at 180 for assistance.
You didn’t receive a confirmation message
Wait a few minutes and try again.
Tips to Keep Your MoMo PIN Safe
Now that you have a new PIN, let’s make sure you don’t forget it or let it fall into the wrong hands.
Memorize it, don’t write it down. Think of your PIN like the secret ingredient in your favorite recipe—keep it safe!
Avoid using easy-to-guess numbers. No birthdays, phone numbers, or repeating numbers like 0000.
Change your PIN regularly. Just like changing passwords, updating your PIN now and then keeps your account secure.
Never share your PIN. Not with friends, family, or even people claiming to be from MTN. MTN will NEVER ask for your PIN.
Be careful where you enter your PIN. If someone is standing too close while you’re entering your PIN, wait until they move away.
Forgetting your MTN MoMo PIN doesn’t have to be stressful. With the simple USSD code *671#, you can reset your PIN in just a few steps. If you ever have trouble, MTN’s customer support is there to help.
Now that you know how to reset your MoMo PIN, you can enjoy worry-free mobile money transactions. Just remember to keep your PIN safe and secure!
Got any more questions? Drop them in the comments, and let’s chat!
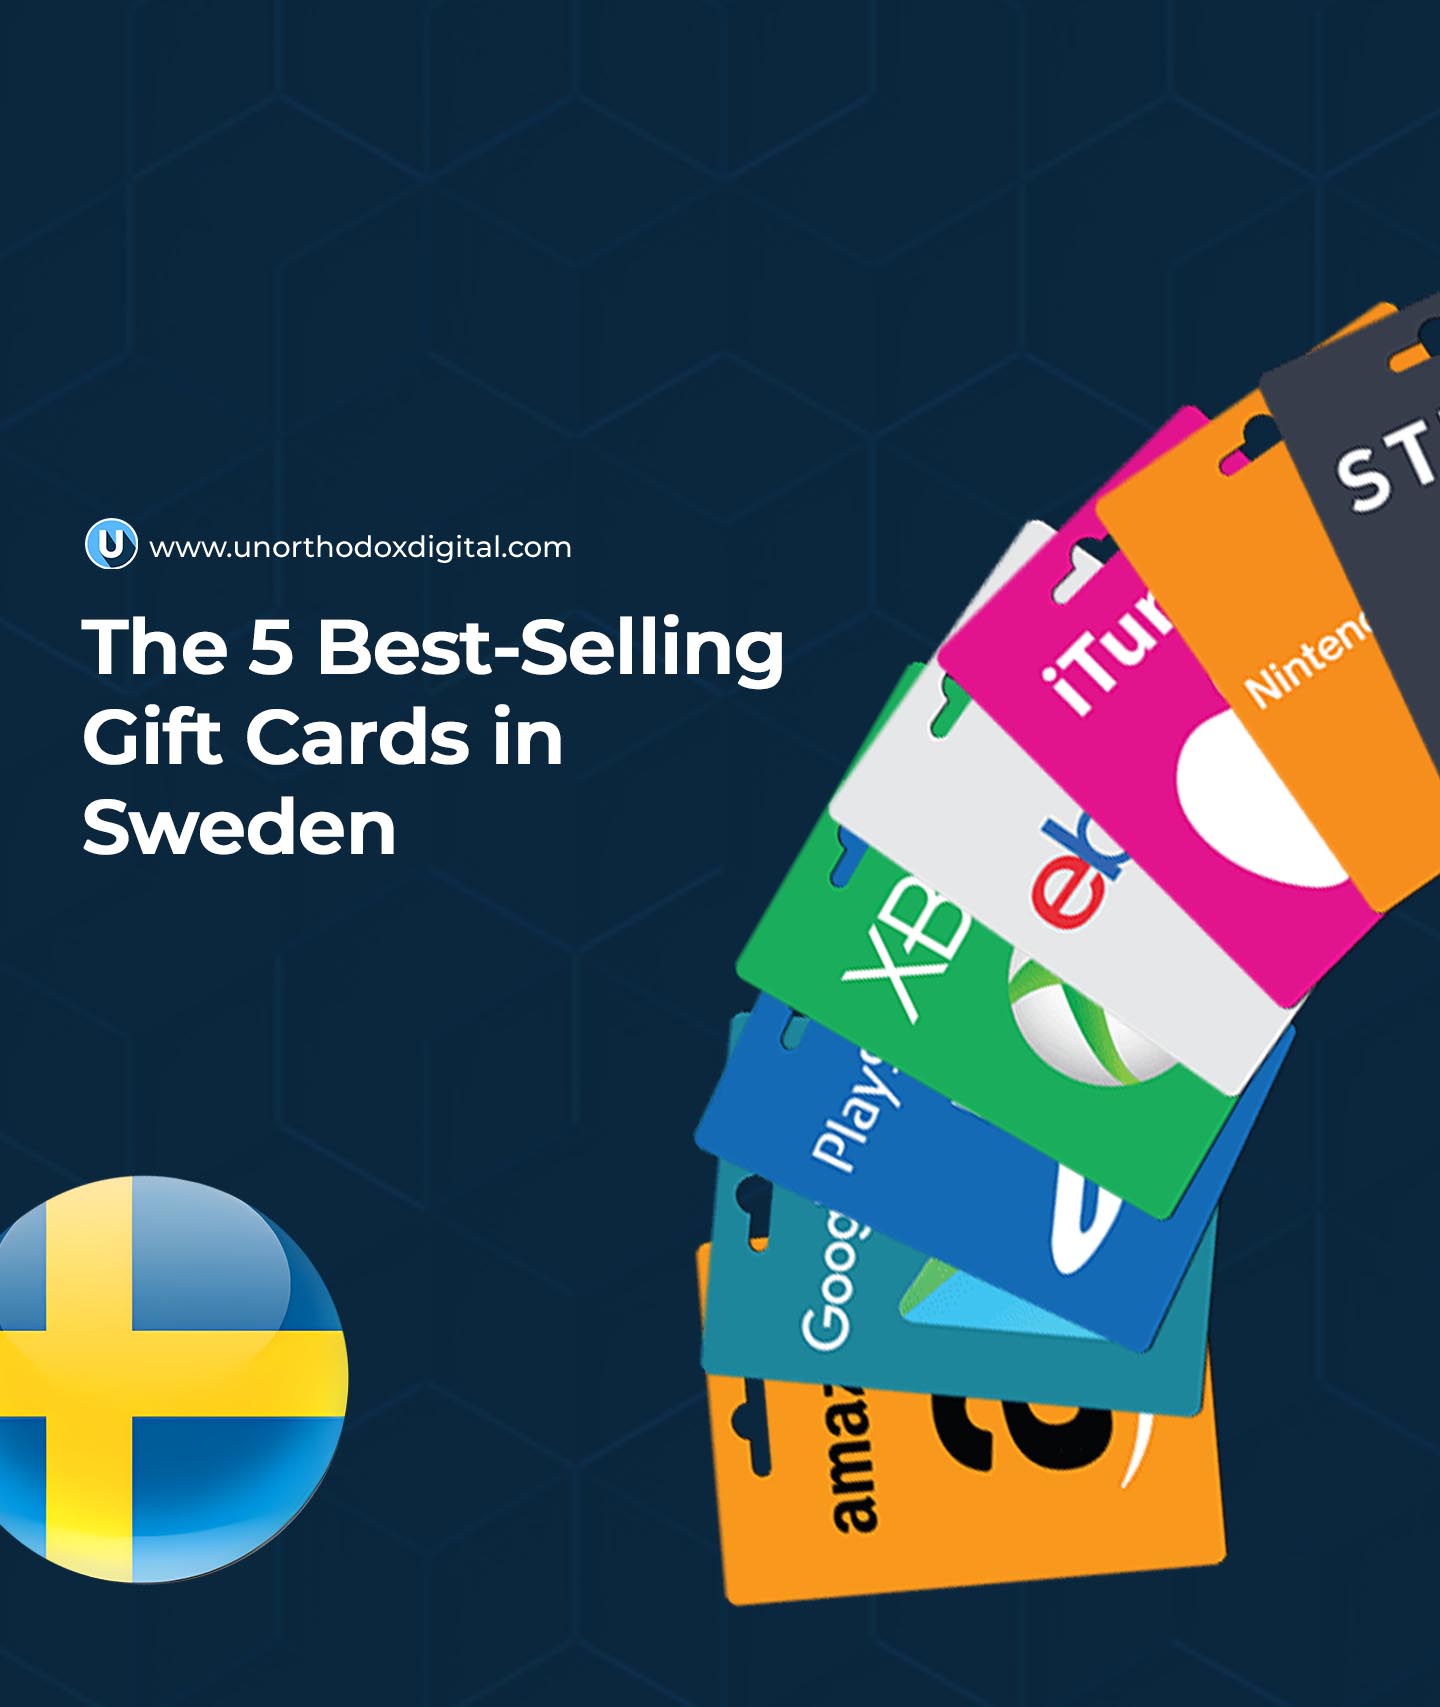
Gift cards are a super convenient way to give someone a present while letting them pick what they truly want.
In Sweden, some gift cards are more popular than others because they offer a lot of options for spending. Whether it’s for shopping, entertainment, or even books, these top five best-selling gift cards are favorites among Swedes. Let’s break them down in a way that makes sense, even if you’ve never used a gift card before.
1. Apple Gift Card
The Apple Gift Card (previously known as the iTunes Gift Card) is a big hit in Sweden. It lets users buy apps, music, TV shows, games, movies, and more from Apple’s digital stores. If you have an iPhone, iPad, or Mac, this gift card is like a magic key to loads of entertainment.
Why People Love It:
It can be used on multiple Apple services, including the App Store, Apple Music, and iCloud.
It’s great for kids, teens, and adults who love tech and entertainment.
It’s delivered digitally, so there’s no waiting.
Denominations and Value Comparison:
Apple Gift Card (SEK)
Approximate Value in Nigeria (NGN)
100 SEK
5,700 NGN
500 SEK
29,500 NGN
2. Amazon Gift Card
Amazon is one of the biggest online retailers in the world, and its gift card is always in demand. In Sweden, an Amazon gift card is a great way to shop for everything from books to electronics and even groceries.
Why People Love It:
It can be used to buy almost anything on Amazon.
It makes online shopping easy and flexible.
You can even sell it for cash if you don’t want to use it.
Denominations and Value Comparison:
Amazon Gift Card (SEK)
Approximate Value in Euros (€)
100 SEK
€9.00
250 SEK
€23.00
300 SEK
€32.00
3. Åhléns Gift Card
Åhléns is one of Sweden’s biggest department stores, selling fashion, home goods, beauty products, and more. If you’re looking for a gift that gives someone a variety of shopping choices, this is a great option.
Why People Love It:
It works at all Åhléns stores across Sweden.
It’s valid for two years, so there’s plenty of time to use it.
It can be bought with cryptocurrencies like Bitcoin, Ethereum, and Litecoin.
Denominations Available:
Starts from 100 SEK and goes up from there.
Can only be used in Sweden.
4. Zalando Gift Card
Zalando is a popular online fashion retailer that sells clothing, shoes, and accessories from many different brands. If someone loves shopping for stylish outfits, a Zalando gift card is perfect.
Why People Love It:
It’s accepted for all Zalando purchases in Sweden.
It doesn’t expire, so you can use it anytime.
It’s great for fashion lovers who want to choose their own clothes.
Denominations and Value Comparison:
Zalando Gift Card (SEK)
Approximate Value in Euros (€)
100 SEK
€9.50
500 SEK
€46.00
1000 SEK
€92.00
5. Bokus Play Gift Card
Bokus Play is an audiobook and e-book subscription service, making its gift card a fantastic choice for book lovers. Whether someone enjoys fiction, non-fiction, or textbooks, Bokus has something for everyone.
Why People Love It:
It lets users buy or subscribe to audiobooks and e-books.
It’s a great gift for students, professionals, or anyone who loves reading.
It can be purchased using Bitcoin and other cryptocurrencies.
Denominations Available:
From 1 SEK to 1000 SEK, based on Bitcoin price equivalents.
Gift cards are an easy and flexible way to give presents, and these five are the top sellers in Sweden for a reason. Whether you’re shopping for a tech lover, an online shopper, a fashion enthusiast, a home decor fan, or a bookworm, there’s a perfect option available. The best part? These gift cards don’t just work for personal use—they can also be resold or traded, making them even more valuable. Now that you know the best-selling gift cards in Sweden, which one would you choose?
Easily check and cancel your AirtelTigo subscriptions to avoid extra charges. Dial *100*3*5# to view and *100*4# to cancel.
Have you ever checked your AirtelTigo balance and thought, “Wait, where did my airtime go?” You’re not alone! Many people unknowingly subscribe to services that silently eat up their credit. These can be caller tunes, data plans, or promotional offers you didn’t even realize you signed up for. But don’t worry—I’ll show you exactly how to check and cancel these unwanted subscriptions so you can keep your airtime for things you actually need.
How to Check Your AirtelTigo Subscriptions
Before canceling anything, you first need to see what subscriptions are currently active on your line. Here’s how to check:
Using USSD Code
Dial *100# on your AirtelTigo line.
Select “Usage & Subscriptions History.”
Choose “Promos & Product Subscription.”
Wait for an SMS message listing your active subscriptions.
After following these steps, AirtelTigo will send you a message showing all the services you’re currently subscribed to. If you see something you don’t recognize or no longer need, it’s time to cancel it!
How to Cancel Unwanted AirtelTigo Subscriptions
Once you’ve identified the unwanted subscriptions, follow these steps to remove them:
Using USSD Code to Unsubscribe
Dial *100# again.
Select “Content Manager.”
Choose “Deactivate Content Subscriptions.”
Select “Deactivate Content Services.”
Pick the subscription you want to cancel from the list.
Enter 1 to confirm cancellation.
Wait for a confirmation SMS.
This method works for most services, but sometimes you might still see deductions even after unsubscribing. If that happens, don’t panic—there are other ways to fix it.
What If You’re Still Being Charged?
If you’re still losing airtime even after unsubscribing, it could be due to hidden subscriptions or system issues. Here’s what you can do:
Explain that you’re being charged for a service you didn’t subscribe to or one you already canceled.
Ask them to manually cancel all unwanted subscriptions on your line.
2. Visit an AirtelTigo Office
If calling doesn’t resolve the issue, visiting a nearby AirtelTigo office can be more effective. A representative can check your account and ensure all unwanted services are removed.
3. Use the MyAirtelTigo App
If you have a smartphone, the MyAirtelTigo app is another great way to manage your subscriptions. Just download the app, log in, and navigate to the subscriptions section to cancel any unwanted services.
Summary Table: Checking and Cancelling AirtelTigo Subscriptions
Open app > Navigate to subscriptions > Cancel unwanted services
Final Tips to Avoid Unwanted Subscriptions
Be careful when clicking pop-ups or SMS links – Some subscriptions activate when you click on promotional messages.
Avoid dialing random shortcodes – These sometimes enroll you in paid services.
Regularly check your subscriptions – Make it a habit to check every few weeks to catch any new unwanted charges early.
Use the Do Not Disturb (DND) feature – This helps block promotional messages that might auto-subscribe you to services.
No one likes losing airtime to services they don’t need. By following the steps in this guide, you can easily check and cancel unwanted AirtelTigo subscriptions in Ghana. If you ever notice unexpected deductions, don’t hesitate to contact customer support or visit an AirtelTigo office. Stay in control of your airtime and only pay for what you actually use!
If you use AirtelTigo Money in Ghana, you’ve probably wondered, How much money can I send or receive in a day? or What’s the maximum amount I can keep in my wallet? These limits are important because they affect how you use your mobile money account. Whether you’re paying for services, sending cash to family, or receiving payments, knowing your AirtelTigo Money limit helps you plan your transactions smoothly.
This guide will show you, in the simplest way possible, how to check your AirtelTigo Money limit in Ghana, what those limits mean, and how to increase them if needed.
Understanding AirtelTigo Money Account Limits
AirtelTigo Money accounts are categorized into three levels: Platinum, Gold, and Bronze. Each level has different transaction and wallet limits. Your limit depends on your KYC (Know Your Customer) verification, which is simply the process of confirming your identity with AirtelTigo.
Here’s a quick breakdown of the three account levels and their limits:
Account Level
Wallet Capacity (GH₵)
Daily Transaction Limit (GH₵)
Monthly Transaction Limit (GH₵)
Platinum (Enhanced)
50,000
15,000
No limit
Gold (Medium)
25,000
10,000
No limit
Bronze (Minimum)
3,000
2,000
6,000
If you have a Bronze account, you have the most restrictions, while Platinum users enjoy the highest limits. If your transactions are often blocked because of these limits, it might be time to upgrade.
How to Check Your AirtelTigo Money Limit
Checking your AirtelTigo Money limit is easy and takes less than a minute. Just follow these steps:
A menu will appear with different options. Look for “My Account” and select it.
Step 3: Choose “ATM Limit Check”
Under the “My Account” section, you’ll see an option called “ATM Limit Check.” Select it.
Step 4: Enter Your AirtelTigo Money PIN
For security reasons, you’ll be asked to enter your 4-digit AirtelTigo Money PIN. This step ensures that only you can check your limit.
Step 5: View Your Wallet Limit
After entering your PIN, choose “Check Wallet Limit.” In a few seconds, you’ll receive a message displaying:
Your maximum wallet balance (the highest amount your account can hold at a time).
Your daily transaction limit (how much you can send in a day).
Your monthly transaction limit (how much you can transact within a month).
If your transactions keep getting declined, it’s usually because you’ve hit one of these limits.
Note: If you receive a message saying, “Dear Customer, to upgrade your ATMoney account…” instead of seeing your limits, it means your account needs an update. You should contact AirtelTigo support for assistance.
How to Increase Your AirtelTigo Money Limit
If you find that your AirtelTigo Money limit is too low for your needs, you can request an upgrade. Here’s how:
Step 1: Contact AirtelTigo Customer Support
Dial 100 on your AirtelTigo line and follow the prompts to speak with an agent.
Visit any AirtelTigo office near you.
Reach out to AirtelTigo on their official social media pages.
Step 2: Provide the Required Documents
To upgrade your account, you’ll need to submit some documents. These may include:
Shows financial transactions to prove you need a higher limit
Registered tenancy agreement
Confirms your place of residence
Utility bills (in your name)
Provides proof of address
Income tax certificate
Verifies tax compliance if you’re a business owner
Employer’s reference letter
Helps if you’re employed and need a higher limit for salary transactions
Depending on your current account level, not all these documents may be required. AirtelTigo will inform you of exactly what you need based on your account status.
Step 3: Wait for Approval
Once you submit your documents, AirtelTigo will review them and process your request. If everything is in order, your new limit will be activated, and you’ll receive a confirmation message.
Why Your AirtelTigo Money Limit Matters
Understanding your AirtelTigo Money limit isn’t just about avoiding declined transactions. It helps you:
Plan your payments so you don’t run into unexpected restrictions.
Avoid unnecessary trips to an AirtelTigo agent just to fix limit issues.
Know when to upgrade your account if you frequently hit your limits.
If you often send or receive large amounts of money, upgrading to Gold or Platinum will make your transactions smoother.
Now you know how to check your AirtelTigo Money limit, what those limits mean, and how to increase them when necessary. If you ever get stuck, AirtelTigo customer support is always available to help.
Next time you’re about to make a big transaction, take a moment to check your limit first—it could save you a lot of hassle!
So, you’re wondering if your MTN Ghana SIM card supports 4G. Maybe you’re trying to enjoy faster internet, stream videos without buffering, or just make sure you’re getting the best network speeds possible. Whatever the reason, you’ve come to the right place! This guide will walk you through the process step by step, in a way that’s simple, clear, and easy to follow.
What is 4G, and Why Does It Matter?
4G is the fourth generation of mobile network technology. It’s much faster than 3G, allowing you to:
Load web pages almost instantly
Stream videos without annoying buffering
Download large files quickly
Enjoy smoother online gaming
If your MTN SIM doesn’t support 4G, you might be stuck with slower internet speeds. Let’s find out if your SIM is 4G-enabled!
Method 1: Check Through Your Phone Settings
The easiest way to check if your MTN SIM supports 4G is through your phone’s network settings. Let’s break it down for both Android and iPhone users.
For Android Users
Since Android phones vary by brand and model, the steps might look slightly different. Here’s a general guide:
Open Settings on your phone.
Tap on “SIM card & mobile network” (this may also be called “Connections” or “Network & Internet”).
Select the SIM you are using for MTN.
Find “Preferred network type” or “Network mode”.
If you see an option that includes 4G/LTE, your SIM supports 4G!
Example for Infinix Users:
Step
Action
1
Open Settings
2
Tap “SIM card & mobile network”
3
Select your MTN SIM
4
Find “Preferred network type”
5
Look for 4G/LTE in the options
For iPhone Users
Open Settings.
Tap “Mobile Data”.
Select “Mobile Data Options”.
Tap “Voice & Data”.
If 4G or LTE appears as an option, your MTN SIM is 4G-enabled!
Method 2: Look at Your Signal Bar
Take a quick glance at your phone’s status bar (the top-right corner for most phones). If you see 4G or LTE next to your network signal, congratulations—your SIM is already 4G-enabled!
However, if you only see 3G or H+, your SIM might not support 4G, or your phone’s settings may need adjustment.
Method 3: Dial *156# to Check
MTN has a USSD code to verify if your device and SIM are compatible with 4G.
Wait for a message confirming whether your SIM and device support 4G.
Method 4: Contact MTN Customer Care
If you’re still unsure, you can always ask MTN directly. Here’s how:
Call MTN Customer Care at 100.
Visit an MTN service center and ask a representative to check.
Message MTN on social media (Twitter, Facebook, or WhatsApp at +233554300000).
When contacting MTN, have your phone number ready. If reaching out via email or social media, include your phone number in the message for a quicker response.
What If My SIM is Not 4G?
If your MTN SIM is not 4G-enabled, don’t worry! You can easily upgrade it.
Send the ticket number to MTN’s WhatsApp support (+233554300000).
MTN will process the request and activate 4G on your number.
Important Notes:
MTN will reject the request if the provided details are incorrect or falsified.
If you visit an MTN service center, carry your original ID.
By now, you should know how to check if your MTN Ghana SIM supports 4G. Whether you’re checking through your phone settings, dialing *156#, or contacting MTN directly, it’s a quick and simple process. If your SIM isn’t 4G-enabled, upgrading is straightforward and worth it for the faster internet speeds.
Now go ahead—check your SIM and enjoy a smoother, faster browsing experience!
Check your MTN Ghana data balance using USSD (*124# or *138#) or the myMTN app for quick and easy access.
Staying on top of your MTN data balance in Ghana is crucial, especially when you rely on mobile internet for work, school, or entertainment. Imagine streaming your favorite video or chatting with friends, and suddenly—boom! Your data runs out. Annoying, right?
Good news! Checking your data balance on MTN is super easy. In this guide, I’ll walk you through step-by-step methods using a simple USSD code and the MyMTN app. Whether you’re new to MTN or just need a refresher, you’ll have your data balance at your fingertips in no time.
Checking Your MTN Data Balance Using a USSD Code
USSD codes are like secret phone codes that let you access information quickly. Think of it like dialing a special number to get instant updates about your data balance. Here’s how:
Method 1: Quick Data Balance Check
Open your phone’s dialer (where you normally enter a phone number).
Dial *124# and press the call button.
Wait a few seconds, and a pop-up message will show your current data balance.
Method 2: Detailed Data Balance Breakdown
Sometimes, you may want a more detailed breakdown of your data, especially if you’ve purchased multiple bundles like Kokrokoo, Midnight, or Mashup. Here’s what to do:
Dial *138# and press call.
Select 1 to proceed to buy a bundle.
Scroll down and select 99 for More options.
Again, scroll down and select 7 for More.
Finally, select Check Bundle Balance.
You’ll receive a prompt with all available bundle balances and an SMS summary.
Important: Some special bundles like Zone bundles or Just4U offers may not appear in the balance summary.
USSD Code
Purpose
*124#
Quick data balance check
*138# → More Options → Check Balance
Detailed data balance breakdown
Checking Your MTN Data Balance Using the MyMTN App
If you prefer a visual interface with more details, the MyMTN App is a great option. It provides a real-time breakdown of all your active bundles, including special offers. Here’s how to use it:
Download the MyMTN App: If you haven’t already, get the MyMTN app from the Google Play Store or Apple App Store.
Log in: Open the app and sign in with your MTN number.
Check your balance: On the home screen, tap Data under the Balances section.
Refresh if needed: Tap the refresh icon (circular arrow) to get the latest balance.
Why Use the MyMTN App?
It shows all your data balances, including special bundles like Mashup and Just4U.
You can track your data usage history.
It helps you monitor which apps consume the most data.
Feature
USSD Code
MyMTN App
Quick balance check
Yes
Yes
Detailed balance breakdown
Yes
Yes
View past usage history
No
Yes
Track app data usage
No
Yes
How to Track Your Data Usage
Ever wondered why your data disappears so fast? The MyMTN App allows you to track your data usage history:
Open the MyMTN App.
Tap Data under Balances.
Select View History at the bottom.
Tap a date to see your detailed data usage for that day.
Another way to check data usage is through your phone’s built-in settings:
On Android: Go to Settings > Network & Internet > Data Usage.
On iPhone: Navigate to Settings > Cellular > Cellular Data Usage.
How to Make Your Data Last Longer
Now that you know how to check your balance, let’s talk about saving data so it doesn’t run out too quickly. Here are some smart tips:
Use Wi-Fi When Possible – Connect to Wi-Fi whenever available to save mobile data.
Restrict Background Data – Some apps keep using data even when you’re not using them. Turn off background data for non-essential apps.
Lower Video Streaming Quality – Watching YouTube or Netflix? Reduce video quality from HD to 480p to save data.
Turn Off Automatic App Updates – Stop your apps from updating over mobile data. Instead, set them to update only on Wi-Fi.
Check Your Balance Regularly – Keep an eye on your usage to avoid surprises.
Frequently Asked Questions (FAQs)
Can I check someone else’s MTN data balance from my phone?
No, you can only check the data balance of the MTN number registered on your phone.
Does checking my balance cost money?
No, checking your MTN data balance using USSD codes or the MyMTN App is completely free.
What happens if my data runs out?
MTN will notify you when your data is low. You can then purchase a new bundle using *138# or through the MyMTN App.
Checking your MTN data balance in Ghana is quick and easy, whether you use a simple USSD code for instant updates or the MyMTN App for a detailed breakdown. By keeping track of your usage and applying smart data-saving tips, you can avoid unexpected disconnections and enjoy uninterrupted browsing.
Try both methods today and see which one works best for you!
Sometimes, you need to make an urgent call or send an important text, but you’re out of airtime. Maybe you’re in a place where you can’t buy a recharge card or your banking app is acting up. That’s where borrowing airtime comes in handy! Nigerian mobile networks allow customers to borrow airtime and pay it back later when they recharge. Let’s break it down so you know exactly how to do it for MTN, Glo, Airtel, and 9Mobile.
General Requirements To Borrow Airtime
Before you jump in, here are a few things you should know:
You must be a prepaid user (postpaid users are not eligible).
Your line must be active for a certain period (varies per network).
You should have a history of regular recharges.
You must have repaid any previous borrowed airtime.
There is always a service charge (usually 15%), so you’ll receive less than what you borrow.
Now, let’s get into the specifics for each network.
How To Borrow Airtime From MTN
MTN calls its airtime loan service MTN XtraTime. To check your eligibility, dial *303# and select “Check Eligibility.” If you’re eligible, follow these steps:
Borrow Airtime From MTN Using USSD Code
Dial *303# on your MTN line.
Select “Borrow Airtime.”
Choose an amount from the options displayed (eligibility depends on your usage history).
Confirm the request.
You’ll receive an SMS confirming the transaction.
Borrow Airtime From MTN Using The MTN App
Open the MTN app and log in.
Tap “Borrow.”
Select “Airtime” from the options.
Choose the amount you want to borrow.
Review the service charge and confirm.
The borrowed airtime will be credited to your account.
Borrow Airtime From MTN Via Customer Support
Call 300, follow the prompts, or request to speak with an agent.
Borrowed Amount
Service Charge (15%)
Amount Received
₦50
₦7.50
₦42.50
₦100
₦15
₦85
₦200
₦30
₦170
₦500
₦75
₦425
How To Borrow Airtime From Airtel
Airtel calls its airtime loan service Airtel Extra Credit. You need to be an active user for at least three months and recharge a minimum of ₦200 per month to qualify.
Borrow Airtime From Airtel Using USSD Code
Dial *303# on your Airtel line.
Select “Borrow Credit.”
Choose an amount (eligibility depends on your past usage).
Confirm the request.
You’ll receive an SMS notification once the airtime is credited.
Borrow Airtime From Airtel Using myAirtel App
Log into the myAirtel app.
Click on “Borrow Airtime.”
Select an amount based on your eligibility.
Click “Confirm.”
The airtime will be credited instantly.
Borrow Airtime From Airtel Via Customer Support
Call 300 and follow the prompts.
Borrowed Amount
Service Charge (15%)
Amount Received
₦50
₦7.50
₦42.50
₦100
₦15
₦85
₦200
₦30
₦170
₦500
₦75
₦425
How To Borrow Airtime From Glo
Glo’s airtime loan service is called Glo Borrow Me Credit. To qualify, you must have been active on the network for at least four months.
Borrow Airtime From Glo Using USSD Code
Dial *303# on your Glo line.
Select “Borrow Credit.”
Choose an amount from the available options.
Confirm the transaction.
Your account will be credited instantly.
Borrow Airtime From Glo Using The Glo Cafe App
Log into the Glo Cafe app.
Click “Show All,” then tap “Borrow Me.”
Choose the amount you want to borrow.
Click “Subscribe” to confirm.
Borrowed Amount
Service Charge (15%)
Amount Received
₦50
₦7.50
₦42.50
₦100
₦15
₦85
₦200
₦30
₦170
₦500
₦75
₦425
How To Borrow Airtime From 9Mobile
9Mobile’s airtime loan service is called 9Mobile More Credit. To qualify, you must have been using your SIM for at least three months and recharge a minimum of ₦200 monthly.
Borrow Airtime From 9Mobile Using USSD Code
Dial *303# on your 9Mobile line.
Select “Borrow Airtime.”
Choose the amount you want to borrow.
Confirm the request.
The airtime will be credited instantly.
Borrow Airtime From 9Mobile Using The 9Mobile App
Log into the 9Mobile app.
Tap the menu icon.
Select “Borrow Airtime” under the Services section.
Choose the amount and confirm the request.
The borrowed airtime will be added to your balance.
Borrowed Amount
Service Charge (15%)
Amount Received
₦50
₦7.50
₦42.50
₦100
₦15
₦85
₦200
₦30
₦170
₦500
₦75
₦425
How to Repay Borrowed Airtime on MTN, GLO, Airtel, and 9Mobile
To repay borrowed airtime, just top up your line, and the amount you owe will be deducted automatically. The 15% service fee is already factored in when you take the loan, so there’s no extra charge during repayment.
Airtime Deduction Process
For example, if you borrow ₦500, you’ll receive ₦425 after the service fee is deducted. Once you recharge, the full ₦500 will be taken from your balance.
Borrowing airtime is a lifesaver when you’re in a pinch, but remember, it’s not free money! Always check your eligibility, be aware of the service charges, and repay as soon as you recharge. Now that you know how to borrow from MTN, Airtel, Glo, and 9Mobile, you’ll never be stuck without airtime when you need it most!
FAQs
1. How Much Airtime Can I Borrow?
The amount you can borrow depends on your network provider and your credit limit. To know your eligible loan amount, you’ll need to check with your service provider.
2. Can Borrowed Airtime Be Used to Purchase Data?
Yes, you can use borrowed airtime to buy data on most networks. However, MTN, GLO, Airtel, and 9Mobile also allow users to borrow data directly and repay when they recharge.
3. Can I Take Another Loan If I Haven’t Repaid the Previous One?
This depends on your network. 9Mobile and MTN let users borrow airtime even with an unpaid balance, as long as they haven’t exceeded their credit limit. On the other hand, GLO and Airtel require you to settle any outstanding debt before requesting another loan.
4. What Happens If I Don’t Repay My Borrowed Airtime?
Each network has its own rules. GLO, for example, blocks you from borrowing more airtime until you clear your debt. It may also lower your credit score, limiting how much you can borrow in the future. MTN, however, allows users to take another loan if they haven’t exceeded their borrowing limit. It’s best to check with your provider to know their specific policy.
5. How Do I Borrow Data on MTN, GLO, Airtel, and 9Mobile?
The process is similar to borrowing airtime. Simply dial *303# and follow the instructions. You can also borrow through the network’s mobile app or by contacting customer service.
6. Can I Repay Borrowed Airtime Even If I Haven’t Used It?
Yes, you can repay borrowed airtime by recharging, even if you haven’t used it. However, the 15% service fee is non-refundable.
Telecel Ghana rewards its loyal customers with Red Coins, a special kind of loyalty point that you can use to get free airtime, data, and other discounts. But how exactly do you redeem these points? Don’t worry—I’ll walk you through everything step by step, making it super easy to understand. Let’s dive in!
What Are Telecel Red Coins?
Think of Telecel Red Coins as reward points you earn whenever you use Telecel services. Whether you’re buying airtime, subscribing to a data bundle, or using Telecel Cash, you’re earning these points without even thinking about it. The more you use Telecel, the more Red Coins you collect!
How Do You Earn Telecel Red Coins?
Here’s a simple breakdown of how you accumulate Red Coins:
Activity
Red Coins Earned
Recharge GHS 0.10
1 Red Coin
Buy a bundle
Varies
Use Telecel Cash
Varies
Transfer credit
Varies
The best part? You don’t need to sign up for anything! As long as you’re a prepaid or hybrid Telecel user, you’re automatically earning points.
How to Check Your Red Coins Balance
Before redeeming your points, it’s a good idea to check how many you have. Here’s how:
Dial *533# on your Telecel line.
Select Check Red Coins from the menu.
You’ll receive a message with your current Red Coins balance.
Simple, right? Now let’s get to the fun part—redeeming your points!
How to Redeem Your Telecel Red Coins
There are two easy ways to redeem your Telecel Red Coins:
Via USSD Code (Dialing a simple code on your phone)
If you prefer dialing codes (which is quick and doesn’t require internet), follow these steps:
Dial *533# on your Telecel phone.
Select Redeem Red Coins from the menu.
Choose a reward category (Airtime, Data Bundles, or Discounts).
Pick your preferred package.
Confirm your selection and wait for the confirmation SMS.
And just like that, you’ve successfully redeemed your Red Coins!
Method 2: Redeeming Red Coins via the Telecel Play App
If you’re comfortable using apps, the Telecel Play App makes it even easier:
Open the Telecel Play App on your phone.
Scroll down and select Red Loyalty under Value Added Services.
Choose the reward category you want (airtime, data, etc.).
Select the specific package you want.
Tap Redeem and wait for the confirmation SMS.
Both methods work smoothly, so just pick the one that’s most convenient for you!
Important Things to Know About Telecel Red Coins
Here are some key points to keep in mind:
Question
Answer
Do Red Coins expire?
Yes, they expire one year after they are earned. If you earned points in January 2024, they will expire in January 2025.
Can I transfer my Red Coins?
No, Red Coins cannot be transferred to another Telecel user.
Do I have to sign up to earn Red Coins?
No, you earn them automatically when using Telecel services.
Can I use Red Coins for anything other than airtime and data?
Right now, they are mainly for airtime, data, and Telecel service discounts.
How to Make the Most of Your Telecel Red Coins
Now that you know how to earn and redeem Red Coins, here are some pro tips to maximize your rewards:
Use Telecel regularly – The more you recharge and buy bundles, the more points you earn.
Keep track of your balance – Check your Red Coins often so you don’t let them expire.
Redeem them early – Don’t wait too long to use your points. They expire after a year, so spend them before they disappear!
Use the app for convenience – The Telecel Play App makes it easier to manage and redeem your rewards.
Final Thoughts
Telecel’s Red Coins are a great way to get free airtime, data, and discounts just by using your phone as you normally would. Whether you prefer dialing *533# or using the Telecel Play App, redeeming your points is quick and hassle-free.
Now that you know how to check, earn, and redeem your Telecel Red Coins, why not go ahead and use your points today? You might just get some extra airtime or data for free!
Nigeria has one of the largest banking industries in Africa, with financial institutions that serve millions of customers daily. Whether you’re opening your first account, looking for investment opportunities, or just curious about the biggest players in the industry, knowing Nigeria’s top banks is essential. In this article, we break down the 10 largest banks in Nigeria, their sizes, history, and what makes them stand out. Let’s dive in!
10. Union Bank of Nigeria – N3.65 trillion
Established in 1917, Union Bank is one of Nigeria’s oldest financial institutions. Over the years, it has built a strong reputation for stability and trust. Today, it has an asset size of about N3.65 trillion and serves over 7.8 million customers through its 258 branches and cash centers nationwide.
Why It Matters: Union Bank has consistently focused on digital banking solutions and financial inclusion, making banking accessible to more Nigerians.
9. First City Monument Bank (FCMB) – N3.78 trillion
FCMB started in 1982, founded by Otunba Subomi Balogun. Today, it has grown into a major player in Nigeria’s banking industry, with an asset size of N3.78 trillion. FCMB operates in all 36 states, with 203 branches and a customer base of about 8.7 million people.
What Stands Out:FCMB is known for its support of small businesses and entrepreneurs, making it a preferred bank for startups and SMEs.
8. Stanbic IBTC Bank – N4.97 trillion
A subsidiary of South Africa’s Standard Bank Group, Stanbic IBTC has an asset size of N4.97 trillion. With about 130 branches and 814 ATMs across Nigeria, this bank is widely recognized for its innovative digital banking services.
Why People Like It: If you’re into wealth management, investments, or stock trading, Stanbic IBTC is a go-to bank.
7. Fidelity Bank – N6.23 trillion
Fidelity Bank started as a merchant bank in 1988 but later transformed into a commercial bank in 1999. It has grown steadily and now has an asset size of N6.23 trillion, with 249 branches in Nigeria and one in the UK.
Key Feature: Fidelity Bank is known for strong customer service and SME-friendly banking solutions.
6. GT Bank – N8.79 trillion
GT Bank, a subsidiary of GTCO Holdings, is one of Nigeria’s most popular banks. With an asset size of N8.79 trillion and 270 locations, including 237 branches and 33 digital banking outlets, GT Bank has set itself apart with excellent digital banking services.
Why It’s Popular: GT Bank is a leader in mobile and internet banking, making transactions seamless and easy for customers.
5. Ecobank Nigeria – N10.37 trillion
A subsidiary of Ecobank Transnational Incorporated, Ecobank Nigeria has assets worth N10.37 trillion. The bank operates 273 branches and 541 ATMs nationwide.
What’s Interesting: Founded in Togo, Ecobank operates in 32 African countries, making it one of the most Pan-African banks on this list.
4. First Bank of Nigeria – N16.90 trillion
First Bank, Nigeria’s oldest bank, was established in 1894. With an asset size of N16.9 trillion, it has 595 branches and 144 Quick Service Points (QSPs) in Nigeria. Additionally, it has 86 international branches.
Biggest Strength: It serves over 41 million customers, making it Nigeria’s bank with the highest number of account holders.
3. Zenith Bank – N24.28 trillion
Founded in 1990 by Jim Ovia, Zenith Bank has grown into Nigeria’s third-largest bank, with an asset size of N24.28 trillion. It has 447 branches, including 397 in Nigeria, and serves over 33 million customers.
Why It’s Special: Zenith Bank is known for its profitability and strong corporate banking services.
2. United Bank for Africa (UBA) – N25.37 trillion
UBA operates in 24 countries, with 451 branches in Nigeria alone. It has an asset size of N25.37 trillion and employs over 10,000 staff worldwide.
Key Fact: UBA is one of the best banks for international banking services, with a presence in Africa, Europe, and the U.S.
1. Access Bank – N32.57 trillion
Access Bank is Nigeria’s largest bank, with assets worth N32.57 trillion. It has 737 branches, including 554 in Nigeria and 183 in 20 other countries.
Why It’s Number One: Access Bank has expanded aggressively, acquiring several banks over the years, making it the biggest financial institution in Nigeria.
Comparison Table of Nigeria’s Top 10 Banks
Rank
Bank Name
Asset Size (Naira)
Branches in Nigeria
1
Access Bank
N32.57 trillion
554
2
United Bank for Africa
N25.37 trillion
451
3
Zenith Bank
N24.28 trillion
397
4
First Bank of Nigeria
N16.90 trillion
595
5
Ecobank Nigeria
N10.37 trillion
273
6
GT Bank
N8.79 trillion
237
7
Fidelity Bank
N6.23 trillion
249
8
Stanbic IBTC Bank
N4.97 trillion
130
9
First City Monument Bank
N3.78 trillion
203
10
Union Bank of Nigeria
N3.65 trillion
258
These banks play a crucial role in Nigeria’s economy, offering various services from personal banking to large corporate financing. Whether you need a simple savings account, a business loan, or international banking services, there is a bank that fits your needs.
So, you woke up one day, tried making a call, and boom—your MTN or Airtel line isn’t working. No calls, no texts, no data. Frustrating, right? If your SIM got blocked due to the ongoing NIN-SIM linkage requirements, don’t worry. Fixing it is easier than you think. Let’s break it down step by step, so you can get back online in no time.
Why Did Your Line Get Blocked?
The Nigerian Communications Commission (NCC) made it mandatory for all SIM cards to be linked with the National Identification Number (NIN). If your line is blocked, it’s most likely because you haven’t linked your NIN, or the process wasn’t completed properly.
Now, let’s move on to how you can unblock it.
How to Unblock Your Line on MTN & Airtel
For MTN Users
MTN makes it easy to check and link your NIN. Here’s what you need to do:
Call 8002345678 or email [email protected]. You’ll need to visit a Spectranet store for final verification.
Ntel
Visit any Ntel store with your NIN for fingerprint verification.
How Long Does It Take to Get Unblocked?
Most of the time, once your NIN is successfully linked, your line should be restored within a few hours. In rare cases, it might take up to 24–48 hours. If it takes longer, contact your network’s customer care.
Getting blocked can be annoying, but now you know exactly what to do. Whether you’re on MTN, Airtel, or any other network, linking your NIN is the fastest way to restore your line. If you’re still having trouble, visit a service center for help.
Need your line unblocked fast? Follow these steps now and get back to making calls, texting, and browsing without stress!
In today’s digital world, having access to a virtual dollar card has become essential for Nigerians who want to shop online, subscribe to international services, or run a global business. These cards solve a major problem: how to spend money internationally without the hassle and high fees of traditional banking.
What Are Virtual Dollar Cards?
Think of a virtual dollar card as a digital version of a physical credit or debit card. It works exactly the same way – you can use it to make purchases online – but it exists only in digital form. You get all the card details (card number, expiry date, and CVV) without having a piece of plastic in your wallet.
These cards are funded with dollars, which means you can pay for services that only accept USD without worrying about currency conversion issues. For Nigerians dealing with services like Netflix, Spotify, Amazon, or platforms that require dollar payments, these cards are a game-changer.
Why Nigerians Need Virtual Dollar Cards
If you’ve ever tried to use a Nigerian naira card for international purchases, you might have encountered frustrating declines or restrictions. Virtual dollar cards solve several problems:
Global Acceptance: They work on platforms that might reject Nigerian cards
Forex Simplicity: You avoid complicated currency conversion processes
Lower Fees: Many virtual card providers offer better rates than traditional banks
Security: You can create and delete cards as needed, reducing fraud risk
Subscription Management: Perfect for managing recurring payments to international services
Top Virtual Dollar Cards in Nigeria Now
Let’s dive into the best options available for Nigerians right now. I’ve researched the top providers and compiled their key features to help you find your perfect match.
Top Selection at a Glance
Provider
Creation Fee
Monthly Fee
Min Funding
Monthly Limit
Special Features
Cardtonic
$1.5
none
Not specified
Not specified
Best exchange rates, widely accepted
Vesti
$10
none
$10
$10,000
100+ platform acceptance
GeePay
$3
none
$2
Not specified
Multiple currencies (USD, GBP, EUR)
Grey
$4 ($1 rebate)
none
$2
$2,500/transaction
Multi-currency support
Chipper Cash
$3
$1
Not specified
Not specified
3D-secure protection
Cardify Africa
$2
none
Not specified
Not specified
Multiple funding options
PSTNET
$7-$10
none
Not specified
Not specified
Specialized for ads platforms
Zole
$2
none
Not specified
Not specified
0.5% transaction fee, 3-year validity
Klasha
$2
none
Not specified
Not specified
Spending analytics
Bitsika
$3
none
Not specified
Not specified
Crypto & Naira funding
Dantown
$2
none
Not specified
Not specified
Crypto & Naira funding
Changera
Varies
none
$0
$10,000
Multi-currency support
ALAT by Wema
none
none
Not specified
Not specified
Bank-backed security
Spectrocard
$3
none
Not specified
Not specified
Detailed transaction reports
Tribapay
Varies
none
Not specified
Not specified
Multiple cards, PayPal linking
Fundall
Free (1st card), $2 (others)
none
$5
Not specified
Multiple card creation
Bitnob
$1
$1 (if < $100)
Variable
$10,000
Customizable cards
Eyowo
$2
none
Not specified
Not specified
Spending tracking
Eversend
none
$1
$1
Not specified
Multi-country support
Gomoney
Free (1st card), ₦850 (others)
none
Not specified
$100
Free first card
Nearpays
$2
none
Not specified
Not specified
Spending limits feature
PayDay
$2
none
$2
Not specified
Integrated with financial tools
Kuda
Free
none
$1
$1,000
No maintenance fees
Note: Information is accurate as of this article’s publication. Some details may change, so always check the provider’s website for the most current information.
Cardtonic offers one of the most affordable virtual dollar cards in Nigeria with wide acceptance across major platforms. The card can be funded in Naira at competitive exchange rates, making it ideal for international payments. No recurring fees make it a cost-effective option for regular users.
Why Cardtonic stands out:
Global acceptance on major platforms including Amazon, Netflix, Spotify, ChatGPT, and more
Simple setup process: just download the app, complete KYC, and fund your wallet
Perfect combination of affordability, ease of use, and reliability
The absence of maintenance fees means you’re not paying for the card when you’re not using it
For beginners just getting started with virtual dollar cards, Cardtonic offers an ideal entry point with its user-friendly approach and comprehensive platform support.
2. Vesti
If you’re looking to make larger international payments, Vesti deserves your attention. With a monthly spending limit of $10,000, it’s built for users who need to move significant amounts.
Minimum Funding: $10 Monthly Limit: $10,000 Standout Feature: Accepted on over 100 platforms
Vesti’s virtual dollar card offers a straightforward experience with strong security features. The app lets users easily manage transactions, view balances, and delete compromised cards when necessary. It’s particularly good for users who want reliability without complexity.
What makes Vesti special:
User-friendly app interface for easy transaction management
Secure payment processing with reliable customer support
High monthly spending limit ideal for business transactions
Comprehensive platform support for various international services
Vesti is particularly suitable for business owners and professionals who need higher transaction limits and robust security features.
3. GeePay (by Raenest)
GeePay takes flexibility to another level by offering virtual cards in multiple currencies (USD, GBP, and EUR). This makes it perfect for freelancers and business owners who work with clients from different regions.
Perfect for freelancers and business owners, GeePay’s card works seamlessly with platforms like PayPal and Payoneer. The multi-currency support makes it versatile for various international transactions. It also supports withdrawals to local banks and mobile money accounts in over 100 countries.
GeePay’s standout features:
No monthly maintenance charges
Works seamlessly with PayPal and Payoneer
Supports withdrawals to local banks in over 100 countries
Ideal for freelancers working with international clients
If you’re a freelancer receiving payments from clients abroad, GeePay offers the currency flexibility that can save you money on conversion fees.
4. Grey
Grey offers an interesting proposition: a $4 creation fee but gives you $1 back into your account. This effectively makes the creation cost just $3, along with zero maintenance fees.
Creation Fee: $4 (with $1 cashback) Funding Range: $2 – $2,500 per transaction Standout Feature: Zero maintenance fees with competitive exchange rates
Grey offers flexible funding options with support for multiple currencies including NGN, USD, and GBP. The absence of maintenance fees makes it economical for long-term use. Its simplicity and reliability make it a top choice.
Grey’s advantages:
Multi-currency support (NGN, USD, GBP)
Competitive exchange rates
Seamless user experience with intuitive app design
Effective $3 creation fee after cashback
Grey is ideal for regular online shoppers who want a straightforward, no-hidden-fees experience for their international purchases.
5. Chipper Cash
Security-conscious users will appreciate Chipper Cash‘s 3D-secured virtual dollar card. While it does come with a $1 monthly maintenance fee (one of the few on this list that charges monthly), the enhanced security features make it worthwhile for many.
Chipper Cash provides enhanced security with 3D protection, making it a safe option for international payments. The strong acceptance on popular platforms like Spotify, Netflix, and Apple services makes it worth considering. The app offers a user-friendly interface for managing your card.
Why consider Chipper Cash:
Strong security features with 3D authentication
Wide acceptance on popular platforms
User-friendly mobile app for card management
Reliable customer support
If security is your primary concern when making online payments, the small monthly fee might be a worthwhile trade-off for Chipper Cash’s enhanced protection.
Cardify Africa‘s virtual dollar card offers flexibility and ease of use. The zero maintenance fee policy keeps costs down for regular users, and the multiple funding options make it accessible regardless of how you prefer to manage your money.
The card works well on platforms like AliExpress, eBay, and Amazon, giving you access to a world of online shopping without the typical restrictions Nigerian cards face.
7. PSTNET
Monthly Fee: $7-$10 Standout Feature: Specialized cards for advertising and e-commerce
PSTNET‘s cards are specifically designed for users who need to run digital advertising campaigns or make specialized online purchases. Though the fees are higher than some competitors, the specialized nature of these cards makes them invaluable for businesses running campaigns on platforms like Facebook Ads, TikTok, and Google.
You can fund the card with cryptocurrency, and the app offers tools to track spending and download transaction histories. If you’re running digital marketing campaigns, the specialized features justify the higher cost.
8. Zole
Creation Fee: $2 Validity: 3 years Standout Feature: Long validity period with no maintenance fees
Zole offers excellent value with a three-year validity period and no recurring maintenance costs. The 0.5% transaction charge is transparent and reasonable for the service provided. It’s particularly good for educational platforms like Udemy and Coursera.
If you’re looking for a card you can set up once and use for years without worrying about renewal fees, Zole provides an attractive option.
Klasha combines affordability with powerful features like spending analytics, real-time transaction notifications, and detailed histories. The competitive exchange rates when funding from your Naira wallet make it an economical choice for regular international shoppers.
The app also keeps you organized with spending analytics, making it perfect for budget-conscious users who want to track their international spending habits.
Bitsika offers flexibility with its funding options, accommodating both traditional currency users and crypto enthusiasts. The absence of maintenance charges and the intuitive app interface make it a solid choice for managing international payments.
If you’re into cryptocurrency and want the option to fund your card directly from your crypto holdings, Bitsika provides a seamless experience for bridging the crypto and fiat worlds.
Dantown provides a reliable virtual dollar card that works well with major international platforms including the sometimes-challenging PayPal. The dual funding options (Naira or cryptocurrency) offer flexibility for different types of users.
For Nigerians who need reliable PayPal access, Dantown solves a common pain point with its compatibility with the platform.
Changera, powered by Bitmama, offers excellent flexibility with its multi-currency support. The absence of a minimum funding requirement removes barriers for new users, and the compatibility with PayPal makes it versatile for various uses.
The high monthly limit of $10,000 also makes it suitable for business users who need to make larger transactions.
13. ALAT by Wema
Standout Feature: Bank-backed security and integration
As a product of an established bank, ALAT‘s virtual card offers enhanced security and reliability. The seamless integration with the bank’s other services provides a comprehensive financial experience, and the ability to quickly manage cards within the app adds convenience.
If you already use Wema Bank services, the integration with your existing banking relationship makes ALAT a natural choice.
Spectrocard caters especially well to business owners and freelancers who need detailed transaction reports. The multiple funding options and absence of hidden charges make it transparent and user-friendly.
Business owners will appreciate the ability to download detailed transaction reports directly from the app, simplifying expense tracking and financial management.
15. Tribapay
Standout Feature: Multiple card creation and PayPal linking
Tribapay excels in flexibility, allowing users to create multiple cards for different purposes. The ability to link cards to PayPal accounts and set individual spending limits offers enhanced control over your finances.
If you need to separate spending for different projects or clients, Tribapay’s multiple card management features provide the organization you need.
16. Fundall
First Card: Free Additional Cards: $2 each Minimum Funding: $5 Standout Feature: First card free policy
Fundall offers excellent value with its free first card policy. The minimum funding requirement is reasonable, and the broad acceptance across major platforms makes it versatile for various uses.
For newcomers to virtual dollar cards, the zero entry cost makes Fundall an attractive option to test the waters without financial commitment.
Bitnob stands out with its highly customizable cards and remarkably low creation fee. The card works across several African countries, making it a good option for regional transactions as well as international ones.
The personalization options let you create cards that reflect your personality or business brand, adding a unique touch to your financial tools.
Eyowo combines simplicity with security, offering competitive exchange rates when funding with Naira. The tracking and card management features in the app add valuable control for users.
The app makes life easier by letting you track spending, freeze your card, or delete it if necessary, giving you complete control over your card security.
Eversend‘s broad geographic support makes it ideal for users who transact across multiple regions. The transparent fee structure and security features offset the small monthly maintenance fee.
The multi-country support makes it particularly valuable for users who travel frequently or do business across different regions.
20. Gomoney
First Card: Free Additional Cards: ₦850 each Monthly Limit: $100 per user Standout Feature: Free first card with transparent spending breakdown
Gomoney is budget-friendly with its free first card policy and absence of monthly fees. The spending breakdown feature helps with financial management, though the $100 monthly limit may be restrictive for heavy users.
The transparent spending breakdown helps you understand where your money is going, making it ideal for budget-conscious users who want to keep track of their expenses.
Nearpays caters well to freelancers and businesses dealing with international clients. The spending limit features and ability to freeze cards add security and control that professional users will appreciate.
The ability to set spending limits makes it perfect for budgeting and financial management, especially for freelancers with variable income.
PayDay offers a comprehensive financial experience by integrating its virtual card with broader financial planning tools. The low minimum funding requirement makes it accessible to new users, and the absence of monthly fees keeps costs predictable.
If you’re looking to incorporate your virtual card into a broader financial management strategy, PayDay’s integrated approach provides valuable synergy.
Kuda offers a virtual card with no creation fee, making it an affordable option for users looking for a cost-effective digital payment solution. With its low minimum funding requirement and absence of maintenance fees, Kuda is an attractive choice for those who want a seamless online transaction experience.
For individuals who need a hassle-free virtual card for everyday purchases, Kuda provides a straightforward and budget-friendly option without unnecessary charges.
How To Choose The Right Virtual Dollar Card
With so many options, how do you pick the right one? Here’s a simple framework:
Consider your usage pattern: Do you need it for occasional purchases or regular subscriptions?
Evaluate the fees: Look at creation fees, maintenance charges, and transaction costs
Check funding options: Do you prefer funding with Naira or cryptocurrency?
Verify acceptance: Make sure it works on the platforms you regularly use
Review limits: Does the card offer sufficient spending limits for your needs?
For most Nigerians, the ideal virtual dollar card combines low fees, easy funding options, wide acceptance, and reliable customer support.
FAQs
Are virtual dollar cards legal in Nigeria?
Yes, they are completely legal. These cards are provided by licensed financial institutions that comply with Central Bank of Nigeria regulations.
Can I use a virtual dollar card on any website?
Most virtual dollar cards work on major international platforms. However, some websites might have restrictions based on geographic location rather than the card type itself.
How do I fund a virtual dollar card?
Most providers allow you to fund the card through their app or website. You typically convert Naira to USD at the provider’s exchange rate, and the funds are then available on your virtual card.
What happens if my virtual card is compromised?
One of the advantages of virtual cards is that you can easily freeze or delete them if you suspect any unauthorized use. Most providers allow you to do this directly from their app.
Can I have multiple virtual dollar cards?
Yes, many providers allow you to create multiple virtual cards for different purposes. This can be useful for separating business expenses from personal spending or for managing different subscription services.
How do I get a virtual card in Nigeria?
To get a virtual card in Nigeria, you need to sign up with a fintech platform or bank that offers virtual cards. Some popular options include Grey, ALAT by Wema, Cardtonic, Chipper Cash, and Eversend. After signing up, navigate to the virtual card section, complete any necessary verification, and fund your account to generate a virtual card.
How much is an ALAT virtual dollar card in Nigeria?
ALAT by Wema offers a virtual dollar card, but the cost depends on the exchange rate at the time of funding. Typically, you may need to pay an issuance fee and maintain a minimum balance. It’s best to check the ALAT app or website for the most updated charges.
Does OPay work in Ghana?
No, OPay does not currently operate in Ghana. It primarily serves users in Nigeria for payments, transfers, and financial services.
Does UBA offer virtual cards?
Yes, UBA offers virtual cards, such as the UBA Dollar Virtual Card, which can be used for online transactions. Customers can request a virtual card through UBA’s mobile banking app or online banking platform.
What is the difference between an OPay physical card and a virtual card?
An OPay physical card is a tangible debit card that can be used for ATM withdrawals, POS transactions, and online payments. A virtual card, on the other hand, exists only in digital form and is mainly used for online transactions, providing extra security since it cannot be lost or stolen physically.
Beyond The Basics: Advanced Virtual Card Strategies
Once you’re comfortable using virtual dollar cards, consider these advanced strategies:
Create separate cards for different services: Use dedicated cards for various subscriptions to better track spending
Set spending limits: Many providers allow you to set limits on individual cards
Use virtual cards for trial subscriptions: Create a card with just enough funds for the trial to avoid unexpected charges
Monitor exchange rates: Fund your card when rates are favorable to maximize value
Consider specialized cards: For business advertising or specific uses, look at cards designed for those purposes
As Nigeria continues its digital transformation, virtual dollar cards will become even more integral to how we participate in the global digital economy. The technology is evolving rapidly, with providers continuously improving features, reducing fees, and enhancing security.
For Nigerians looking to access international services or participate in the global marketplace, virtual dollar cards have removed a significant barrier. They’ve democratized access to international payments, enabling everything from educational opportunities through platforms like Coursera to business growth via advertising on platforms like Facebook and Google.
Whether you’re a student, freelancer, business owner, or just someone who enjoys shopping on international websites, there’s a virtual dollar card solution that fits your specific needs. The key is understanding your requirements and matching them to the provider that offers the best value proposition for your particular situation.
The options listed in this guide represent the best available currently, but the market is dynamic. New providers emerge regularly, and existing ones frequently update their offerings. Always do a quick check for the most current information before making your final decision.
With the right virtual dollar card in your digital wallet, you’re all set to participate fully in the global digital economy – no barriers, no limitations, just smooth international transactions at your fingertips.
Imagine having a special key that unlocks all your bank accounts, no matter which bank you use. That key is your Bank Verification Number (BVN). It’s an 11-digit number assigned to you by the Central Bank of Nigeria (CBN) to protect your identity and make banking safer. Think of it like a fingerprint for your finances—unique and impossible to duplicate.
Why is BVN important? Well, it helps prevent fraud, makes transactions easier, and ensures that banks can verify who you are without confusion. Without a BVN, you may not be able to open a bank account, apply for a loan, or even use certain banking services.
Now, if you’re using an MTN line and need to check your BVN, here’s the easiest way to do it.
How to Check Your BVN on MTN
Method 1: Using a USSD Code
The fastest way to check your BVN on MTN is by dialing a simple code on your phone. This method works on any mobile device, whether it’s a basic feature phone or a smartphone.
Steps:
Open your phone’s dialer.
Dial *565*0# and press the call button.
Wait a few seconds, and your BVN will appear on the screen.
Write it down or save it in a secure place.
Note: This service is not free. MTN charges a small fee (usually around ₦20) for each BVN request.
Method 2: Checking via SMS (Alternative Option)
Some banks and telecom providers allow BVN retrieval via SMS, but this option is not always available on MTN. If you’re unable to use the USSD code, check with your bank for SMS options.
Things to Keep in Mind
Factor
Details
Service Fee
₦20 per request
Works On
Any MTN-connected phone
BVN Length
11 digits
Availability
24/7, anytime, anywhere
What If You Can’t Retrieve Your BVN?
If you dial *565*0# and don’t get your BVN, here’s what might be wrong:
Your phone number isn’t linked to your BVN – The MTN number you’re using must be the one linked to your BVN during registration.
Insufficient airtime – Ensure you have at least ₦20 on your MTN line.
Network issues – Try again later if the service is temporarily unavailable.
Can You Check Your BVN Online?
Currently, there’s no direct way to check your BVN online via MTN. However, you can retrieve it through:
Your Bank’s Mobile App – Many banks display your BVN when you log in.
Internet Banking – Log in to your bank’s online portal and check your profile details.
Visiting a Bank Branch – If all else fails, walk into any branch of your bank with a valid ID, and they’ll provide your BVN.
Frequently Asked Questions (FAQs)
1. Can I check my BVN for free on MTN?
No, checking your BVN using *565*0# costs ₦20 per request.
2. Can I check my BVN on another person’s phone?
No, you must use the MTN number linked to your BVN during registration.
3. What should I do if I forget my BVN?
You can retrieve it by dialing *565*0# on your registered MTN line or checking via your bank’s mobile app.
4. Can I change my BVN?
No, your BVN remains the same for life. However, you can update your personal details linked to it at your bank.
5. Is my BVN safe to share?
Never share your BVN with anyone unless it’s a trusted bank representative. Fraudsters may try to use it to access your banking details.
Checking your BVN on MTN is quick and easy. Just dial *565*0#, pay a small fee, and retrieve your BVN instantly. Make sure to keep it safe because it’s one of the most important banking details you’ll ever have!
If you have any issues retrieving your BVN, ensure you’re using the right MTN number, have enough airtime, and are in a good network coverage area. Stay informed and secure your financial identity!
MTN Mobile Money (MoMo) is one of the easiest ways to send, receive, and store money in Ghana. But did you know that your MoMo account has limits on how much you can transact daily or even hold in your account? Whether you use MoMo for small transactions or big business payments, knowing your limits can help you avoid surprises. In this guide, we’ll break it all down for you in simple, clear steps.
What Are MTN Mobile Money Limits?
Your MoMo limit determines the maximum amount of money you can send, receive, or keep in your wallet. MTN Ghana has three types of MoMo accounts, each with different limits:
KYC Account Type
Maximum Account Balance (GHS)
Daily Transaction Limit (GHS)
Monthly Transaction Limit (GHS)
Minimum
5,000
3,000
10,000
Medium
40,000
15,000
Unlimited
Enhanced
75,000
25,000
Unlimited
What Determines Your Account Limit?
Your MoMo limit depends on the level of Know Your Customer (KYC) verification you’ve completed with MTN Ghana. Here’s how it works:
Minimum Account – The most basic account type. You only need a Ghana Card to register.
Medium Account – Requires extra details like your next of kin and the source of your funds.
Enhanced Account – The highest level, requiring proof of address (such as a utility bill or bank statement) plus the Medium Account requirements.
If you’re not sure which type of account you have, don’t worry—you can check it in just a few seconds!
How to Check Your MTN MoMo Limit
Want to know your MoMo limit? Follow these easy steps on your phone:
You’ll receive a message showing your MoMo account type and limits.
That’s it! Now you know exactly how much you can send, receive, or keep in your MoMo account.
How to Increase Your MTN MoMo Limit
If your current MoMo limit isn’t enough for your needs—maybe you run a business or frequently make large transactions—you can request an upgrade. Here’s how to do it:
Check your phone for the One-Time Password (OTP) and enter it on the portal.
Select “MoMo Profile Enhancement Form” from the options.
Accept the disclaimer and proceed to fill out the form.
Attach any required documents, such as a utility bill (for enhanced accounts).
Click “Submit Request” to send your application.
You will receive a ticket number via SMS.
Send this ticket number to MTN Ghana’s WhatsApp support at +233554300000 for further processing.
Your request will be reviewed, and once approved, your new limits will take effect.
FAQs About MTN MoMo Limits
1. Can I increase my MoMo limit without visiting an MTN office?
Yes! You can request a limit upgrade online via the MTN eRequest portal. However, for higher limits, you may need to submit additional documents.
2. Are the MoMo limits the same for everyone?
No, your limits depend on your KYC verification level. If you’ve provided only basic details, you’ll have a lower limit than someone who has completed full verification.
3. How long does it take to upgrade my MoMo limit?
It usually takes a few business days for MTN to process your request. If there are delays, you can follow up using your ticket number.
4. Can I downgrade my MoMo limit if I want to?
No, once you upgrade to a higher limit, you cannot downgrade it. However, you can manage your spending by keeping track of your transactions.
Knowing your MTN MoMo limits helps you plan your transactions wisely. Whether you’re sending money to family, paying for goods, or running a business, understanding your account limits ensures you don’t run into unexpected restrictions. If your current limit isn’t enough, upgrading is easy—just follow the steps above.
Now that you know how to check and increase your MoMo limit, managing your mobile money transactions will be a breeze!
Staying connected with friends and family is important, but let’s be honest—airtime runs out fast, especially when you love long conversations. MTN Ghana has a special offer that lets you talk more while spending less. It’s called MTN Free After 1, and if you’re an MTN user, you need to know how it works!
In this guide, I’ll break it down in the simplest way possible. Whether you’re new to MTN or just hearing about this offer, by the time you finish reading, you’ll know exactly how to activate it, how it works, and why it’s a smart deal. Let’s dive in!
What is MTN Free After 1?
MTN Free After 1 (also known as Nkomode) is a voice offer that lets you enjoy free call minutes after paying for just the first minute of your call.
Sounds good, right? Here’s how it works:
You pay for the first minute of your call (GHS 0.3539).
After that, you get free minutes to continue your conversation.
You can call any network in Ghana without extra charges.
This means that with the Free After 1 Extra package, if your call goes beyond 10 minutes, you’ll pay for just another minute before enjoying another set of free minutes.
How to Activate MTN Free After 1
Activating the MTN Free After 1 offer is quick and easy. Just follow these steps:
Dial *550# on your MTN phone.
Select option 6 (Free After 1 Extra).
Choose your preferred package (Free After 1 or Free After 1 Extra).
Confirm activation, and you’ll receive a message that your subscription is successful.
And that’s it! The next time you make a call, you’ll be charged for only the first minute, and the rest will be free, depending on your chosen package.
How to Cancel MTN Free After 1
Maybe you tried the offer and decided it’s not for you, or you just want to switch to another plan. Here’s how to cancel it:
Dial *550# on your MTN phone.
Select option 6 (Free After 1 Extra).
Choose your active package (Free After 1 or Free After 1 Extra).
Select “Deactivate” to cancel the offer.
You’ll receive a message confirming that the service has been deactivated.
This offer is perfect for people who love talking without checking their airtime balance every few minutes. Here’s why you should consider it:
1. Save Money on Calls
Instead of paying per minute, you only pay for the first minute and get up to 60 minutes free. That’s a huge saving!
2. Talk Without Worries
No need to cut your calls short just to save airtime. Chat as long as you want without stress.
3. Bonus Data
Each time you subscribe, you get 70MB of free data valid for one day—perfect for quick browsing or checking messages online.
4. Call Any Network
Unlike some offers that work only for on-net calls, MTN Free After 1 works for all networks in Ghana.
FAQs
1. Can I Use This Offer for International Calls?
No. The Free After 1 offer is only for local calls within Ghana. International calls are billed separately.
2. Can I Use Free After 1 on Every Call?
Yes! As long as your subscription is active, every call you make follows the Free After 1 billing system.
3. Does the Offer Expire?
Your subscription remains active until you cancel it. However, the bonus 70MB data expires after one day.
4. What Happens If I Don’t Have Enough Airtime for the First Minute?
The call won’t connect. You need at least GHS 0.3539 to start a call on this plan.
5. Can I Switch Between Free After 1 and Free After 1 Extra?
Yes! You can switch between the two packages by following the activation steps and choosing your preferred option.
MTN’s Free After 1 is a great way to enjoy long calls while saving airtime. Whether you prefer 10 free minutes or 60 free minutes, this deal makes staying connected more affordable. If you make frequent calls, this offer is definitely worth activating.
Now that you know how it works, go ahead and try it out! Dial 550# and activate your preferred package today. Happy calling!
If you’ve got an MTN SIM card in Ghana, you need to register it—no ifs, ands, or buts. Whether you’re getting a new SIM or making sure your old one is properly registered, this guide will walk you through every step in the simplest way possible. Think of it like setting up a new phone—easy when you know what to do, but frustrating if you don’t. Let’s make sure you get it right the first time!
Why Do You Need to Register Your MTN SIM Card?
Registering your SIM card isn’t just some random rule—it’s a government requirement. The goal is to keep mobile networks secure and prevent fraud. If you don’t register, your SIM will eventually get blocked, meaning no calls, no texts, no data—nothing. That’s not a situation you want to be in!
What You Need for MTN SIM Registration
Before heading to an MTN office or agent, make sure you have:
Your Ghana Card (ECOWAS card) – No other ID will work!
Your digital address – You can find this using Ghana Post GPS
That’s it! If you have these three things, you’re good to go.
Step 1: Linking Your Ghana Card to Your MTN SIM
Before you can complete biometric verification, you need to link your SIM to your Ghana Card. You can do this in two ways: using a USSD code or through the myMTN app.
Method 1: Using the USSD Code (Easiest Method)
Dial *404# on your phone.
Follow the prompts and enter:
Your full name (as it appears on your Ghana Card)
Your Ghana Card number (skip the hyphens)
Your date of birth
You’ll get a confirmation message with a unique code.
Method 2: Using the myMTN App
If you prefer using an app, follow these steps:
Open the myMTN app (download it from Google Play Store or Apple App Store if you don’t have it).
Tap More, then My Account.
Select SIM Registration and agree to the Terms of Service.
Confirm that you are the owner of the SIM.
Enter your phone number and verify with an OTP (One-Time Password).
Enter your name and Ghana Card number.
You’ll get a notification confirming the linking process.
Note: If you’re registering a brand-new SIM, the linking process is automatic since it’s required before activation.
Step 2: Completing Biometric Verification
Linking your SIM isn’t enough—you still need to verify your identity through biometric registration. This part must be done in person at an MTN office or an authorized agent.
Here’s what to do:
Visit any MTN service center or an authorized MTN agent.
Provide your MTN SIM card, Ghana Card, and digital address.
The agent will scan your fingerprints and take other biometric details.
Once complete, they’ll confirm that your SIM is now fully registered.
You’ll receive a confirmation message, and your SIM is now good to go!
Step 3: Checking Your SIM Registration Status
Not sure if everything went through successfully? Here’s how to check:
B-Cap (Biometric Capture) status (if it says “Yes,” you’re fully registered)
If the B-Cap status is “No,” you need to visit an MTN office to complete biometric verification.
FAQs
Can I Register My MTN SIM by Myself?
No. MTN used to have a self-registration app, but it’s no longer available for customers. You must visit an authorized agent for biometric verification.
How Much Does SIM Registration Cost?
Officially, registering an MTN SIM is free when you buy a new SIM. However, some agents may charge between GHS 30 – GHS 35 for verification and Mobile Money (MoMo) registration.
What Happens if I Don’t Register My SIM?
If you don’t register your SIM, MTN will block it. You won’t be able to make calls, send texts, or use data. If you miss the final deadline set by the government, your number could be permanently deactivated.
Registering your MTN Ghana SIM card isn’t as complicated as it might seem. Just follow these steps:
Link your SIM to your Ghana Card using *404# or the myMTN app.
Visit an MTN office or agent for biometric verification.
Check your registration status by dialing *400#.
That’s it! Now, you can enjoy your MTN service without any worries. If you found this guide helpful, share it with someone who might need it!
Learn how to borrow airtime or data from MTN Ghana using *506# and stay connected with minimal fees.
Have you ever been in a situation where you’re trying to make an urgent call or stream your favorite music, but your airtime or data runs out? It can be super frustrating, especially when you don’t have any credit left and you need to stay connected. But don’t worry! MTN Ghana has got you covered with a service called XtraTime, which lets you borrow both airtime and data. That means, even if you’re out of credit, you can still make calls, send texts, or browse the web until you top up your balance.
Let’s walk through how you can easily borrow airtime and data from MTN. Trust me, it’s way simpler than you think!
What is MTN XtraTime?
MTN XtraTime is a super helpful service that allows you to borrow airtime or data when you’re running low. Whether you’re making an important call or need to finish that last bit of browsing, XtraTime has your back. However, there are a few things to know before you can start using this service.
Who Can Borrow Airtime or Data on MTN?
Before you start borrowing, make sure you meet the following criteria:
Registered MTN SIM: You need to be using an MTN SIM that’s properly registered.
Prepaid Customer: The service is available to prepaid or pay-as-you-go customers.
On the MTN Network for 3 Months: You should have been using MTN for at least three months.
Low Balance: If you have less than GHS 4 worth of airtime or data, you’re eligible to borrow.
No Unpaid Loans: If you have an outstanding loan from a previous XtraTime borrowing, you need to clear that first.
How to Borrow Airtime on MTN?
Imagine you’ve run out of airtime and need to make a quick call. Here’s what you need to do:
Dial the Code: On your phone, dial *506#. This is the magic number that gets you into the MTN XtraTime service.
Select Airtime Option: After dialing, you’ll see a menu with different options. Choose the one that says “Borrow Airtime” or, if you’re unsure, select Option 3 to see more choices.
Pick the Amount: You’ll be shown different amounts of airtime that you can borrow. Select the one that suits your needs. Don’t worry; there’s something for everyone!
Confirm Your Borrowing: Once you’ve selected your amount, MTN will ask you to confirm. Just press 1 to confirm your choice.
Get Your Airtime: Within a few seconds, you’ll get a message confirming the airtime has been added to your balance. You’re all set!
How to Borrow Data on MTN?
Now, let’s say you need some extra data to finish browsing or watching a video. Borrowing data from MTN is just as simple as borrowing airtime. Here’s how:
Dial the Code: Dial *506# to access the XtraTime service.
Select Data Option: Choose “Request Data Advance” from the menu.
Pick Your Data Bundle: You’ll see a list of data bundles you can borrow. Pick the one that fits your needs. Whether it’s a small amount for checking social media or a bigger bundle for streaming, MTN has you covered.
Confirm the Data Borrowing: After choosing your preferred bundle, you’ll need to confirm by pressing 1.
Receive Your Data: Just like with airtime, MTN will send you a message confirming that your data has been added to your account. Now you can browse to your heart’s content!
How Much Can You Borrow?
The amount of airtime or data you can borrow depends on a few things:
How Much You Use: If you often buy a lot of airtime or data, you’ll have a higher limit to borrow.
Your Repayment History: If you’ve been quick to repay your previous loans, MTN will trust you more and give you the option to borrow more in the future.
Your Limit: Everyone has a specific borrowing limit, which can grow over time if you’re a loyal MTN customer.
So, while you might not be able to borrow a huge amount at first, the more you use and repay XtraTime, the more you can borrow in the future.
How Much Does Borrowing Cost?
While XtraTime is super helpful, it’s not entirely free. MTN charges a small 10% service fee on everything you borrow.
For example, if you borrow GHS 1 worth of airtime, you’ll need to pay back GHS 1.10 when you recharge. If you borrow GHS 10 worth of data, the total cost will be GHS 11.
Here’s a quick tip: When you select the amount to borrow, always double-check the total cost before confirming your transaction. MTN will show you how much you’ll need to repay, so you can decide if it’s okay with you.
How Do You Pay Back the Borrowed Airtime or Data?
You don’t have to worry about remembering to repay your loan. MTN makes it easy by automatically deducting what you owe from your next airtime or data recharge. So, when you top up your balance, the borrowed amount will be deducted first. If you borrow data, the equivalent airtime will be deducted from your next recharge.
For example, if you borrow 500MB of data for GHS 3, plus a service fee of GHS 0.30, you’ll repay the total of GHS 3.30 the next time you top up.
Can You Borrow 1GB of Data?
Yes, but there’s a catch! Borrowing 1GB or more of data is usually reserved for long-time, loyal customers who frequently use the service. Your limit depends on how active you are on MTN’s network and your borrowing history. The more you use XtraTime and pay back on time, the higher your limit will get.
Borrowing airtime or data on MTN in Ghana is a quick and easy way to stay connected when you need it most. With just a few simple steps, you can borrow airtime for calls or get some extra data for browsing, all without having to wait for a top-up.
So next time you’re caught without airtime or data, just dial *506#, follow the simple prompts, and you’re good to go! Don’t forget to repay your loan the next time you recharge to keep your borrowing limit growing.
Have you ever found yourself in a situation where you needed to reach someone but didn’t have enough airtime to make a call? Or maybe you’re just in an area with bad signal and can’t get through? Well, Vodacom’s “Please Call Me” feature is a lifesaver for times like these! It’s a quick and free way to ask someone to call you back—perfect for when you’re low on airtime or can’t make a direct call. Don’t worry if this sounds confusing, though! By the end of this article, you’ll know exactly how to use it like a pro.
What is a “Please Call Me”?
Let’s break it down. A “Please Call Me” is a service from Vodacom that allows you to send a text to anyone asking them to call you back. It’s like knocking on someone’s door and saying, “Hey, can you please give me a call when you get a chance?” without actually making the call yourself. Super handy, right? This service works even when you’re out of airtime or have a poor network connection.
The best part? It works on any network. So whether the person you’re trying to reach uses Vodacom, MTN, Cell C, or Telkom, you can send them a request to call you back.
Why Would You Need “Please Call Me”?
There are plenty of reasons why you might need this service:
Running low on airtime: We’ve all been there, right? You’re trying to make an urgent call but realize you have no airtime. Instead of stressing, you can simply send a “Please Call Me” message and wait for the call to come to you!
Bad signal or no reception: Sometimes you’re in a place with no signal or a super weak connection. In those moments, calling is out of the question, but you can still send a “Please Call Me” to let someone know you’re trying to reach them.
Emergency situations: If you’re in a situation where you need help but can’t make a call, a “Please Call Me” message can be your way of asking someone to check in on you.
How to Send a “Please Call Me” on Vodacom: Step-by-Step
Now that you understand what “Please Call Me” is, let’s get into how to send one. It’s super easy, and I’m going to walk you through it step by step.
Step 1: Open the Dialer or Messaging App
First, you’ll need to open the phone’s dialer or messaging app. You know, the usual app you use to make calls or send texts.
Step 2: Enter the Recipient’s Number
Once the app is open, it’s time to enter the number of the person you want to contact. Here’s where you’ll input their phone number, but make sure it’s correct! You don’t want to accidentally send your message to the wrong person.
Dial the following code: *140* followed by the recipient’s phone number, and then close it with #.
For example, if you want to send a “Please Call Me” to the number 0821502903, you would type this into the dialer: *140*0821502903#.
Step 3: Optional: Add a Personal Message
Some versions of the service allow you to add a little personal note to your “Please Call Me” message. If you need to make the request more urgent or just want to explain why you need the call, feel free to add a brief message.
For instance, you could say, “Please call me back ASAP!” or “I need to talk to you about something important.” But remember, keep it short—there’s not a lot of space for long messages.
Step 4: Hit Send
Once you’ve entered the number and added a custom message (if you want), double-check to make sure everything is right. Then, press send, and the “Please Call Me” message will be delivered to the recipient.
That’s it! You’re done. It’s really that simple.
What Happens Next?
Once you’ve sent the “Please Call Me” message, the person you contacted will get a text saying that you need them to call you back. They don’t need to worry about calling you at a specific time or worrying about their airtime—they can just call you back when they’re able to.
If they’re on Vodacom, it’s free for both of you! If they’re on a different network, they might be charged for the call, but it’s still a great way to get in touch without worrying about airtime on your end.
Alternatives to “Please Call Me”
While the “Please Call Me” feature is super useful, there are also other ways to reach out if you can’t make a call. Let’s take a look at some of them:
Direct Calls: If you have airtime, the fastest way to reach someone is just to call them directly.
Text Messages (SMS): If you can’t make a call but have enough airtime, you can always send a text. It’s quick and gets your message across.
Instant Messaging Apps: If you’re on Wi-Fi, you can use apps like WhatsApp or Facebook Messenger to send messages or even make voice calls.
Email: For non-urgent or more detailed communication, email is another option.
Frequently Asked Questions (FAQs)
1. How long does it take for the recipient to get the message?
The “Please Call Me” message usually gets delivered almost immediately. But if there are network issues or the recipient’s phone is off, there might be a slight delay.
2. Can I send a “Please Call Me” message more than once?
You can! However, Vodacom might put a limit on how many messages you can send in a certain period, so be mindful of that.
3. What if the person doesn’t call me back?
If they don’t respond right away, you can try sending a follow-up text or, if possible, calling them again later. You can also consider using other ways to get in touch, like messaging them through social media or WhatsApp.
4. Can I send a “Please Call Me” internationally?
Unfortunately, the “Please Call Me” feature typically works only within the same country or network. If you’re trying to contact someone overseas, you might want to use another method, like WhatsApp or email.
Pros and Cons of “Please Call Me”
Like anything, the “Please Call Me” service has its ups and downs. Here’s a quick look at the advantages and potential drawbacks:
Pros:
Free: Sending a “Please Call Me” is completely free, which makes it an affordable option when you don’t have airtime.
Quick: It’s an instant way to let someone know you need them to call you back.
Great for Emergencies: If you need help but can’t call directly, it’s a useful backup plan.
Works on all networks: Whether your friend uses Vodacom, MTN, or any other network, you can send them a request.
Cons:
Message Length: The message is short, so you can’t explain everything in detail.
Recipient’s Response: It’s up to the recipient to respond, and sometimes they might not be able to call back right away.
Privacy: Sending a “Please Call Me” will reveal your phone number, which might be a concern for some people.
Network Issues: If there are network problems, your message might not go through.
Vodacom’s “Please Call Me” is a simple, free, and effective way to get in touch with someone when you can’t make a call yourself. Whether you’re out of airtime, have a weak signal, or just need someone to get back to you, this feature is a great tool to have in your phone. By following the easy steps above, you’ll be able to send your request in no time, and stay connected with those who matter most.
So, the next time you find yourself needing a quick call back, just send a “Please Call Me”!